BTCPay Shopify – Accept Bitcoin on Shopify with the BTCPay Server
BTCPay Shopify

How to accept Bitcoin on Shopify with BTCPay Server?
You run an online store via Shopify? Now you can turn your Shopify store into a Bitcoin Shopify store and accept Bitcoin payments.

With BTCPay server you can receive Bitcoin Shopify payments for free.
In addition to a Shopify online store, you also need your own BTCPay server or you can share Coincharge’s BTCPay server for free.
In addition, you need a Bitcoin wallet to which the Bitcoin payments of the customers are credited.
How to turn a Shopify store into a Bitcoin Shopify store and accept Bitcoin on Shopify is explained in this post.
Bitcoin Shopify Demo Shop
We have at the address:
https://coincharge.myshopify.com/collections/all
set up a Bitcoin Shopify demo store so you can see how Bitcoin payments work with the BTCPay server on Shopify.
The Coincharge demo store created at Shopify is not freely available.
To bypass the password protection for Bitcoin Shopify, enter the password coincharge.
Shopify charges a monthly usage fee for the use of payment processing.
Therefore, only a limited live demonstration of the functions is possible for the demo version. The following images show how accepting Bitcoin on Shopify works in live mode.
Coincharge’s Bitcoin Shopify demo store looks like this:
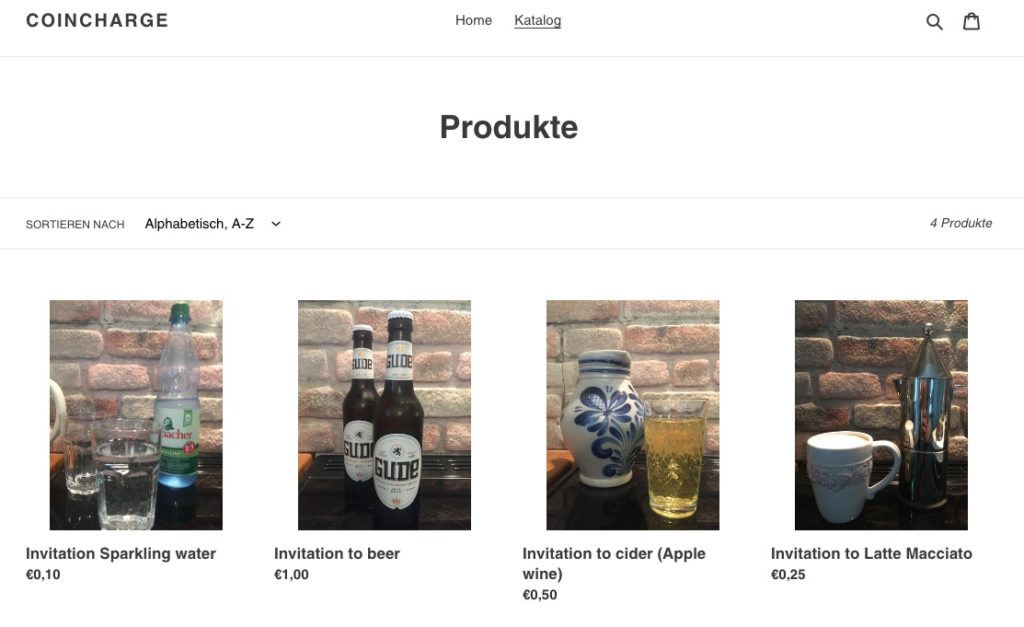
Note: By clicking on the following images, the image will be displayed in a larger detailed view.
The buyer selects a product and put it in the shopping cart.
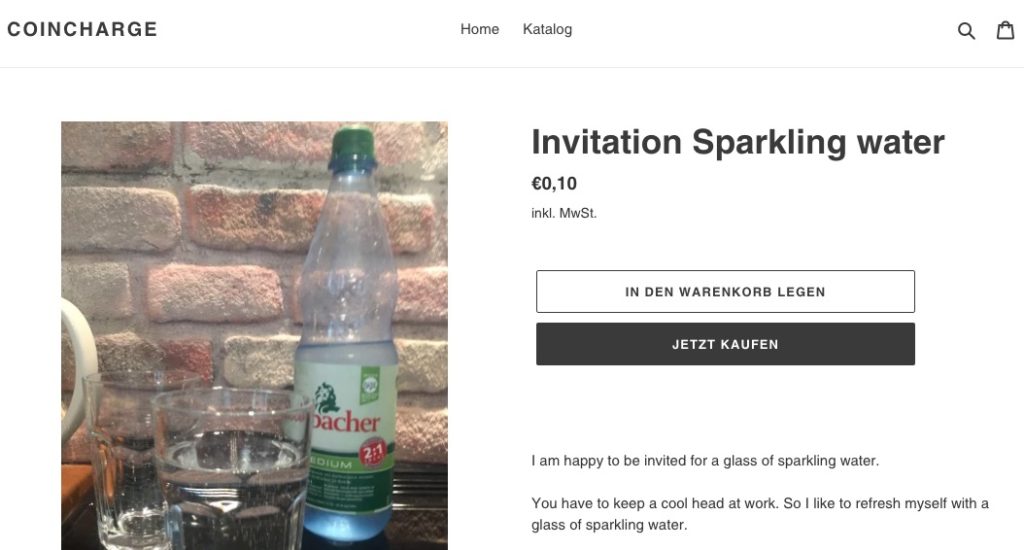
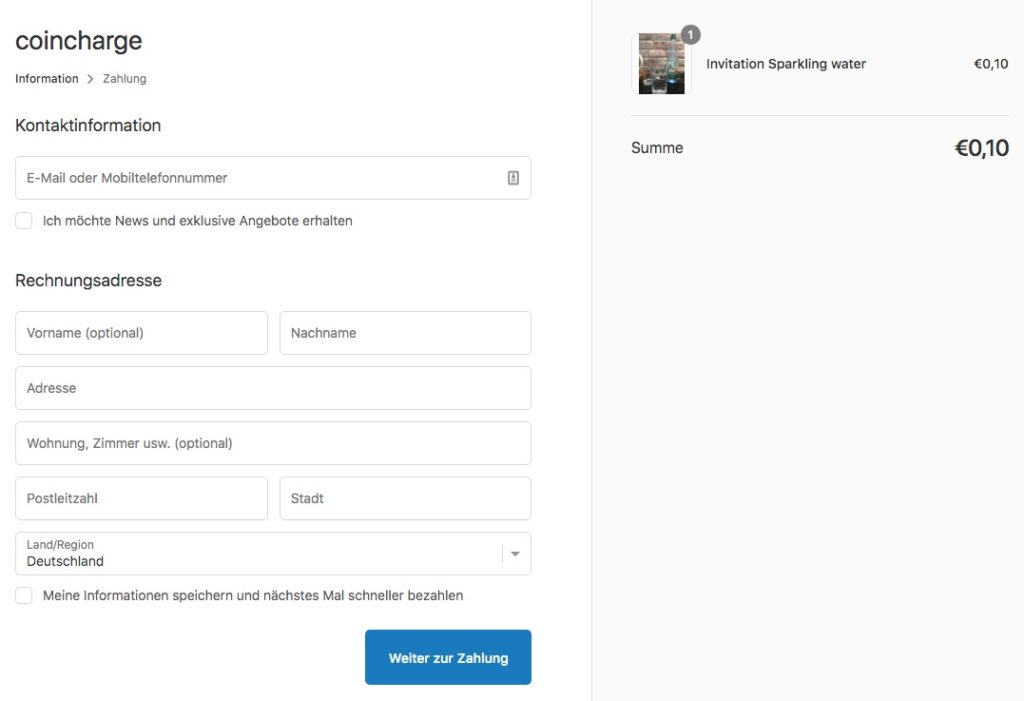
Then the data for the creation of the invoice is recorded and by clicking on “continue to payment” the customer gets to the payment page.
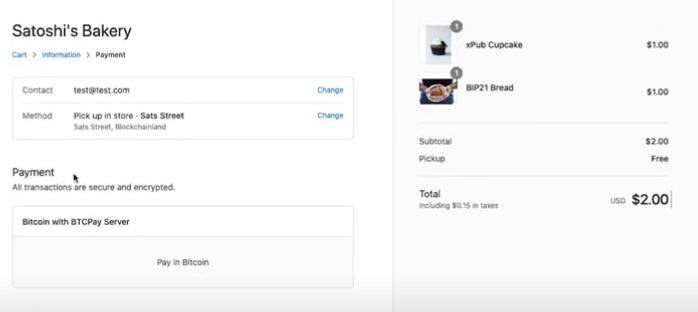
On the payment page, a selection of the different payment methods is displayed.
Shown here with the text “Bitcoin with BTCPay Server”.
The payer clicks on it and is shown a confirmation page.
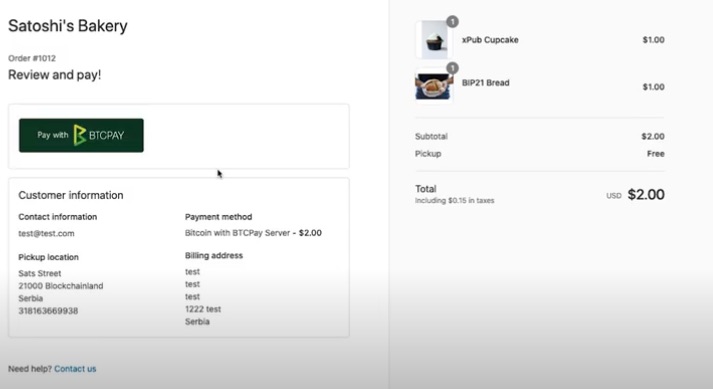
On the payment confirmation page, the payment logo is displayed. Here with “Pay with BTCPay”.
The payment logo / image can be changed in the BTCPay Store Administration.
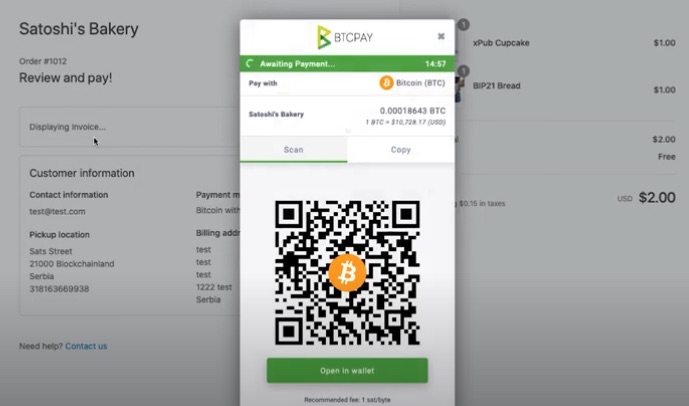
After clicking on the pay button, the Bitcoin payment window will open.
The Bitcoin payment window can be customized with the store logo or colors to match the design of the online store.
The payer scans the QR code to pay with Bitcoin or Lightning.
After seeing how to accept Bitcoin with Shopify, we will show how to set up your own Shopify online store accordingly.
Create BTCPay Store
Basic requirement to accept Bitcoin payments on Shopify is additionally a BTCPay store. A BTCPay store is set up on a BTCPay server.
You can run your own BTCPay server or use Coincharge’s BTCPay server, for example.
How to operate and set up your own BTCPay server is explained in detail in the article “BTCPay Server Setup“.
To share the Coincharge BTCPay server, go to https://btcpay.coincharge.ioand set up a BTCPay store for free.
The article “How to create a BTCPay Store” and “How to administer a BTCPay Store” explain in detail how to create a BTCPay Store, which is a prerequisite for a Bitcoin Shopify online store.
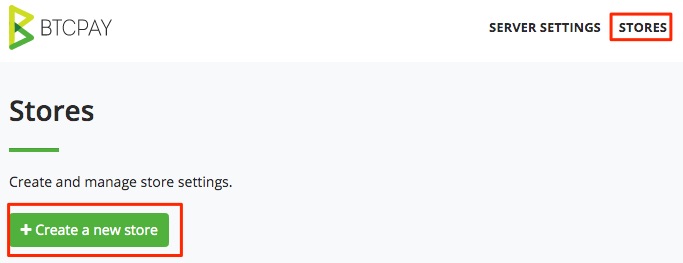
After registering on the BTCPay server, go to the Stores section and create a BTCPay store.
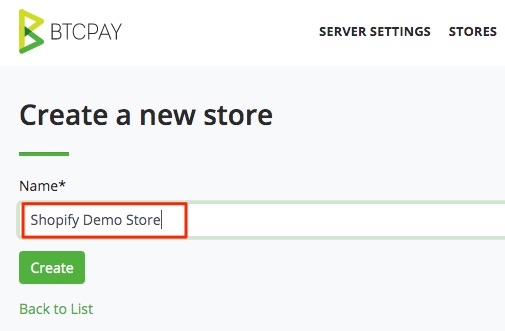
We give the BTCPay store a unique name.
In our example we use: Bitcoin Shopify Demo Store.
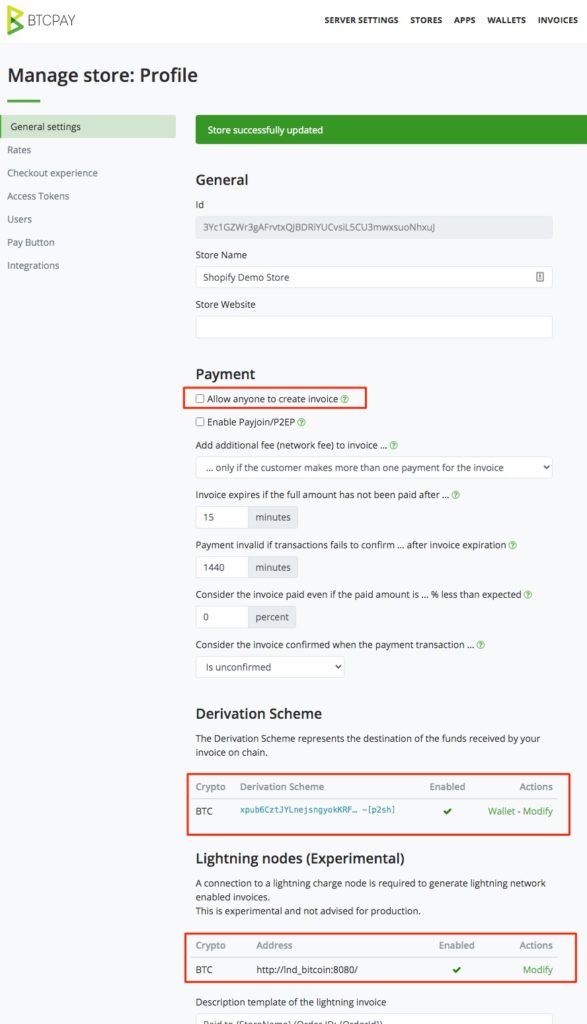
In the General Settings menu and the Payment section, the “Allow anyone to create invoice” field can remain unchecked.
The Shopify API connection eliminates the need to create a public invoice.
In the Derivation Scheme section, it is necessary to deposit your own Bitcoin wallet.
If you already have an external Bitcoin wallet, then the Xpub key can be deposited from this external Bitcoin wallet.
An explanation can be found in the article “Deposit Xpub Key”.
However, you can also use the internal Bitcoin wallet. For this purpose, there is a tutorial “Create internal BTCPay Bitcoin Wallet”.
Set up Bitcoin on Shopify
After the preparations for Bitcoin on the BTCPay server are complete, we can start setting up Bitcoin on Shopify.
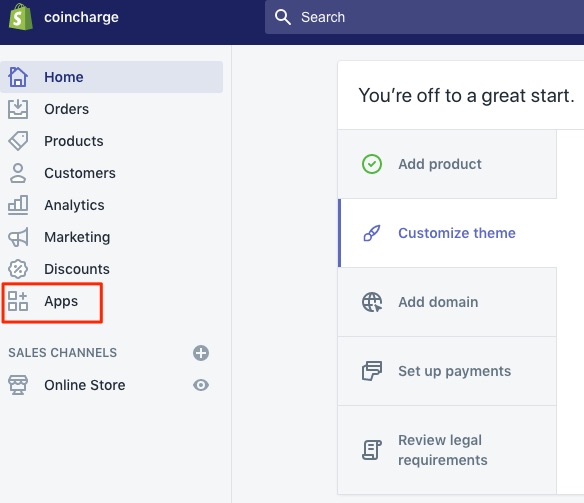
To do this, we log in to our Shopify store and get to the Shopify backend.
There we switch to the Apps section.
After we click on Apps, the Apps section opens, which can be additionally integrated into a Shopify Store.
To integrate Bitcoin payments via BTCPay, we create a Private App.
To do this, we go to the bottom of the page and click on the “Manage private apps” link.

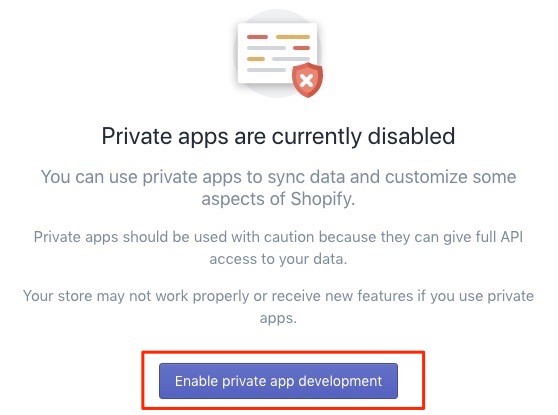
A message appears stating that Private Apps are currently disabled.
We enable the use of Private Apps.
On the following page we have the option to allow permission to use Private Apps.
We check the box everywhere and then click on “Enable private app development”.
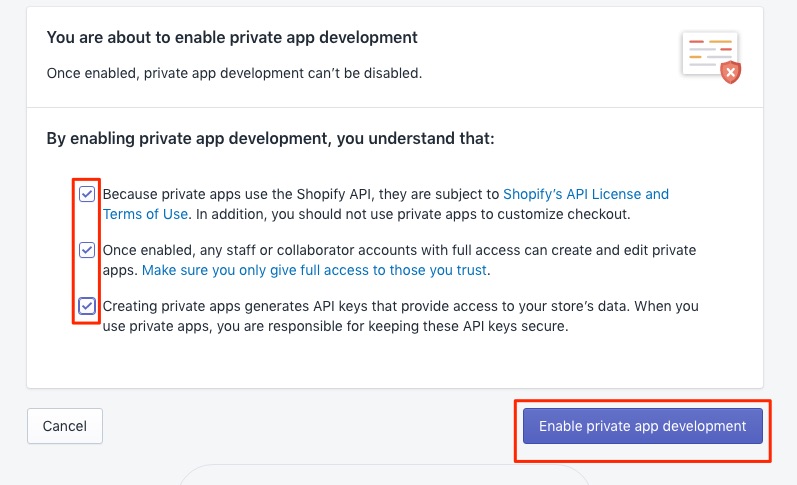
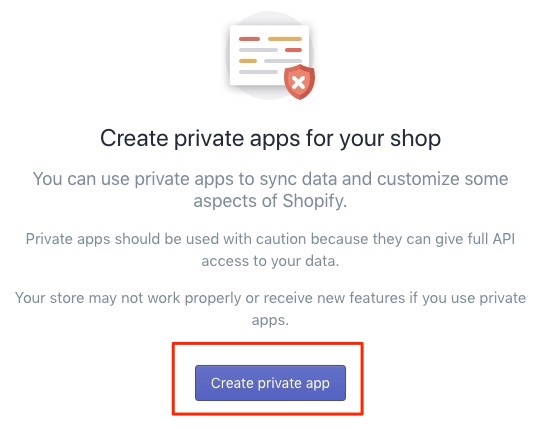
After that we are allowed to create private apps and click on “Create private app”.
On the following page we will start with the configuration of the app details.
We define a name for the Private App and additionally an email address which acts as a technical contact for this Private App.

Then the Private App permissions are granted for the various Shopify functions.
Accepting Bitcoin payments in the Shopify Bitcoin Store only requires that read and write permission be granted for orders.
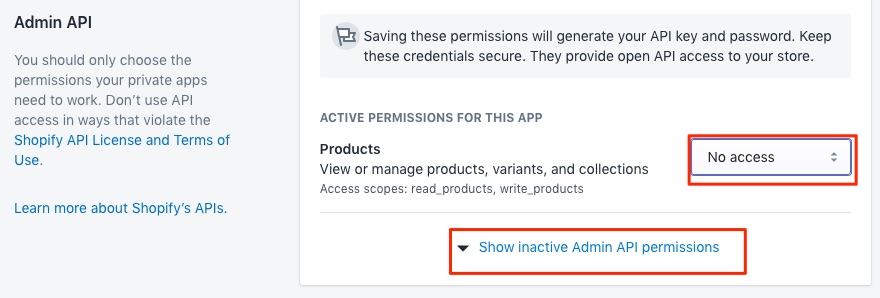
We can therefore change the permission for products to “No Access” and then click on “Show inactive Admin API permissions”.
We then get a listing of all the functions we can address via API.
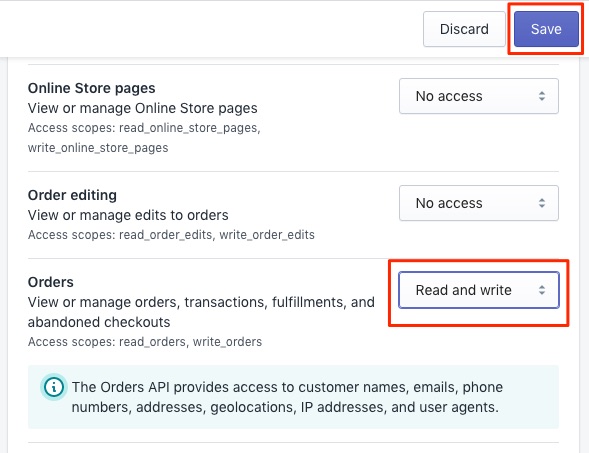
We only need authorization for orders and scroll to the appropriate place.
Set the status of Orders to “Read and Write” and click Save.
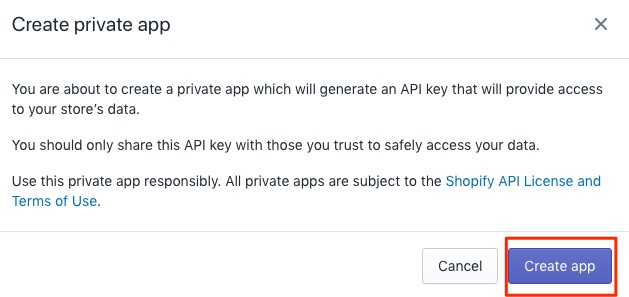
We receive another message, which we confirm with “Create App”.
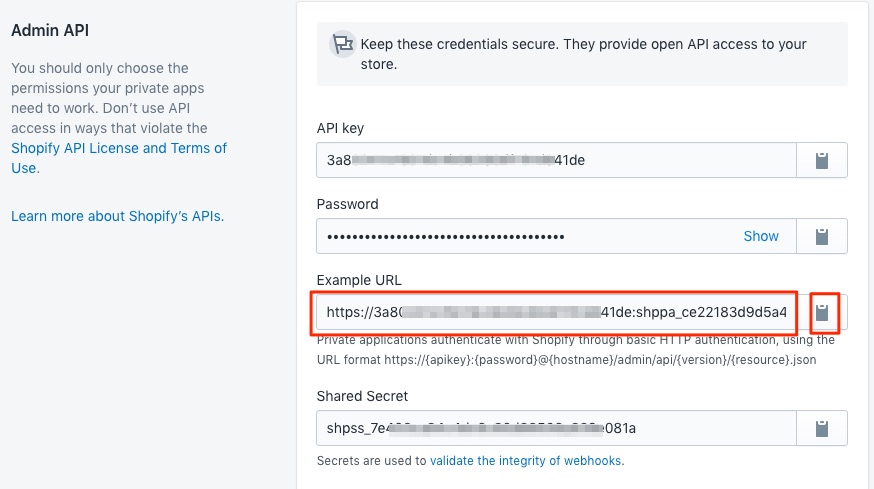
We will then receive all API details for our Private App.
We now need the information from the “Example URL” field and can copy it to our clipboard by clicking on the box.
Now we switch back to our BTCPay server and at Store Settings to the Integrations section.
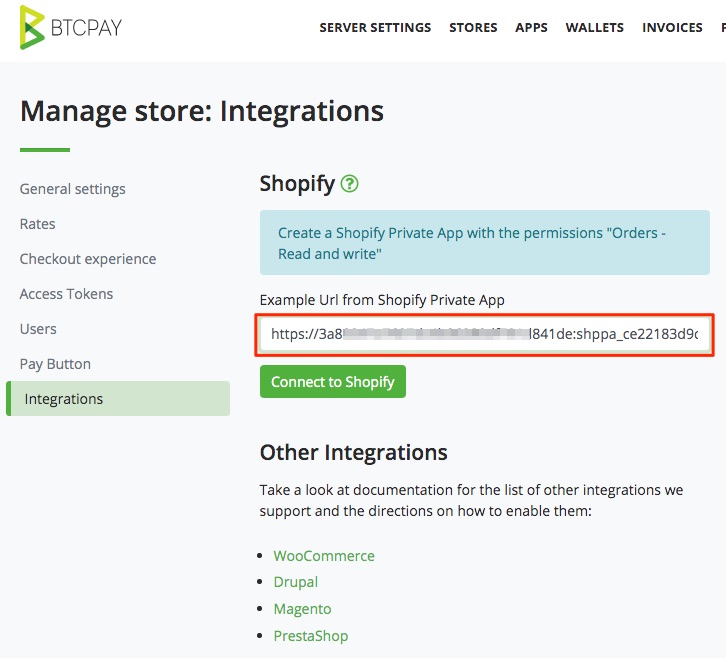
In the “Example Url from Shopify Private App” field, we now paste the URL we copied from the Shopify page.
Then we click on “Connect to Shopify”.
Now a connection is established between Shopify and our BTCPay store. The other information from Shopify such as API Key, Shop Name and Password will be automatically applied.
Now we need to copy the details from the black box and integrate them with Shopify.
We copy the area to our clipboard and switch back to the Shopify page.
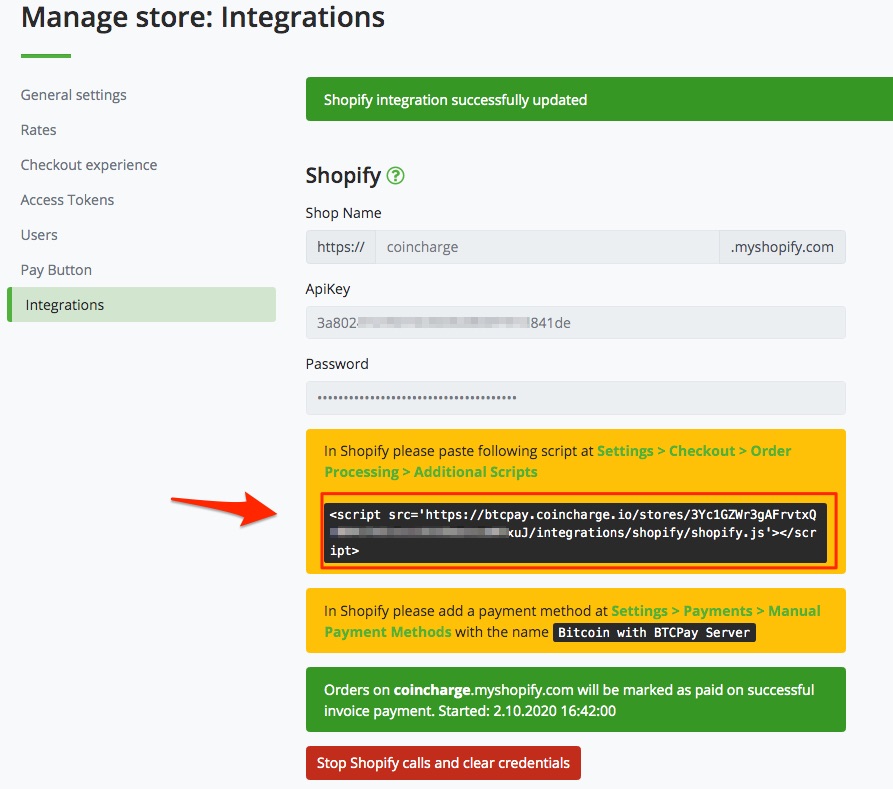
We can do this by clicking on the green link labeled “Settings > Checkout > Order Processing > Additional Scripts” on the BTCPay Server page.
But we can also manually call the page in the Shopify backend.
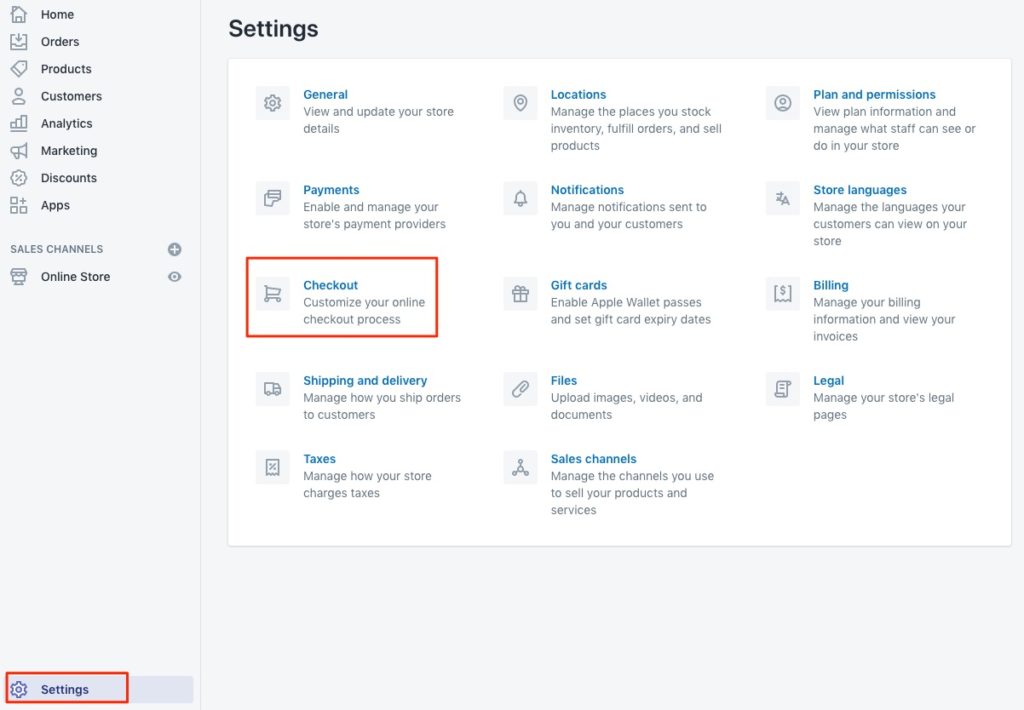
In the Shopify backend, the Settings menu item is located at the bottom left of the page.
We then get to the following view and have to go to the Checkout section.
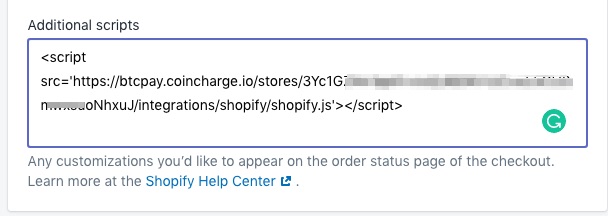
There we scroll down the page to the input field “Additional scripts” and deposit the script from the clipboard, which we have received from the BTCPay page and save “Save” the input.
Now we still need to deposit Bitcoin as a payment method. We can also access the call to this page on Shopify from the BTCPay site.
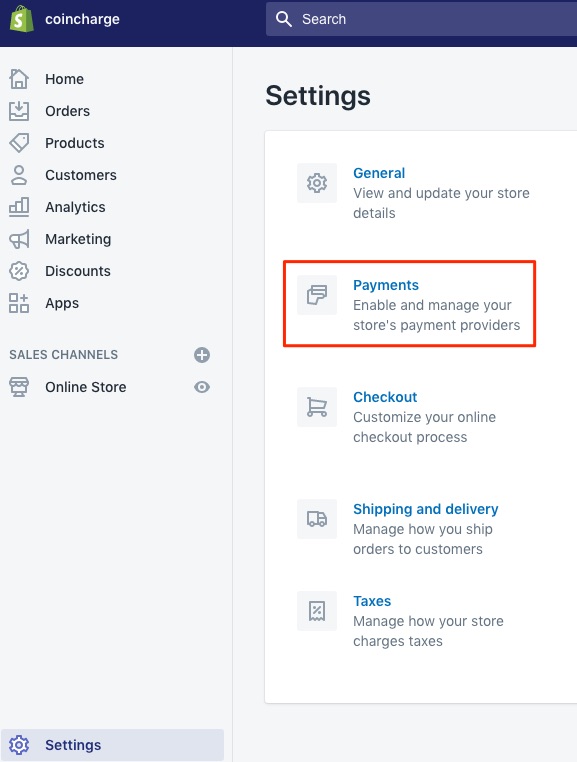
Now we still need to deposit Bitcoin as a payment method. We can also access the call to this page on Shopify from the BTCPay site.
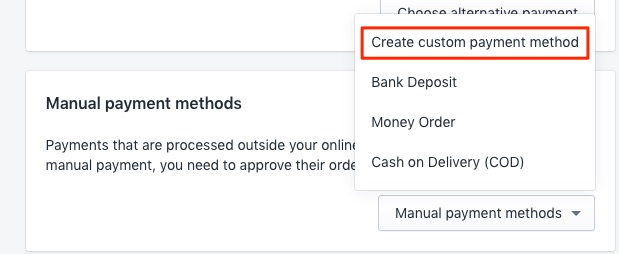
We scroll down the page to the “Manual payment methods” item and then select “Create custom payment method”.
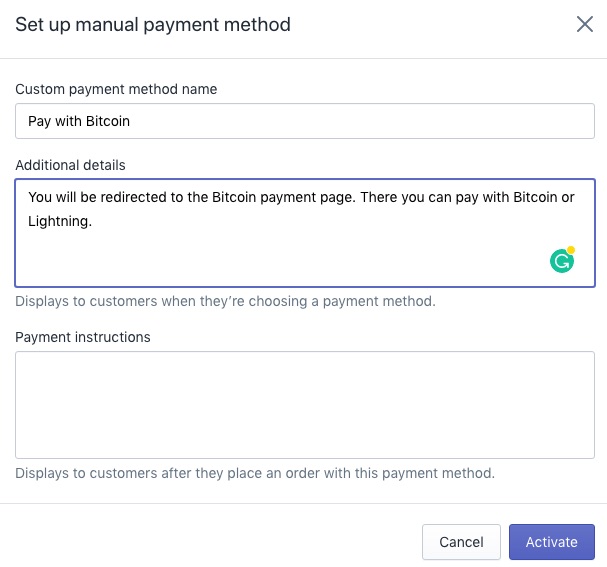
On the page that appears we can enter a name for the payment method in the “Custom payment method name” text box.
For example, “Bitcoin with BTCPay Server” or “Pay with Bitcoin”.
It is important that at least one of the following words is mentioned in this field: Bitcoin, BTCPayserver, BTCPayServer or BTC.
After clicking Activate, Bitcoin can be accepted on Shopify.
Now you make your own test order and check if all functions work properly.
On the BTCPy Server website there is more information in English about “Accept Bitcoin at Shopify with the BTCPay Server“.
Likewise, there is an English-language video tutorial on YouTube:
If you don’t want to implement Bitcoin on Shopify yourself, you can have Coincharge do it for you.
Coincharge offers a Bitcoin integration service on Shopify: “Get BTCPay integrated with Shopify.”







Leave a Reply
Your email is safe with us.