Accept Bitcoin payments for WooCommerce
How to accept Bitcoin for WooCommerce. Do you run an online store based on WooCommerce and want to offer your customers the option of paying with Bitcoin and Lightning in addition to credit card and PayPal?
In this article, we look at this topic:
- How to accept Bitcoin payments in your WooCommerce store.
- How to integrate Bitcoin payments into your WooCommerce store with the help of a Bitcoin payment plugin.
- Which Bitcoin payment providers provide a corresponding Bitcoin payment plugin.
- Installing and setting up a Bitcoin WooCommerce plugin in your online store

YouTube Video: Accepting Bitcoin payments for WooCommerce
We have published a video on the Coincharge YouTube channel on the topic of“Accepting Bitcoin for WooCommerce“
Accept Bitcoin with WooCommerce
Anyone who runs their own website uses WordPress to manage their content. If you want to sell products and services on your website, you usually use the WooCommerce store system integrated into WordPress.
WooCommerce can be used to operate a pure online store to sell physical goods by mail order. However, many WordPress applications also use WooCommerce to sell digital goods. For example, if you want to run a membership site, sell tickets for an event online, offer webinars and training courses online, collect donations or offer digital content for download or as text or video for a fee, you will find corresponding plugins in WordPress that handle payment processing in combination with WooCommerce.

Around 4.7 million online stores worldwide use WooCommerce, in Germany there are over 100,000 online stores.
There are a variety of plugins for WordPress and WooCommerce that you can use to adapt your website or online store to your individual needs.
Plugins are software solutions that can be integrated into WordPress without any programming effort.
Corresponding plugins for payment processing are provided by the payment providers.
In the case of payment processing, such a payment plugin connects the WooCommerce store with the payment processing of the payment provider.
If an order is placed in the WooCommerce store and the payer selects their preferred payment method, the payment request is forwarded to the payment service provider.
This processes the payment and sends a message back to the store system when the payment has been successfully completed. The store system can then start shipping the goods or providing the ordered services.
Which Bitcoin payment providers offer a payment module for WooCommerce?
Anyone who runs an online store based on WooCommerce can count themselves lucky, because almost every Bitcoin payment provider provides a corresponding Bitcoin payment module for WooCommerce.
On the website The 20 best Bitcoin payment providers we have listed all payment providers and there it is indicated which payment modules, also for other store systems, the respective Bitcoin payment provider offers.
These Bitcoin payment modules for WooCommerce are usually provided free of charge by the Bitcoin payment providers. There are also WooCommerce plugin providers who develop corresponding plugins and charge a license fee. In these cases, the fee is indicated.
Integration into the WooCommerce store system is quick and easy and anyone who is familiar with the WooCommerce system can integrate it with just a few clicks.
Solution Provider
WordPress Plugin Page
Price
Lightning
-,-
Lightning
-,-
no Lightning
-,-
Lightning
-,-
Lightning
How do I get the Bitcoin payment module for WooCommerce?
After selecting the Bitcoin payment provider, the payment module is usually offered in two ways.
The plugin is then offered for download as a file on the payment provider’s website or on GitHub and can be installed using the upload plugin function.

Another option is to find the plugin via the plugin search.
If you only enter the term Bitcoin, you will see a large number of plugins, some of which are providers that do not support Bitcoin payments.
It is somewhat more helpful to search for the WooCommerce plugin of a specific Bitcoin payment provider and enter its name.
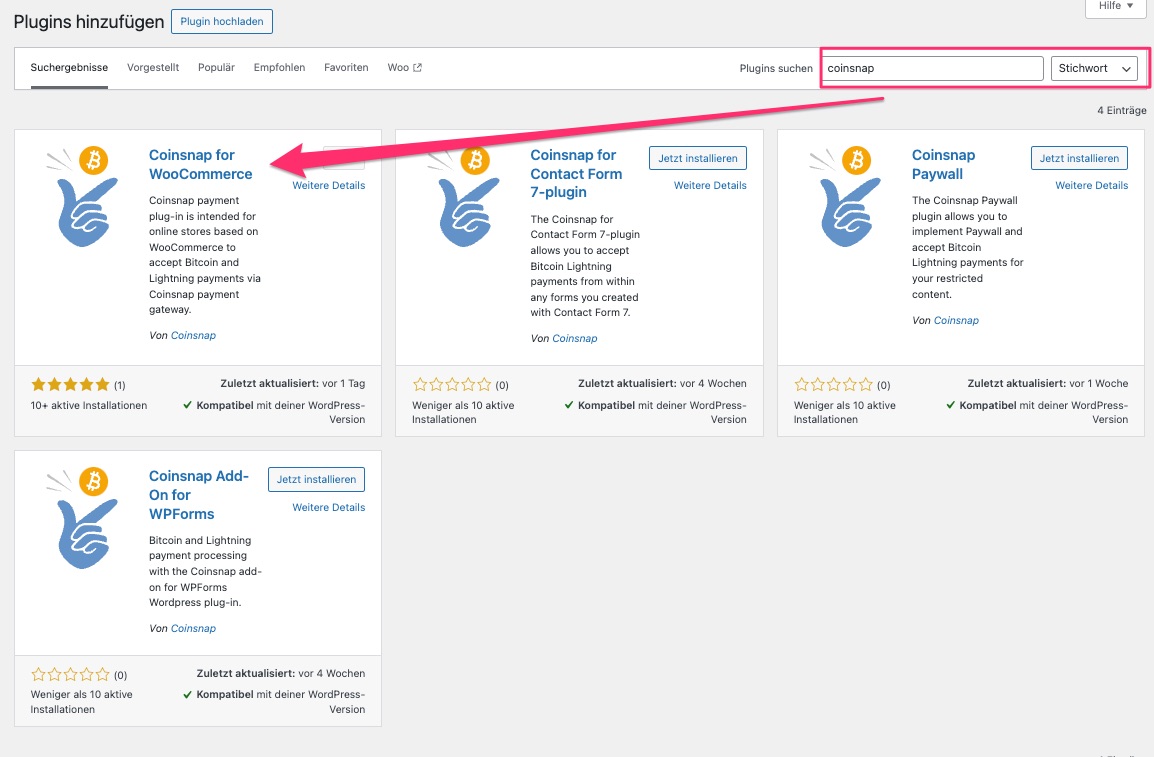
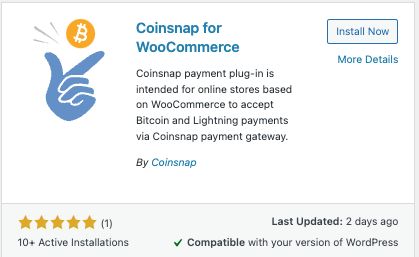
For example, we search for Coinsnap and get a list of all WordPress and WooCommerce modules from Coinsnap, including the module for WooCommerce.
Coinsnap for WooCommerce
https://wordpress.org/plugins/coinsnap-for-woocommerce/
Install Bitcoin WooCommerce plugin
What I’m about to show you is almost identical for all WooCommerce plugins.
Once you have selected the desired plugin, click on Install and then on Activate.
Then switch to the WooCommerce settings area. There you will find the Payments section. All payment methods that are already pre-installed in WooCommerce are listed here, e.g. WooPayments or other payment methods such as Stripe for credit card payments or Paypal.
Here we also find Coinsnap at the bottom and to the right of it is already activated and on the far right is the Manage button.
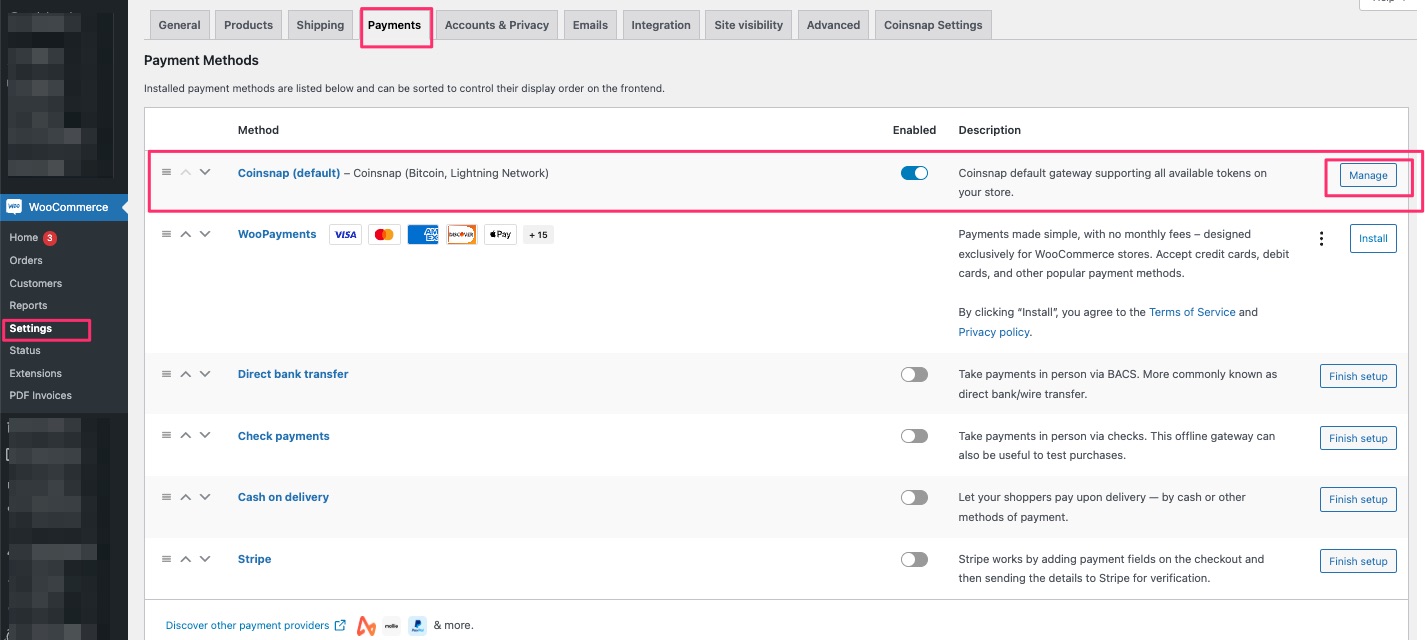
Individual settings can be made by clicking on them.
This is about the settings for which payer is displayed on the payment page. To give us a better idea, I’ll show you an example of the page that a payer sees if they have opted for the Bitcoin payment method.
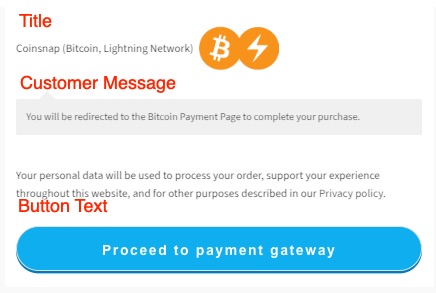
If you want the Bitcoin payment method to be displayed as one of the payment methods offered to your customers, you must set the button to Enable here.
Enter the payment method in the Title line. We recommend Bitcoin + Lightning.
In Customer Message, you write the help text that is displayed to your customers. By default, it says that you will be redirected to the Bitcoin payment page to be able to pay with Bitcoin Onchain or Lightning.
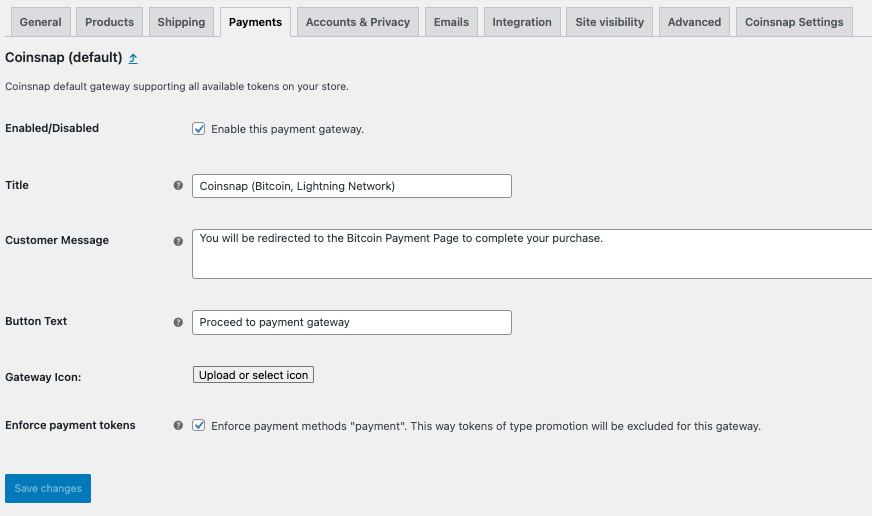
The Button Text field contains the instruction as to what the payer should do. In this case, Pay with Bitcoin.
Then there is the gateway icon. An image of Bitcoin and Lightning is displayed here by default. If you want to use a different image, you can enter it here.
Coinsnap for WooCommerce settings
After we have made the settings for the Bitcoin + Lightning payments, we still need to connect the WooCommerce plugin to the Bitcoin payment provider. To do this, click on the Coinsnap Settings menu item on the right.

In these settings, you must now enter the data that you receive from your Bitcoin payment provider. This data is then used to establish the connection from your WooCommerce to the correct account with the payment provider.
At Coinsnap, the data is called Store ID and API Key and should be named similarly at your payment provider.
If you have not already done so, you must now create an account with the Bitcoin payment service provider. If you decide to use Coinsnap, go to the Coinsnap homepage and find the Register button in the top right-hand corner. When registering, enter the discount code Coincharge to save 0.25% on fees.
After you have connected your Bitcoin Lightning Wallet to Coinsnap via your Lightning address and defined your store name, you will find the Coinsnap Shop Settings under Settings. The Coinsnap store ID and the API key will be displayed there.
Copy this data and store it in the settings in WooCommerce.
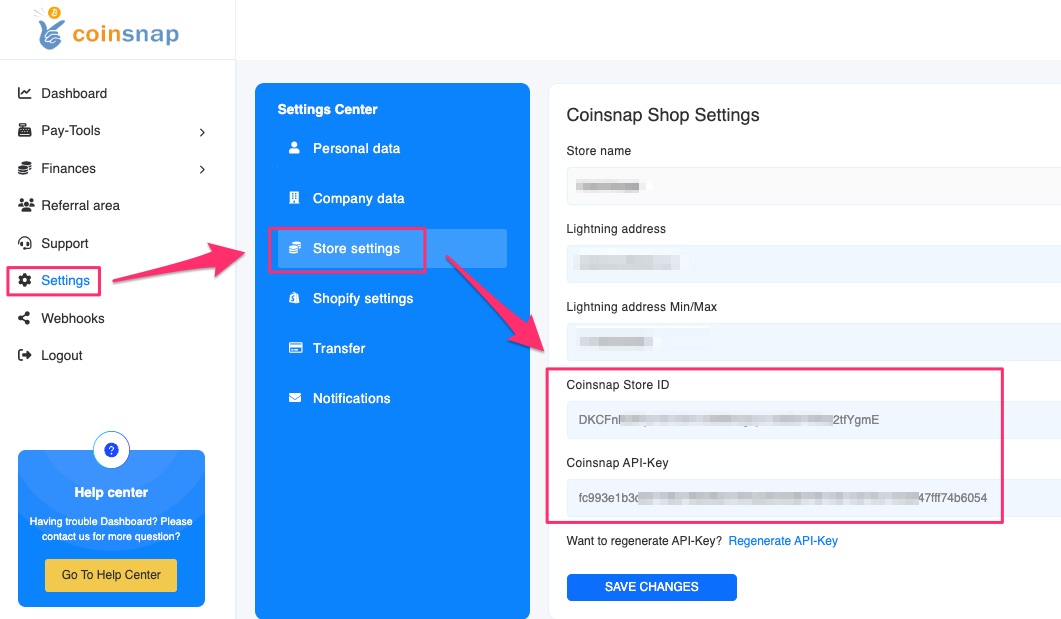
The Store ID is entered in the Store ID field and the API key is entered under API key.

Let’s take a look at the other setting options that are displayed under Coinsnap Settings.
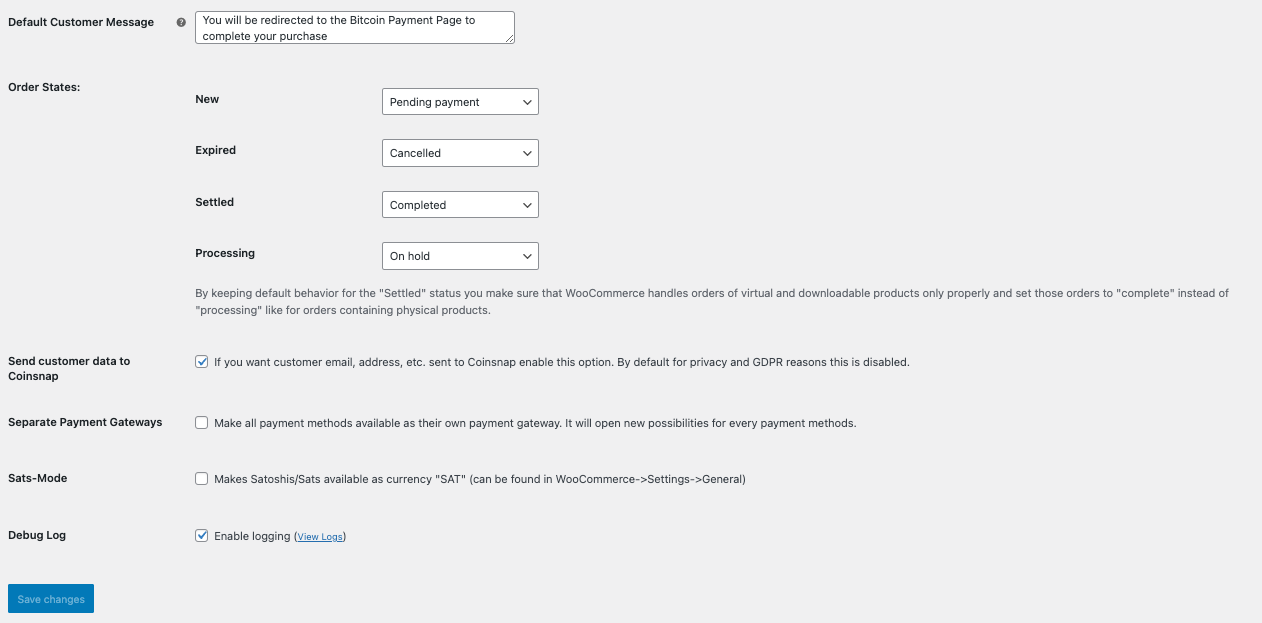
The Customer Message field shows what is displayed to the payer as a message. This message can be changed as required.
This is followed by the Order Status area. Here you can define how the WooCommerce store should react when it receives a corresponding response from the Coinsnap system.
All settings can be applied here.
If you would like to transfer further data from your store system to Coinsnap, you can activate this field. By default, the order ID is transferred, which can be used to clearly assign all orders. Further data is not mandatory, but can be helpful when searching for specific transactions later on.
A joint selection for Bitcoin and Lightning payments is offered on the payment page and a joint QR code is displayed to the payer.
The payer then scans this QR code and the payment page automatically recognizes whether it is a Bitcoin Onchain or Lightning payment.
If you want to display Bitcoin Onchain and Lightning payments separately to the payer or only want to process Lightning payments via Coinsnap and use a different payment provider for Bitcoin and crypto, you can activate the Separate Payment Gateways field. Otherwise, it is recommended to leave the field deactivated.
If you do not operate your webshop in euros, but instead display all products in Bitcoin or Sats, activate the Sats mode. Otherwise, leave this field empty.
Order of the payment methods displayed
After we have made and saved the settings, we go back to WooCommerce under Payments.
As we have already seen, all the payment methods offered are listed here and all those that are activated are displayed to the payer on the payment page.
If you want to change the order of the payment methods, you can move them here and then save them.
WooCommerce test order
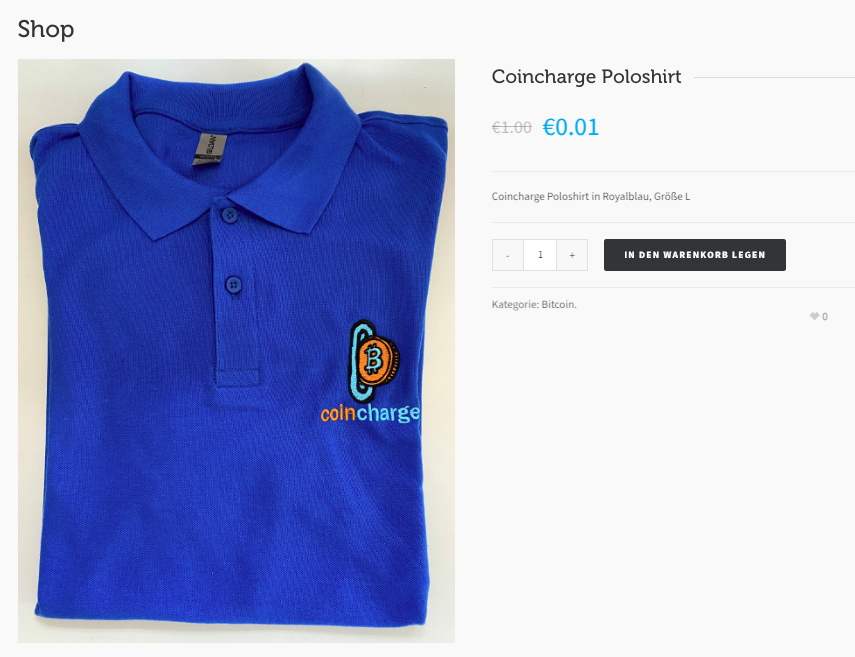
Then let’s try out whether everything works the way we want it to. Ideally, you should create a demo product and test payment via Bitcoin Onchain and Bitcoin Lightning.
We can test this on our demo store at https://demo.coincharge.io/.
We place the demo product in the shopping cart and click on Checkout.
Then click on Pay now.
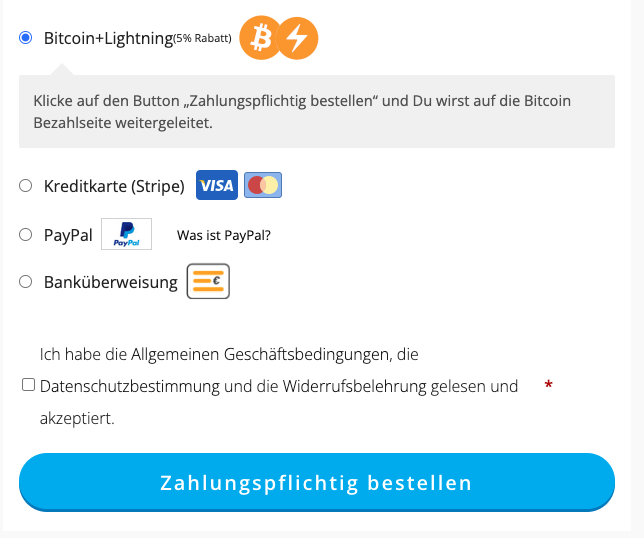
The payer now enters their order details and the payment methods offered are listed on the right-hand side. As only Bitcoin + Lightning is offered in our demo store, the other methods are not listed.
If the payer now wants to pay, they click on “Continue to payment gateway” and the QR code is displayed.
We pay the amount and, as the payer, receive a message that the payment was successful.
WooCommerce orders
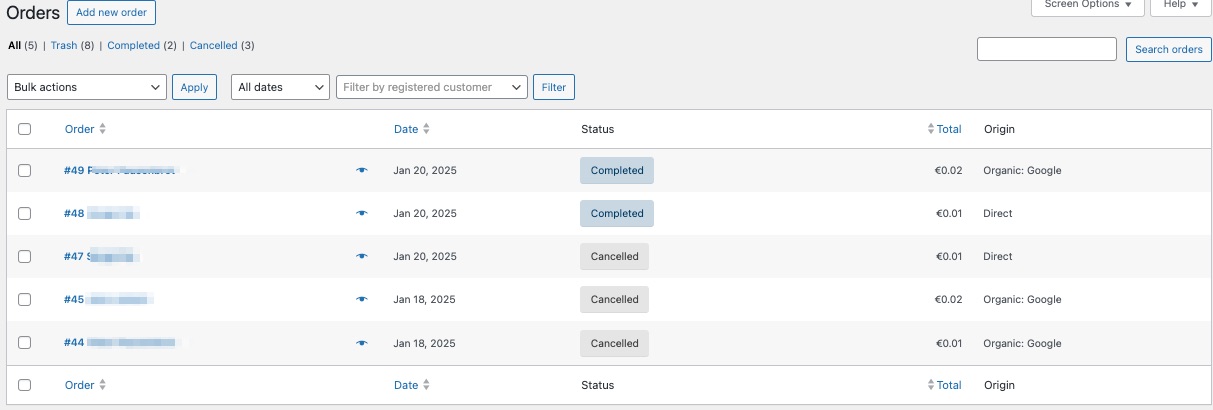
As the store operator, we are informed by the WooCommerce system that the payment was successful. We can check this again by going to the Orders section of WooCommerce.
Here we see the order with the Order ID 49 as paid and further down also the payment processing information that was returned to the WooCommerce system by the Bitcoin payment provider.
In addition, we can log into the payment provider’s backend and receive detailed information about the payment.
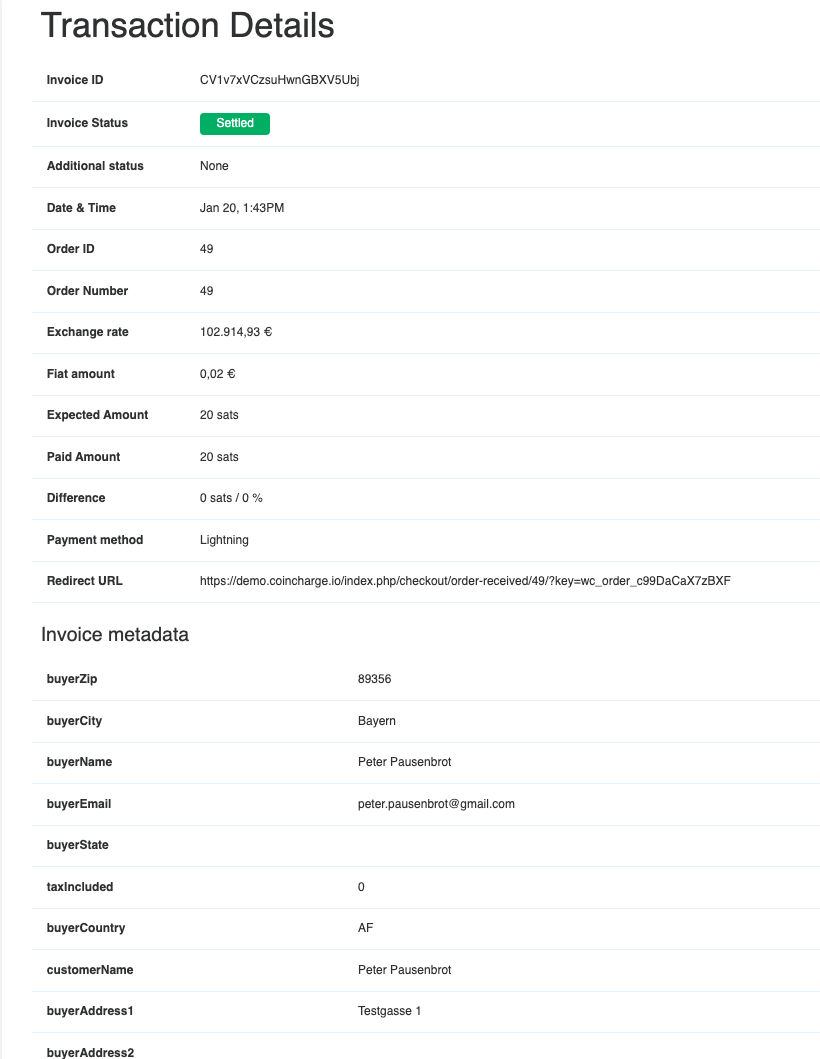
Here we can also see, for example, the order ID 49 and other data transferred by the WooCommerce system. For example, the customer’s name, email address and address.
Also the information that the payment has been successfully completed by the customer.
Further down we see the information that the payment has been successfully received on my wallet.
Summary: Accept Bitcoin for WooCommerce
Online merchants who operate an online store based on WooCommerce can very quickly offer their customers payment via Bitcoin. All Bitcoin payment providers that provide their customers with payment modules also offer a WooCommerce Bitcoin payment plugin.
As the operator of a WooCommerce online store, you therefore have the advantage of a free choice of Bitcoin payment providers.
We have shown this here as an example for the provider Coinsnap, but the technical integration is almost identical for all other Bitcoin payment providers.
When will you start accepting Bitcoin payments in your WooCommerce store?
If you would like to use Coinsnap’s services, follow this link for more information about Coinsnap for WooCommerce and use the discount code Coincharge. This way you support our work and save on fees.
If you would like to use a different Bitcoin payment provider, you can find the most important Bitcoin payment providers here.

