This post is about how Lightning payments appear on the customer’s checkout page. It describes how a Lightning payment via BTCPay works from a merchant’s perspective and how the payment data is presented at Ride the Lightning.
If you have set up a store with Lightning payment via BTCPay, then this is also a guide for you to test a Lightning payment in his own store and see if everything has been set up successfully.
If the Lightning Node has been successfully set up and has sufficient Inbound Liquidity, then Lightning payments can be received via the BTCPay server.
The prerequisite for this is that Bitcoin and/or Lightning is activated under the menu item Derivation Scheme in the General Settings of the Store Settings.
In our example, both Bitcoin and Lightning would be enabled.
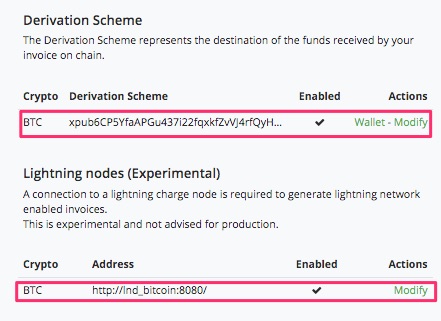
How to create and store the XPub key for Bitcoin can be found in the article “Create Xpub key” and “Store xPub key with BTCPay“.
The article “Lightning payments with BTCPay” explains how to activate Lightning payments in the store.
In the store settings under Checkout Exprience, you can set whether Bitcoin or Lightning is displayed to the customer as the default.
For Bitcoin it is BTC (on-chain) and for Lightning BTC (off-chain).
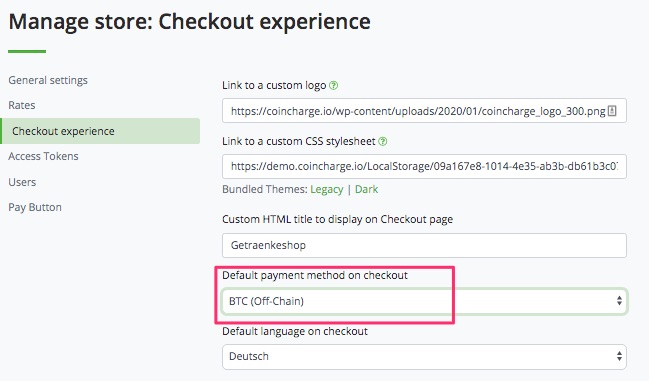
If you offer a product in the microcent range, then it is recommended to use Lightning (BTC off-chain) as the default.
For example, the Voting System application supports Lightning only.
However, since Lightning is not yet so widespread, both variants should always be offered to the customer.
We will demonstrate the process using the example of the page: http://store.coincharge.io/
We buy a mineral water here for 10 cents and head to the checkout. At checkout, we click on “Pay with Bitcoin” and then the payment page or also called checkout page opens.
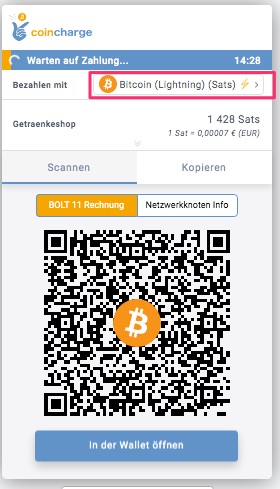
In the Pay with section, the payer can specify whether to pay with Bitcoin or by Bitcoin (Lightning).
The invoice amount of 10 cents is 1,428 sats.
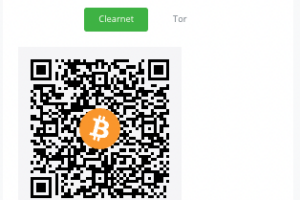
The checkout page is built in such a way that the customer is shown the Lightning invoice (Bolt 11 invoice) in the form of a QR code.
This view is suitable for making a Lightning payment via a mobile wallet.
You can find an overview of the most important Lightning Wallets, with links to the respective detailed descriptions, at: https://coincharge.io/lightning-wallet/
If you click on Network Node Info, you will get the details of the Lightning node also displayed as a QR code
The network node information is the node ID. In our case the node ID of Coincharge: 0318ac9faa9629e7da08819bc8fe0dd2ae3044d69b1b2283a63479acffeb968483@172.81.178.22:9735
This information can be helpful if you want to establish a direct channel to the Lightning Node. Then the Lightning payment would be made directly. However, it is also not mandatory. The Lightning payment will find its way that way too.
If you want to pay the bill as an invoice via Ride the Lightning instead of a mobile wallet, click the Copy button located to the right of the Scan field.
In the upper field all the data for an invoice are given. Click on the field and the information will be copied to your clipboard.
The calculation then looks as follows:
lnbc1450n1p029hlfpp5ry6l7hdwxzpgcd8xsalfy4jn0tdu2fdr0g8ahhg945q4a60vdu0sdrc2pskjepqw3hjq4n0w35kueeq2duhxar9d5szsnmjv3jhygzfgsazqcmjdamkgen4dejz6ctswp0ngdz3f4h9w723xf54vv6nwdcxymtf2phxvvt9wdfnv4pfcqzpgxqzuytghn7jn84nxtqcgmqeq43njz8p6dqp59x2r8xlld33pjwsq0ac04jfnzxv4jfs456x6qncd4v9rf8lmycm97mgtr5y8hrwhyd27wk3qppdq3rc
To recognize about the beginning lnbc
This bill out of interlayer can be used either on the dashboard under Pay or under Lightning > Transactions under Payments.
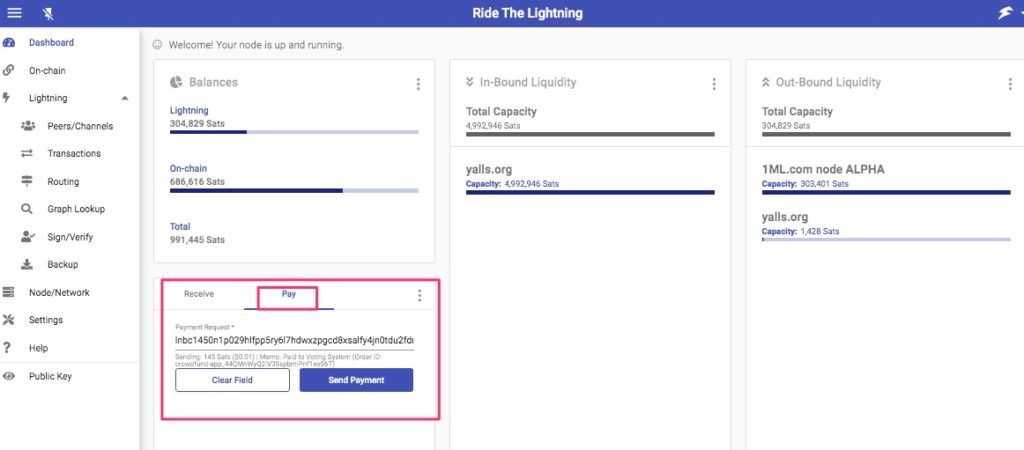
Receipt of a Lightning payment
If the payment was successfully executed, then we will receive a feedback about the successful receipt of payment.
In our Ride the Lightning dashboard, the Lightning payment is then displayed as follows.
Under Lightning > Transactions and then in the Lightning Transaction section click on Invoices. All Lightning invoices generated by the system are listed here. The unpaid bills in yellow.
The unpaid bills in yellow.
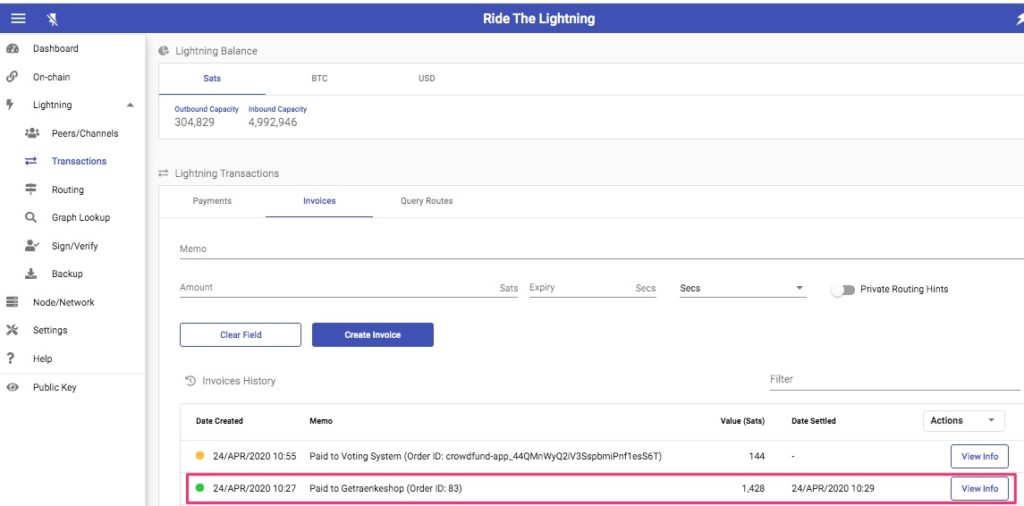
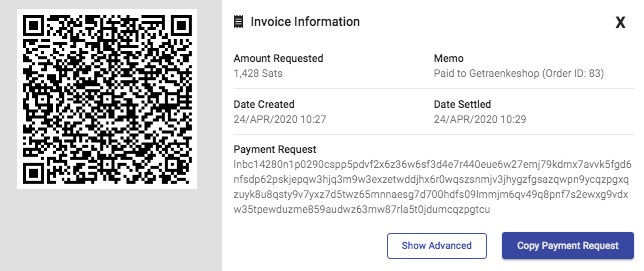
Detailed information about the transaction can be obtained by clicking View Info.
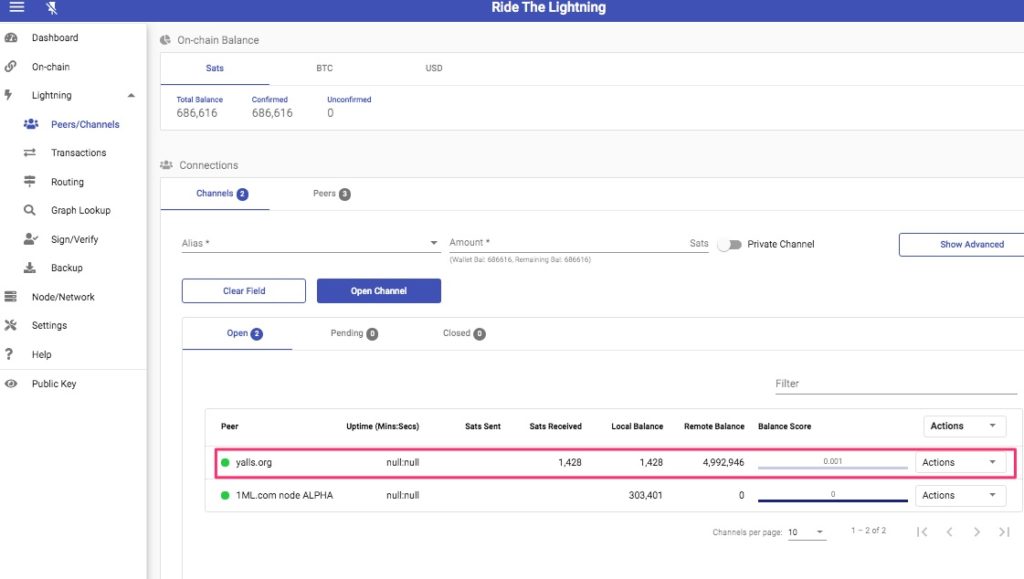
If you want to know through which channel the Satoshi came, you can find out under Lightning > Peer/Channels. In our case, the payment came in through Yalls.






Leave a Reply
Your email is safe with us.