This post about Bitcoin forwarding explains how to automatically forward Bitcoin to another Bitcoin address.
When selling something in our store for Bitcoin, these Bitcoin payments are credited to the internal BTCPay Bitcoin wallet. From this Bitcoin wallet, the Bitcoin should be automatically forwarded to our Bitcoin wallet at a Bitcoin exchange.
This automated bitcoin forwarding from the internal BTCPay bitcoin wallet to the bitcoin wallet to the bitcoin exchange is described here.
The procedure
When a customer successfully pays with Bitcoin, those Bitcoin are credited to the internal BTCPay wallet. Thus, the BTCPay system is able to monitor the status of the respective payments. After the payment is successfully received, these Bitcoin should be forwarded. If one wants to keep the Bitcoin, then the Bitcoin can be forwarded to one’s own wallet.
If one would rather receive Euros or another fiat currency instead of Bitcoin, the Bitcoin can be forwarded to a Bitcoin exchange so that the Bitcoin taken can be converted into Euros there.
The forwarding takes place as soon as there is only one Satoshi on the internal BTCPay wallet. The forwarding should be immediate and automated.
What you need
For the implementation of the described process you need:
- interne BTCPay Bitcoin Wallet
- BTC Transmuter Access
Technical implementation
Forwarding is implemented on the basis of BTC Transmuter. We will configure and set up some External Services for this. These External Services are combined with Trigger and Action statements and are combined as one Recipe.
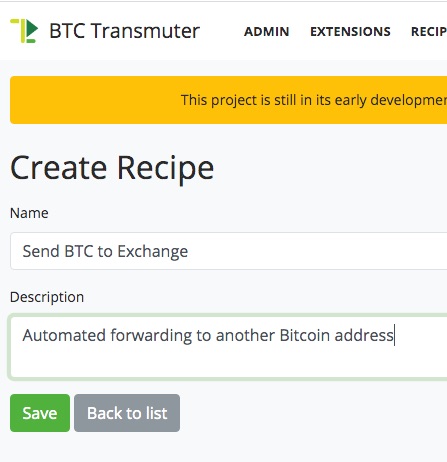
We will create a Recipe for our requirements and thus start creating a new Recipe.
We give our Recipe a unique name and choose for our example: “Send BTC to Exchange” and the description: “Automated forwarding to another Bitcoin address”.
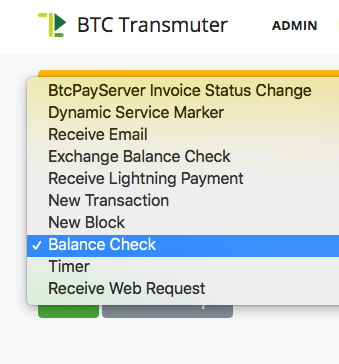
In the first step we need to set the trigger. We receive a variety of triggers, which are provided to us by BTCPay Transmuter.
Once Bitcoin funds are on a particular Bitcoin wallet, those funds are supposed to be forwarded to another Bitcoin address.
That is why we choose the “Balance Check” variant as the trigger.
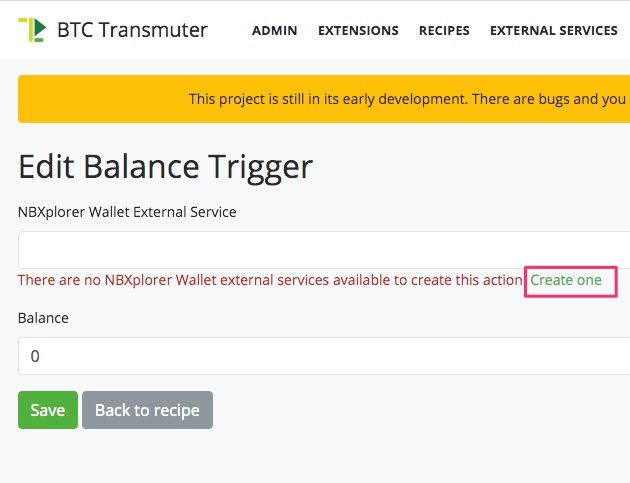
This trigger is to monitor the balance of the wallet. Now the question arises, which Bitcoin wallet should be monitored. This is recorded in the following step.
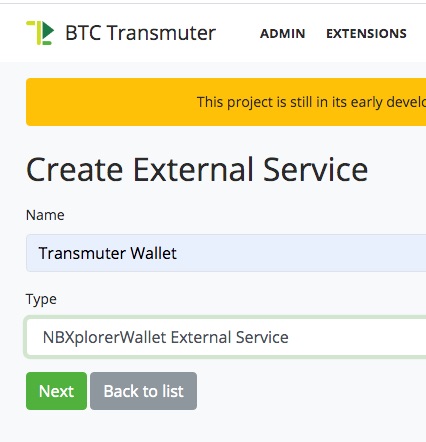
This now requires an External Service, which is created at this point. With the help of NBXplorer, it is possible to detect the changes of a particular Bitcoin wallet. Since we have not yet created a monitoring service based on NBXplorer as an External Service, we are now creating one
We give this wallet a unique name and choose as type: “NBXplorerWallet External Services”.
Then we need to tell the monitoring service which wallet to monitor. This is the internal BTCPay wallet, which belongs to the Supporter Shop, located on our demo BTCPay server.
For this we need to pair the NBXplorerWallet External Service with the Supporter Shop.
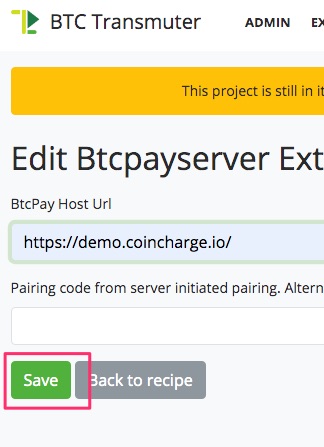
Click Save, then the page appears again with the link.
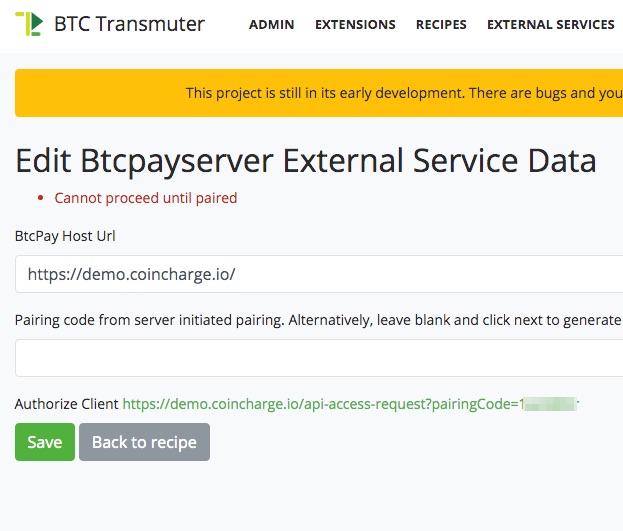
Now we click on the link to authorize the pairing process.
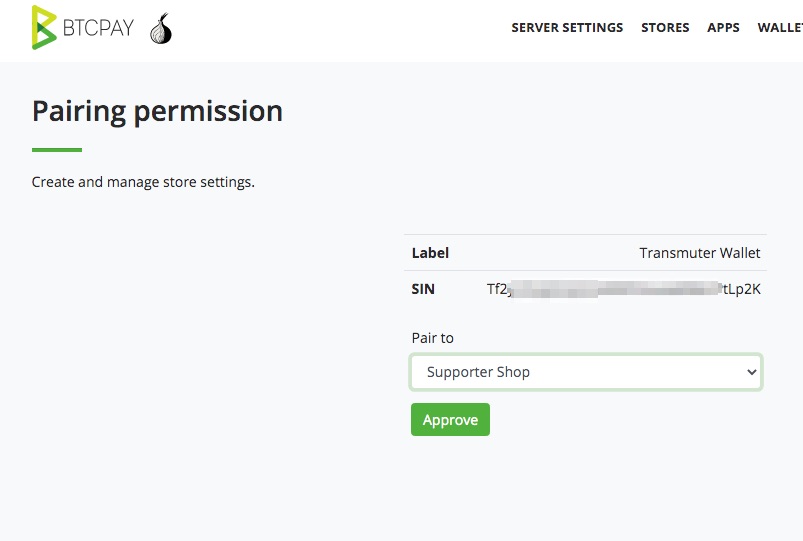
Select the appropriate store and click Approve.
After that we go back to the BTCPay Transmuter page and there to the Recipes menu item. There our Recipe should be listed with the name: “Send BTC to Exchange”:

We click Edit to continue with our setup.
We are offered the “Wallet Generator” option on the following view.
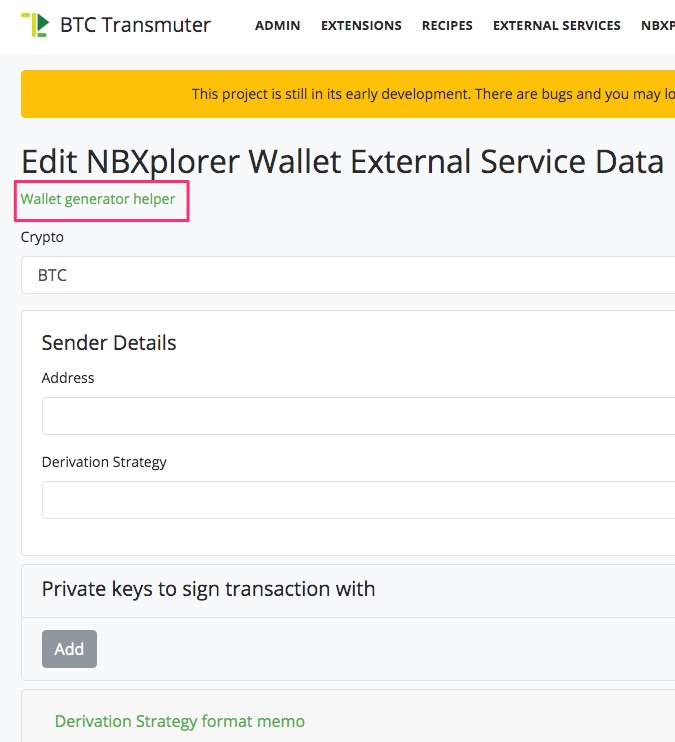
We would use the Wallet Generator option if we wanted to create a new wallet. We don’t need a new wallet as we want to use the internal BTCPay wallet which is linked to our supporter store.
It should not go unmentioned at this point that you could create your own wallet at this point and the relevant relevant information would be provided in this form.
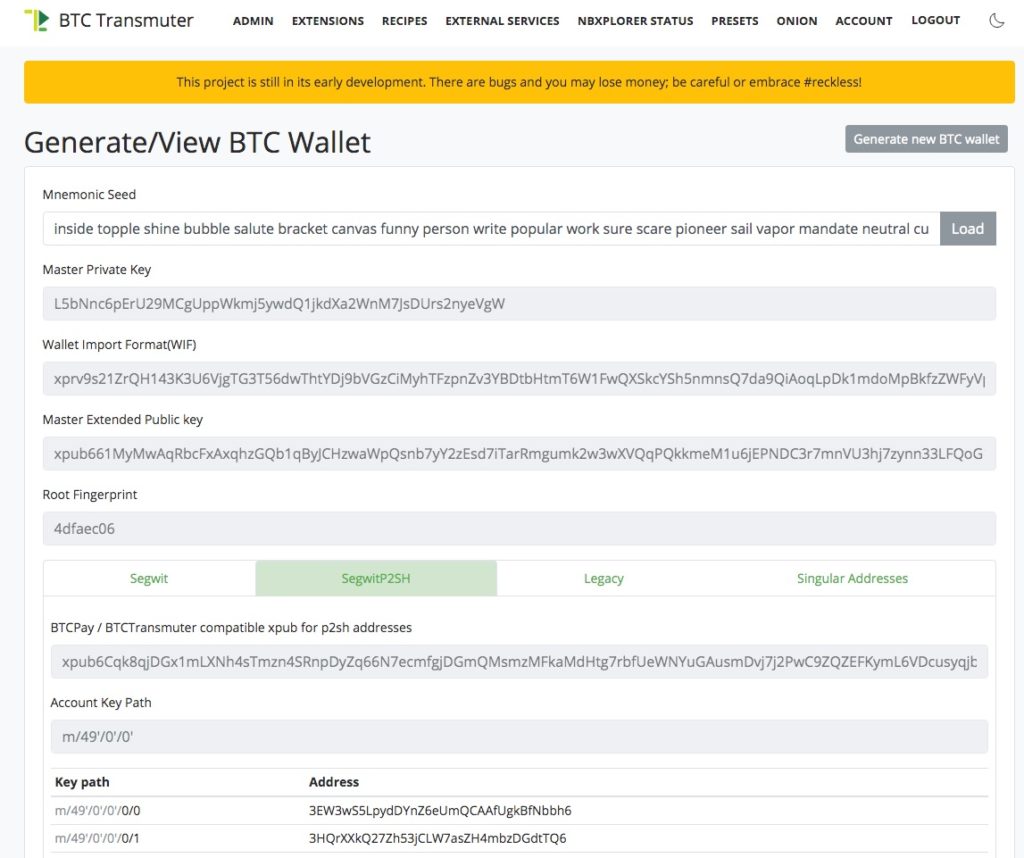
As mentioned above, we want to use the already existing BTCPay wallet and need the corresponding information.
We can find them on the BTCPay server in the Wallets menu item. There we select the appropriate BTCPay store and find the Wallet Settings:
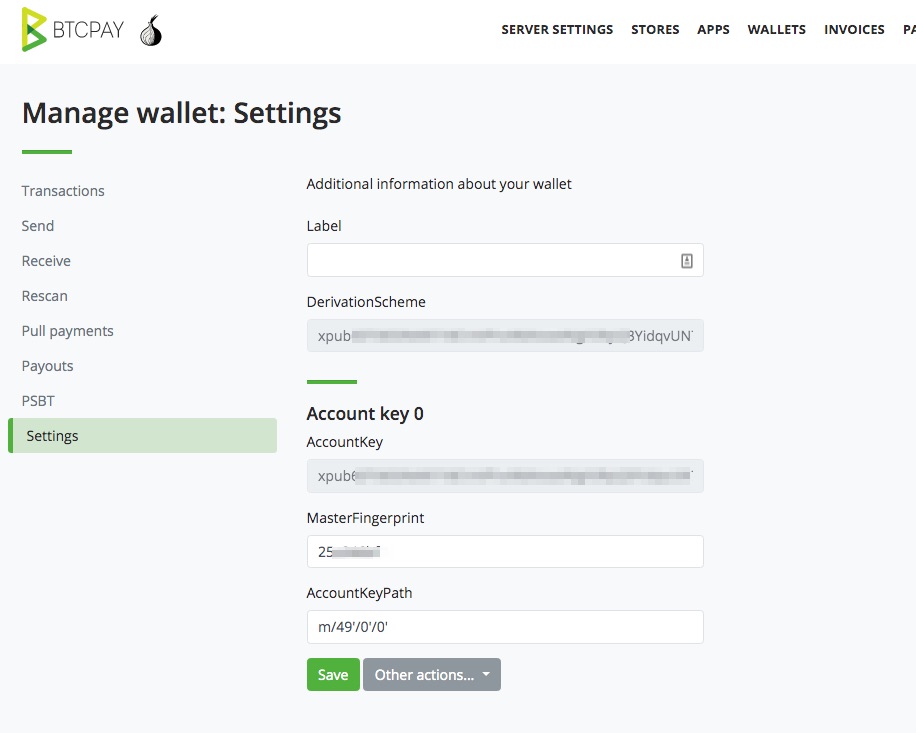
In the Settings section, in the Derivation Scheme field, we find the so-called Public Key (xpub).
It is important that this XPub key is extended with the Address Type information. This was set when the store was created. We have chosen the address type P2SH-P2WPKH and now we have to add -[p2sh] to our XPUB key.
We copy this information into the Derivation Strategy field
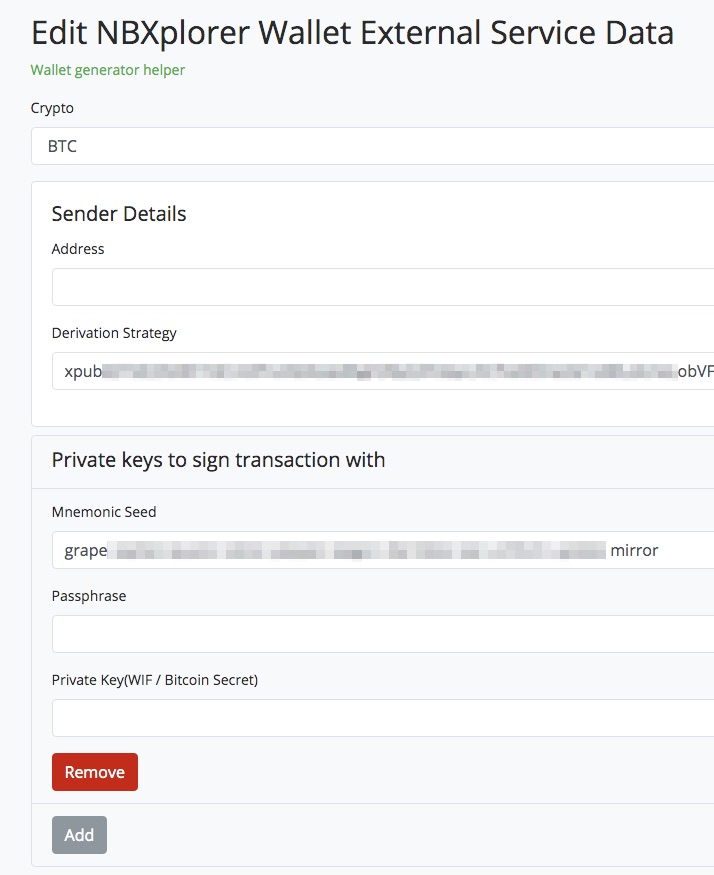
In order for something to be paid out from this wallet, the private key is required. This private key can be a mnemonic seed (12 or 24 words), a passphrase, or a private key. One variant is required. So not all fields have to be filled in. One of the three fields is sufficient.
ATTENTION!!!
ATTENTION!!! Therefore, handle the private key very conscientiously. Be clear about what you are doing right now. Do not store this private key on the Coincharge demo server. At most to try it out. Use your own BTCPay server and never leave a large amount of Bitcoin there that you can’t afford to lose.
In our case, the Bitcoin will stay on this wallet for no more than a millisecond. Nevertheless, one should be aware of the risk.
We click Save and then get the following view.
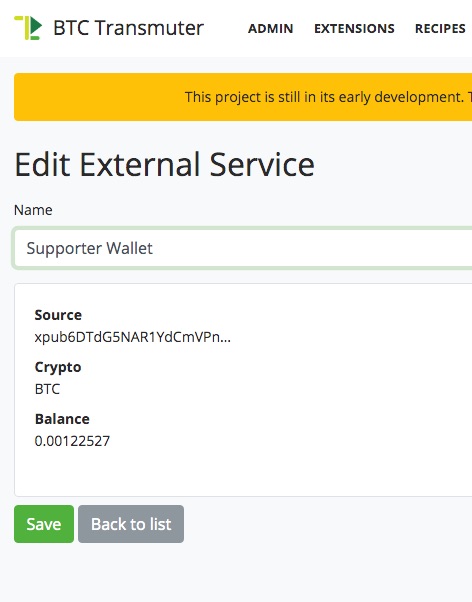
Now we need to set the trigger and the action.
We go to Recipes to our Recipe and there to Edit.
Auf der folgenden Seite bearbeiten wir den Trigger und klicken auf Add.
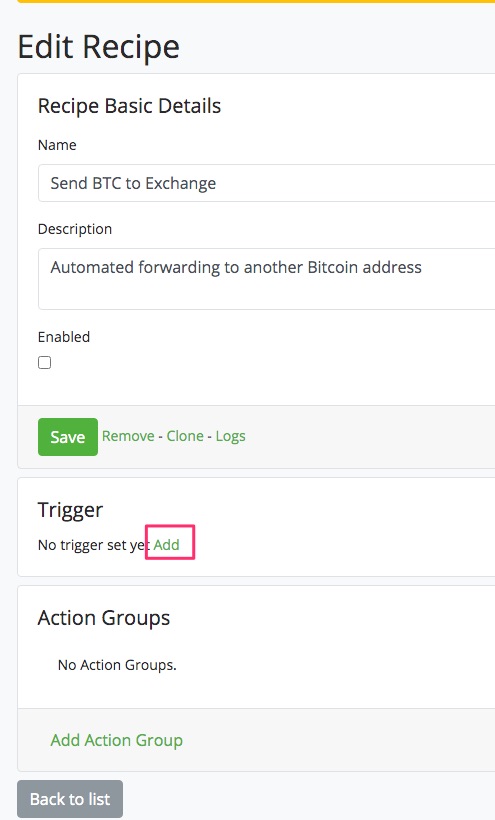
With the trigger, we specify at which condition something should happen. Something should happen when the balance on our Wallet changes.

We specify for our case that if the balance is greater than zero, then something should happen.
After we have saved the trigger, we need to define the action.
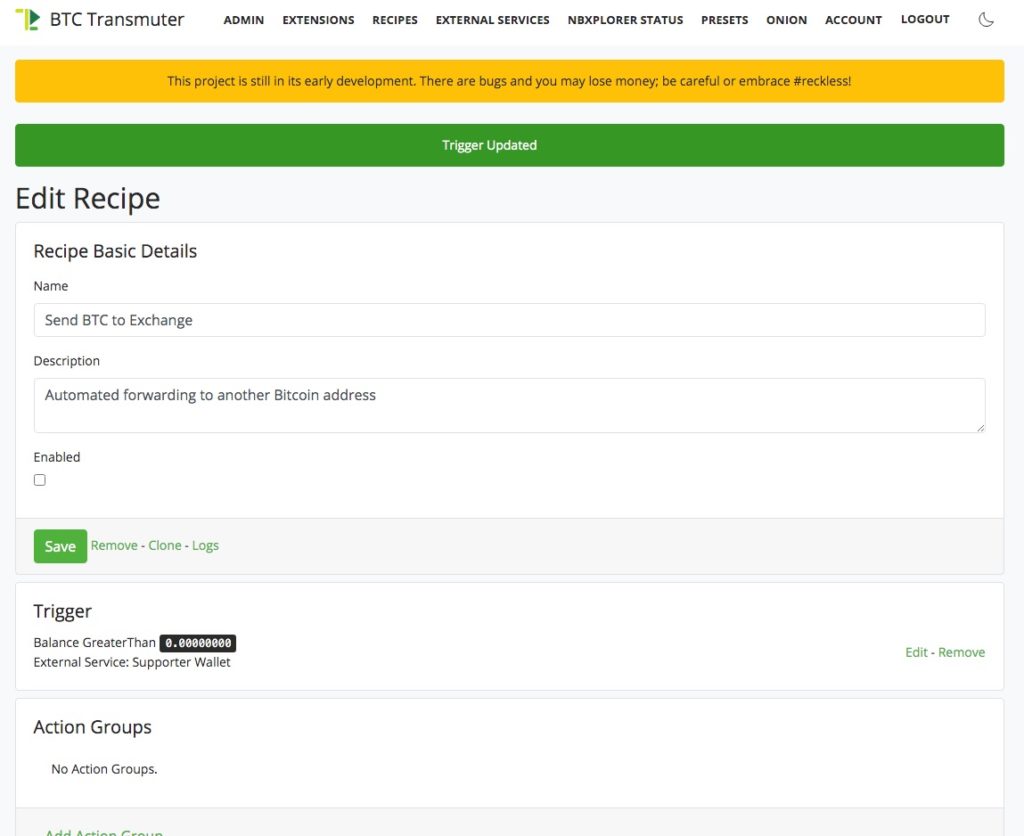
To do this, we click Add Action Group and get a selection of predefined options.
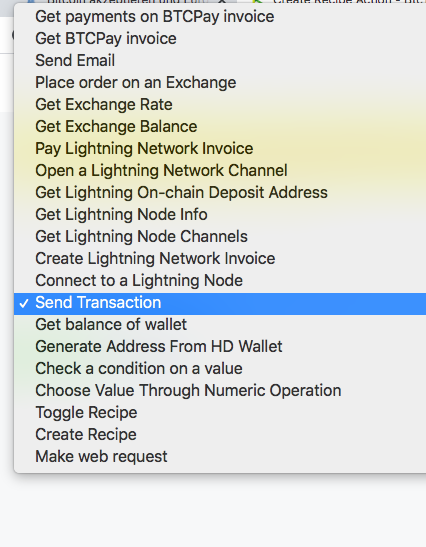
As soon as a credit is received on our Wallet, it should be forwarded immediately. Accordingly, we select the action “Send Transaction”.
On the following page we click Add.
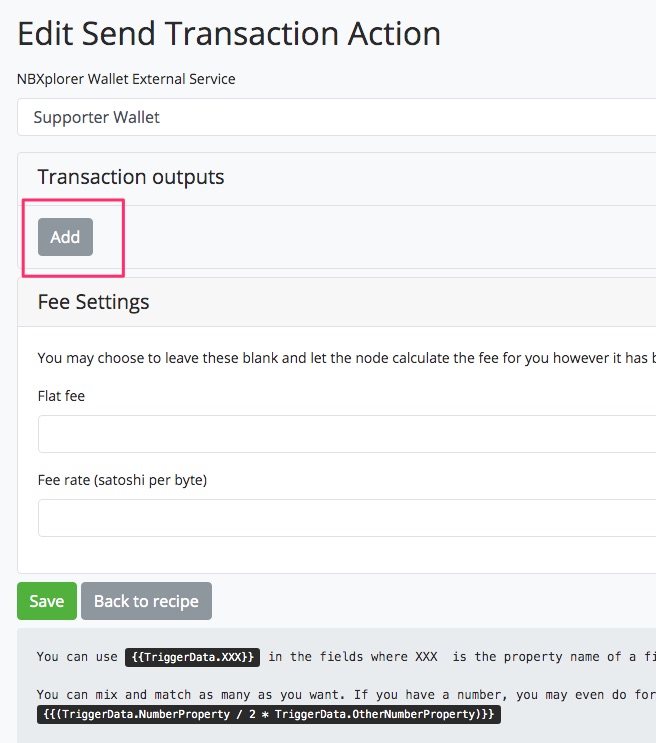
Then we have the option to specify what should happen to the funds on the wallet.
In the Amount field we enter {{TriggerData.Balance.ToDecimal(MoneyUnit.BTC)*(100/100)}}.
This command says that 100% of the credit should be used. For example, if we were to say that we only want to send 50% to the exchange and 50% to our own wallet, then we could define this accordingly with {{TriggerData.Balance.ToDecimal(MoneyUnit.BTC)*(50/100)}}.
The destination address is a static Bitcoin address, which we have obtained from the Bitcoin exchange.
We use a fixed address because the possibility to generate a new destination address for each transaction is not available.
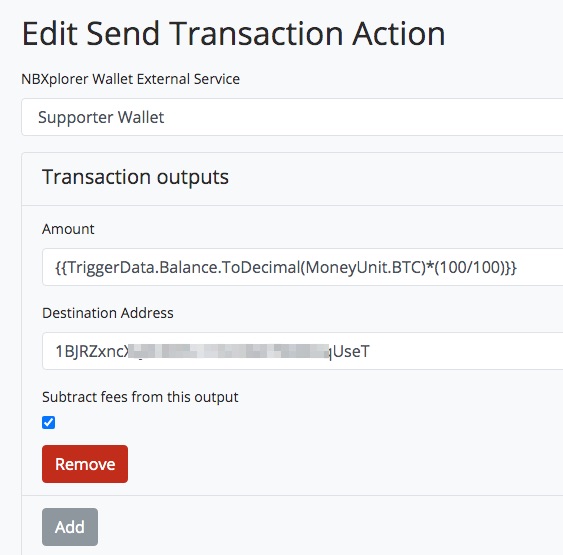
We click Save and we are done. Now we just need to make the appropriate live test.
We are doing a test order in our supporter store. After that, we use Recipes to check the logs for the transaction.
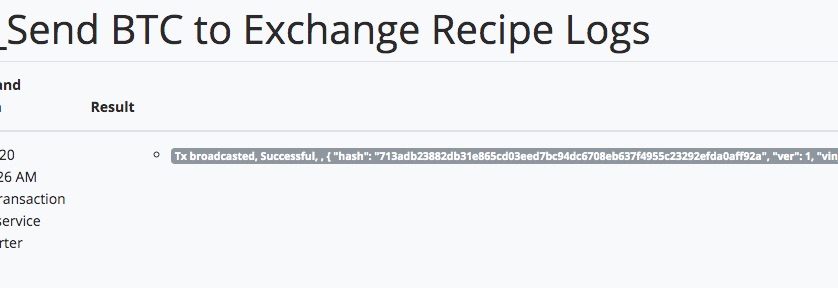
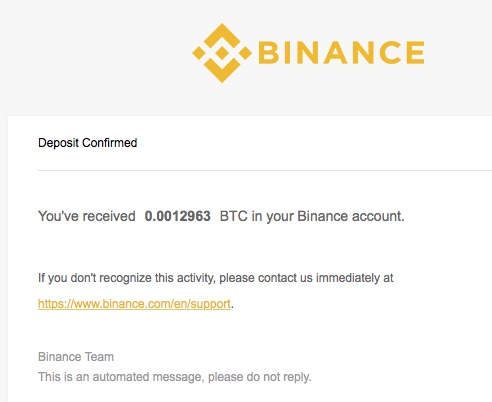
The forwarding was successful and also the Bitcoin exchange informed us by email about the successful receipt of the Bitcoin.
In this post, we have shown how the Bitcoin received in our store wallet can be automatically forwarded to a Bitcoin exchange. Bitcoin can then be sold automatically on the Bitcoin exchange. In the article “Accepting Bitcoin and Receiving Euros” we showed how Bitcoin can be sold automatically on the Bitcoin exchange. This ensures that a trader can accept Bitcoin and not have to fear any exchange rate risks to the euro or dollar. The store sells everything in Euros, the customer pays with Bitcoin and the merchant gets Euros on his bank account.
Mit Hilfe von BTCPay Transmuter lassen sich solche automatisierten Abläufe auf Basis von Trigger und Action Befehlen für die individuellen Anforderungen umsetzen.


Leave a Reply
Your email is safe with us.