You sell something in your store for €100,- and want to get €100,- credited to your bank account?
You want your customers to be able to pay you with Bitcoin, but you want to be independent from value fluctuations.
Use Bitcoin as another payment method in your online store, like credit card or PayPal.
You sell your products for Euros, your customers pay with Bitcoin and you get Euros credited to your bank account.
In the following article you will learn how to offer your customers payment via Bitcoin. The invoice amount is automatically converted to Bitcoin at the current value and the customer pays with Bitcoin. After that, the Bitcoin you earn will automatically be converted into Euros at a Bitcoin exchange and credited to your Euro account.
This way, you can offer Bitcoin as a payment method and have no risk of exchange rate fluctuations and no specifics to consider in your accounting.
The procedure
The end customer has goods worth €100 in his shopping cart and wants to pay for them with Bitcoin. The conversion is based on the exchange rate at the Bitcoin exchange, where much later the collected Bitcoin will exchange for Euro.
Once the payment is successful, two operations are initiated. Once the Bitcoin equivalent taken is exchanged for Euros on the Bitcoin exchange.
In parallel, the Bitcoin taken are forwarded from the internal Bitcoin wallet to the Bitcoin wallet at the Bitcoin exchange.
The sale of Bitcoin on the Bitcoin exchange must ideally take place in the same second as the payment of the end customer in order to exclude price fluctuations.
Therefore, a few Bitcoin have already been deposited with the Bitcoin exchange, which will be used to sell them. This deposit is replenished by the bitcoin that was just paid by the end customer.
If we assume six confirmations for the end customer’s payment to our internal Bitcoin wallet and from there to our Bitcoin wallet at the Bitcoin exchange, this process can take up to two hours. In order to exclude an exchange rate risk within this period, we make use of this deposit.
This ensures that we exchange Bitcoin into Euro at the same rate at which the end customer paid us with Bitcoin.
What you need:
For the implementation of the described process you need:
- a BTCPay store on a BTCPay server,
- an internal BTCPay Bitcoin wallet
- a BTCPay Transmuter access and
- an account with a Bitcoin exchange such as Binance, Bitfinex, Bitstamp, Coinbase or Kraken.
Technical implementation
In the first step, we select the store on the BTCPay server for which we want to perform the automated exchange of bitcoin into euros.
There we have to make two settings. Once we will use the internal BTCPay wallet and use the conversion rate of the Bitcoin exchange where we want to exchange our Bitcoin into Euros later.
Internal BTCPay Bitcoin Wallet
We need the internal BTCPay Bitcoin wallet for the implementation. To do this, we go to the General Settings section of the Store Settings and switch to the Derivation Scheme section.
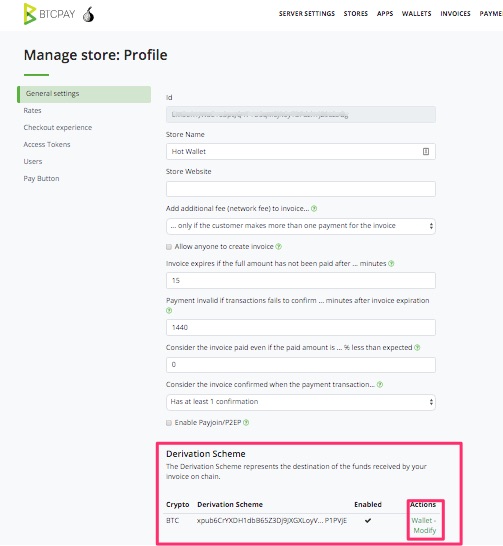
There we have the possibility to create an internal BTCPay Bitcoin wallet. A
exact description, you can find in the article: Creation of an internal BTCPay Bitcoin Wallet
Bitcoin conversion rate
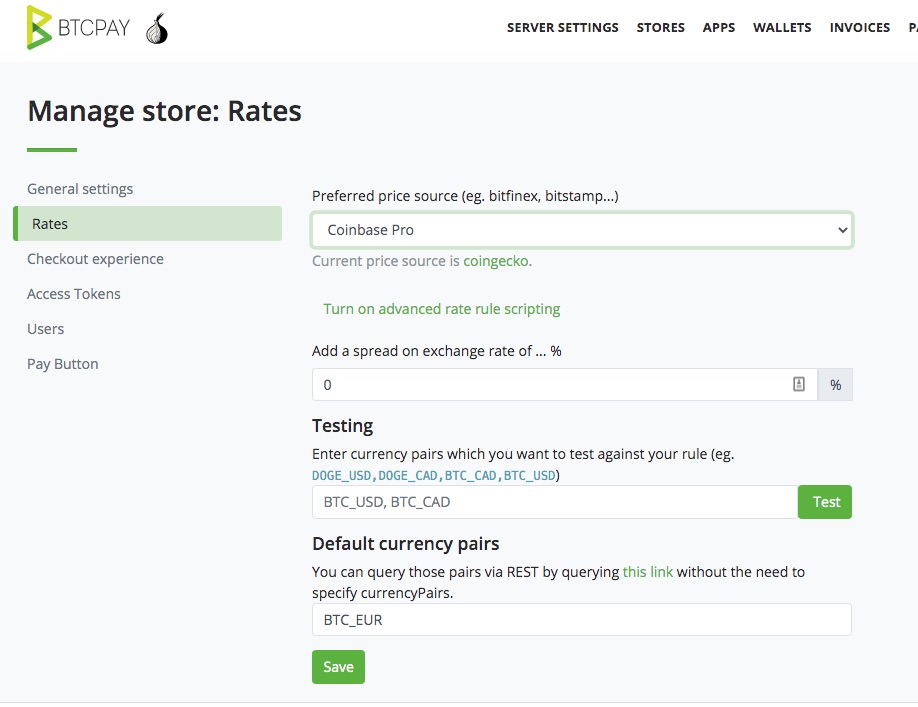
Then, for the conversion of the Bitcoin rate, we select the Bitcoin exchange where we want to exchange the Bitcoin for Euro later. To do this, we go to the Rates section in the Store Settings.
Here you can choose, for example, the exchanges Binance, Bitfinex, Kraken or Coinbase.
In the field “Add a spread on exchange rate of … %” you can set a spread on the exchange rate. In the field “Add a spread on exchange rate of … %” you can set a spread on the exchange rate.
However, it is recommended not to charge a surcharge.
BTCPay Transmuter
After we have made the settings within the BTCPay Store on the BTCPay Server, we log in to BTCPay Transmuter.
In the Presets section we can already find a template for Fiat Conversion.

After we have selected Fiat Conversion, the following page appears.
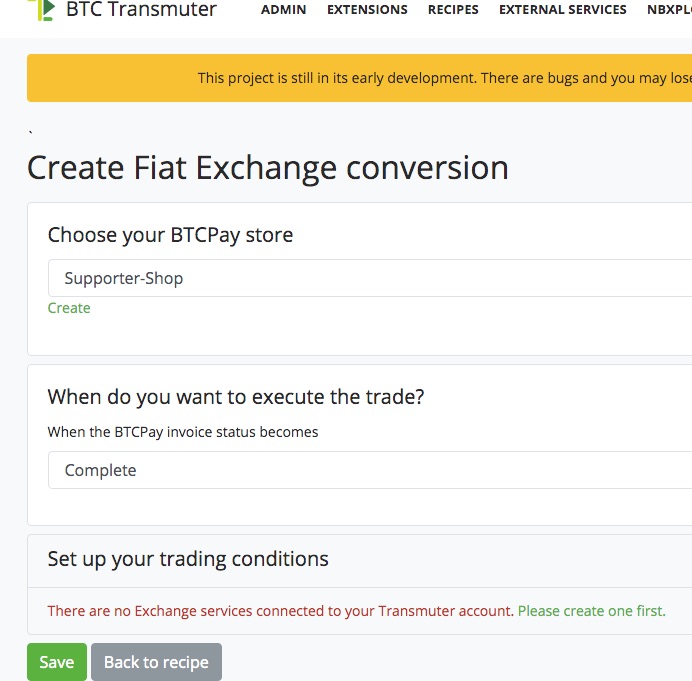
If we have already created a store at Transmuter and connected it to our BTCPay server, then these stores will already be suggested to us. In our case, we have already created the email notification via BTCPay Transmuter for the Supporter Shop. You can find a description under: Receive email notification when making a Bitcoin payment
If you don’t have a store at BTCPay Transmuter yet or you want to add another store, here you can find instructions how to connect a store from BTCPay Transmuter to the BTCpay server.
In our case, we specify that Bitcoin should be sold at the Bitcoin exchange as soon as the status of the order is considered Confirmed.
You can set when an order is considered confirmed under BTCPay Store > General Settings.
If you select the “is unconfirmed” setting, then the payment is already considered completed as soon as the end customer has successfully executed the payment and the transaction is listed in the mempool.
This is also the ideal time to exchange Bitcoin for Euros on the Bitcoin exchange, as Bitcoin is expected to be confirmed by the Blockchain shortly and then credited to our internal BTCPay Wallet.

In the Setup your trading conditions section we specify at which Bitcoin exchange we want to exchange our Bitcoin.
After we click on Please create one first, the following page appears with the selection of all available Bitcoin exchanges.
Among them are the most important Bitcoin exchanges such as Binance, Bitfinex, Bitstamp, Coinbase or Kraken.
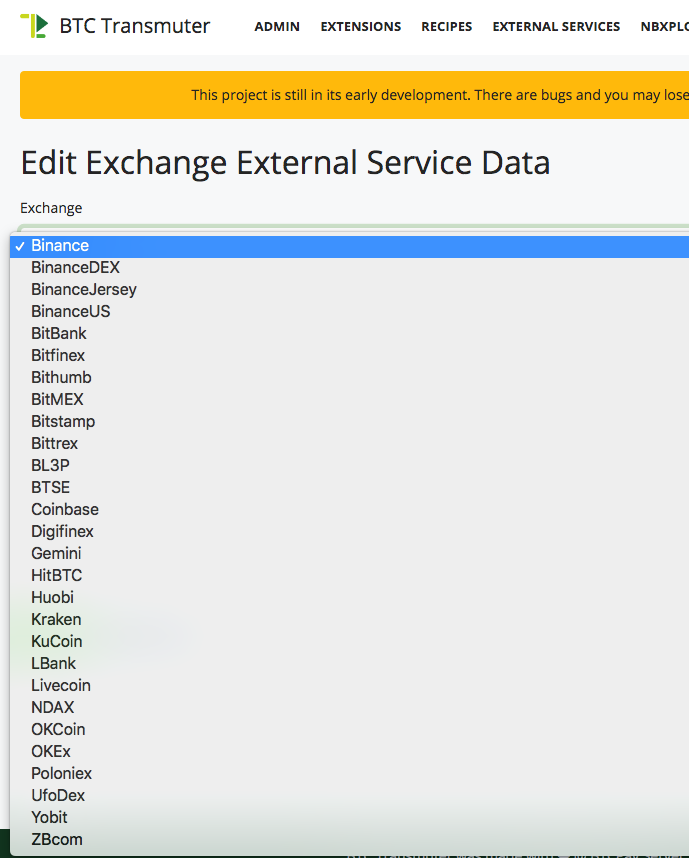
After we have made a selection, we need to enter an API Key. We obtain this API Key from the respective exchange.
To do this, we need to log in to the Bitcoin exchange and find the area where the API is provided to us by the exchange.
Usually this API key can be found in the personal settings.
At Binance you can find it in the API Management section.
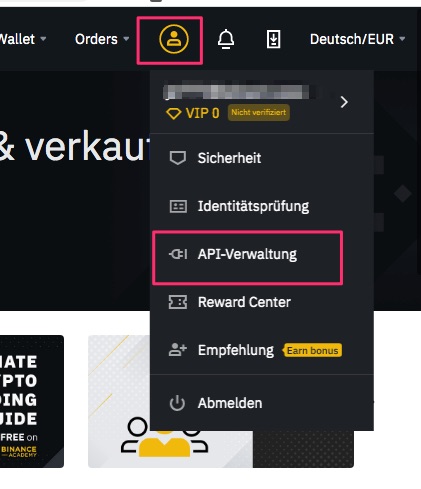
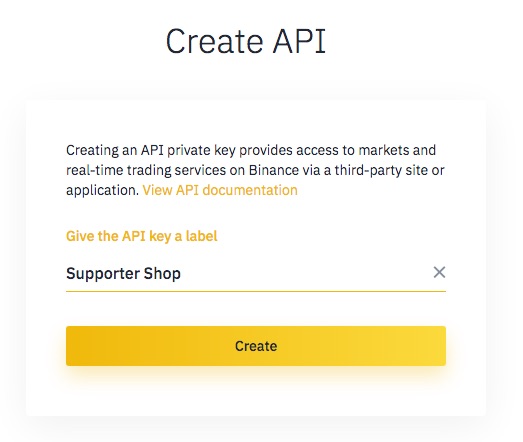
There you can create an API
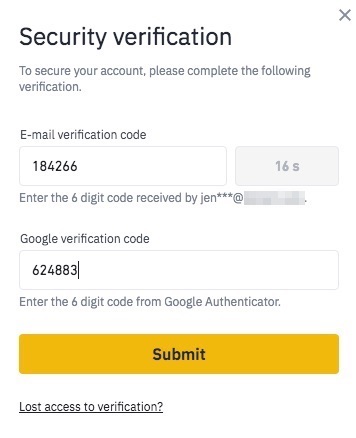
Full access to the account at the Bitcoin exchange is provided via the API key. Accordingly, API access must be secured. Therefore, an email PIN and two-factor authorization must be used to confirm API access.
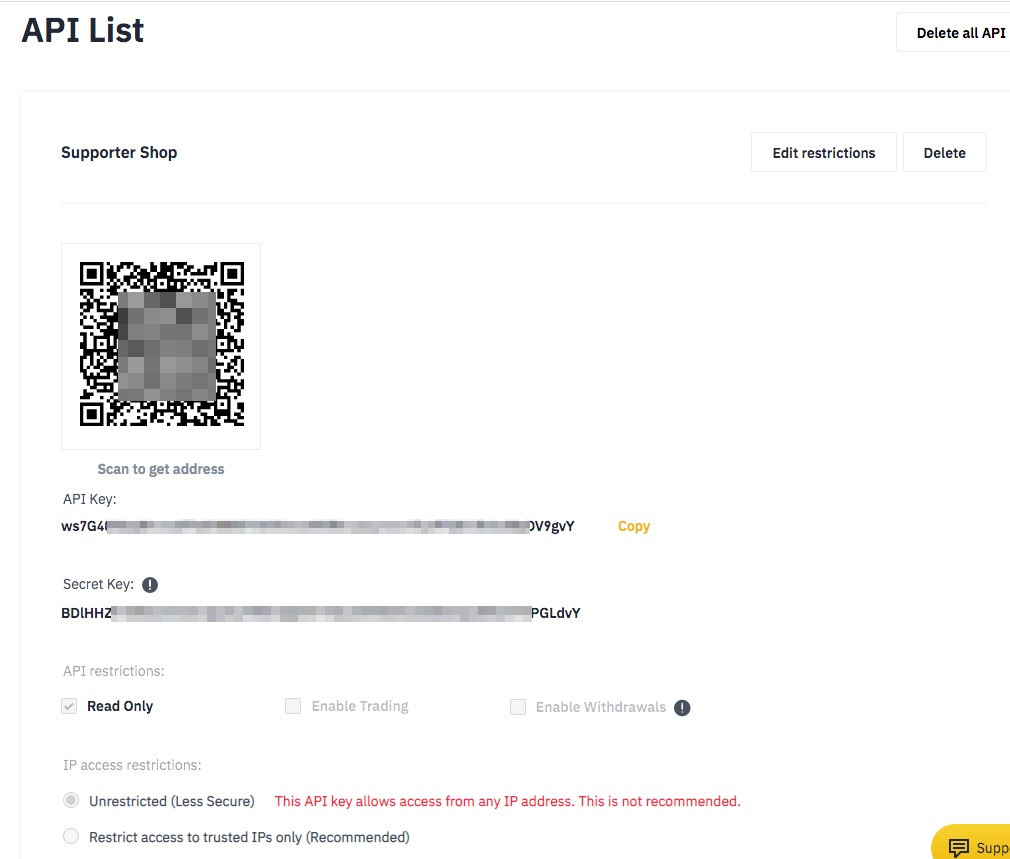
After that you get the API which is divided into a Public Key and a Private Key respectively called API Key and Secret Key.
If you have an account with Coinbase, you can find the API Keys section under Settings.
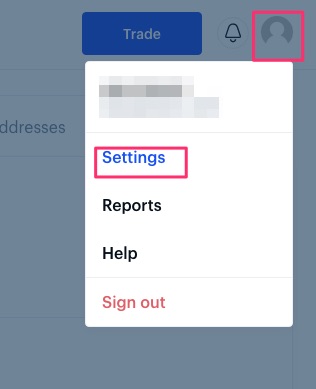
There you can create a new API Key.

Accordingly, it can be defined for which areas access is allowed for this API Key.
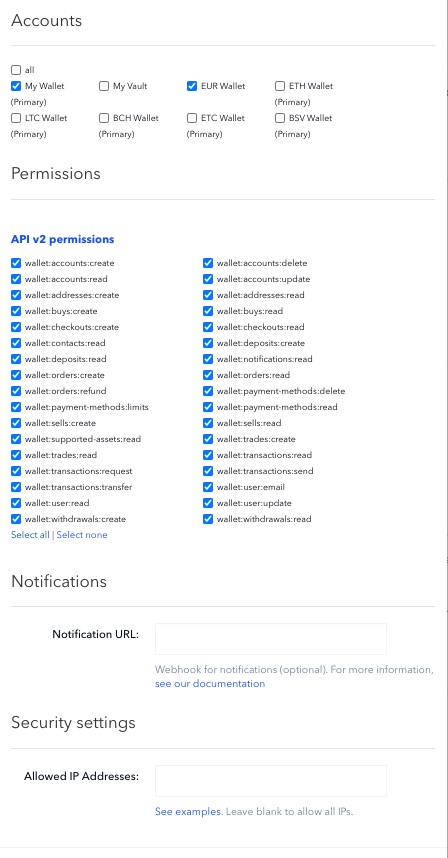
For example, Coinbase’s API key looks like this:
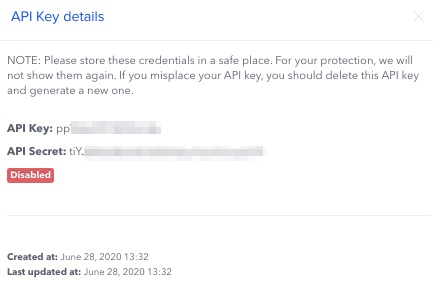
No matter which Bitcoin exchange you use, the structure is almost identical. Under the personal settings you can generate an API Key. The rights of the API Key should be chosen to allow the sale of Bitcoin. In addition to the rights to read, rights to execute must also be granted.
Then you get two API Keys, which are then deposited in the appropriate fields at BTCPay Transmuter.
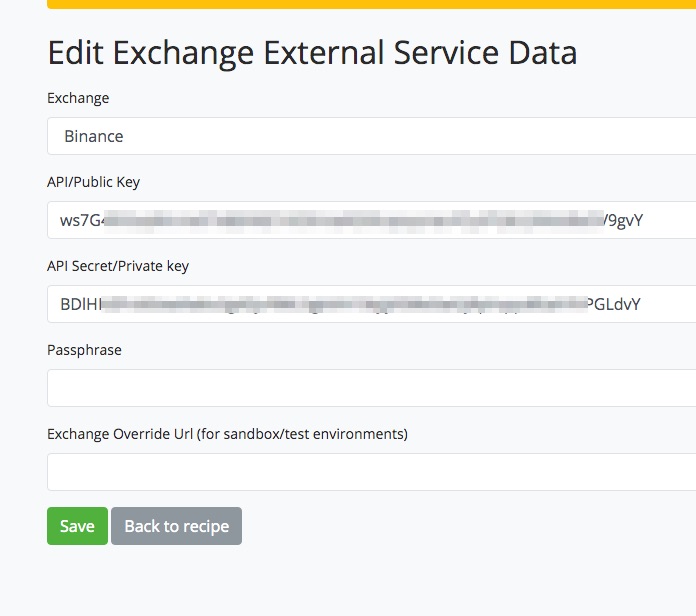
After clicking Save, BTCPay Transmuter will check the settings. With Coinbase, you may receive an error message because API access to the account is only possible after 48 hours for security reasons.
Likewise, there should be some credit on the corresponding account.

After the API Key has been deposited and saved, the following page appears.
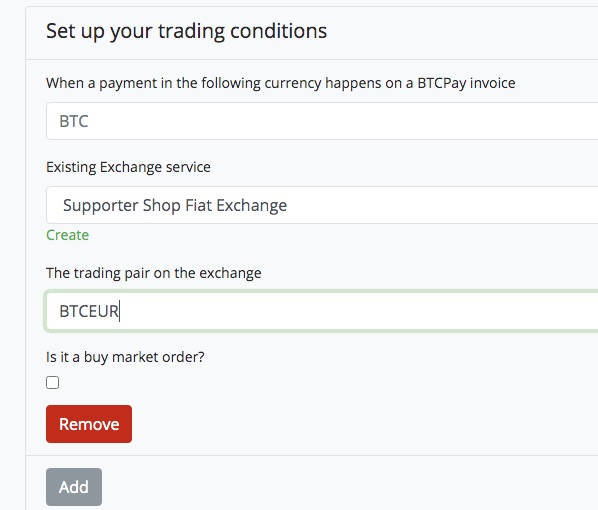
This is where you specify which currency pair to trade. We want to change Bitcoin (BTC) to Euro (EUR) and therefore we enter the currency pair BTCEUR.
Then there is a possibility to activate the Buy Market Order field.
A market order is a purchase or sale at the current market price. In our case, we want to sell Bitcoin at the current market price, not buy it. That is why we do not tick the box.
We have deposited the equivalent of €200 in Bitcoin with Binance. This amount is our deposit from which the sale is carried out against euros.
In the settings for the trigger is set so that the action starts when a payment with the status Complete is made.

A Bitcoin transaction receives the status Complete after six confirmations (about one hour). As soon as the payer executes the payment and the transaction is in the mempool or has less than six confermation, the status of the transaction Before is the transaction Confirmed.
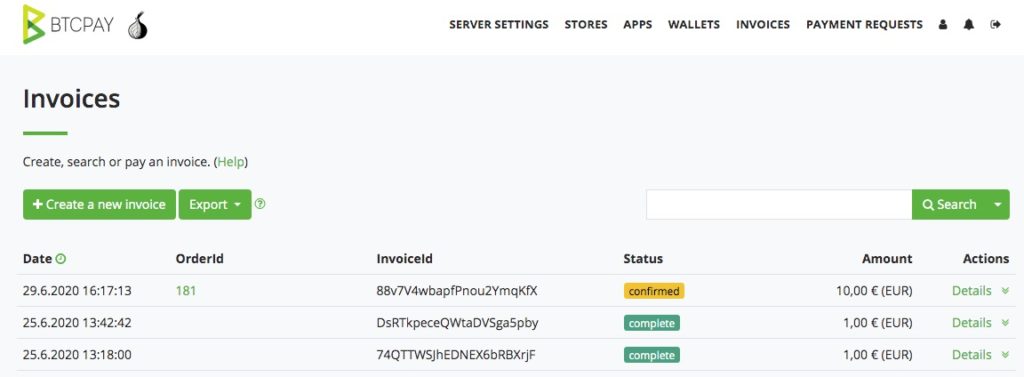
In order for a sale to occur at the time the payer executes the transaction, we change the settings in the trigger.
As Action there are two actions, which are combined as Action Group.

The first action is to enter the invoice number and determine when the second action will be executed.
It is possible to specify that every time a payment is made (Any) the action will be executed. We change at this point that the sale should only be made if it is an on-chain Bitcoin transaction. In the case of payments by lightning (off-chain), there should be no sale on the stock exchange.
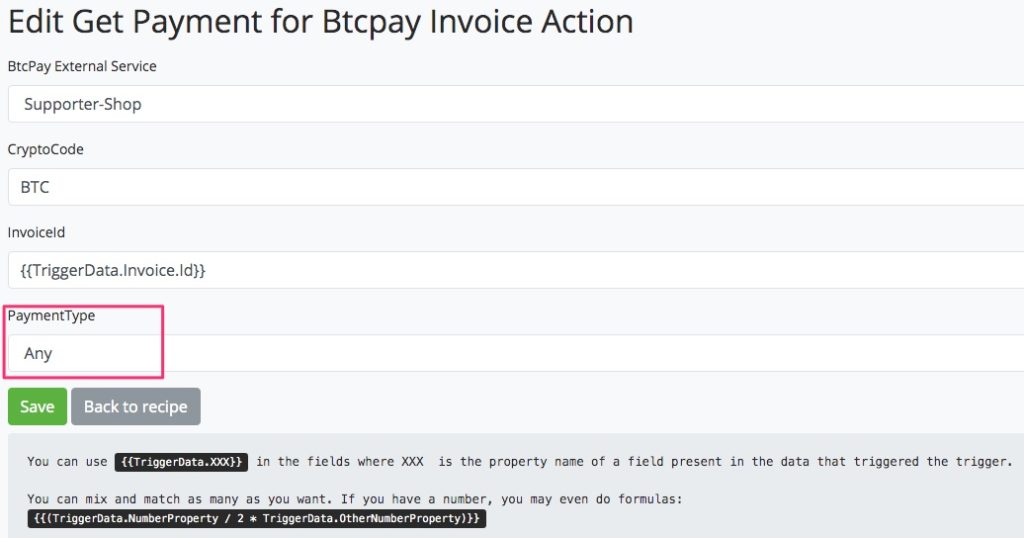
The second action determines what should take place at the exchange.
At the Binance exchange, Bitcoin is to be sold against Euros (BTCEUR) at the respective market price. The amount to be sold is the sum of the amount from the previous action.
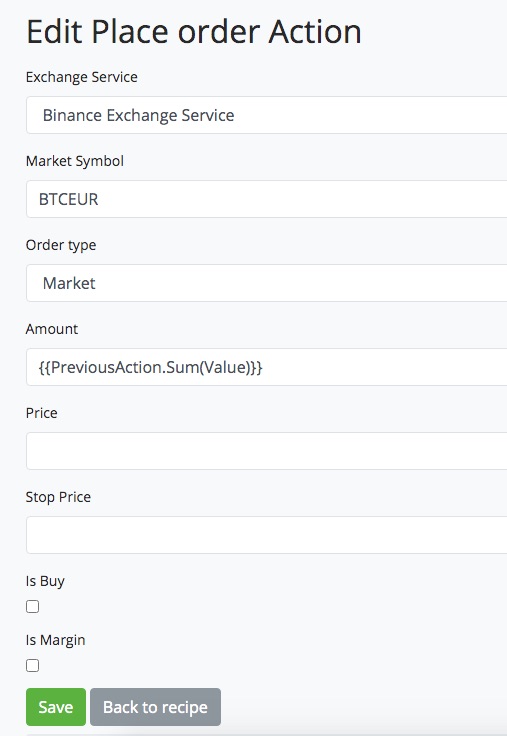
After we have saved everything, we will make a test order for €10 in our supporter store and see what happens.
In our test, the bitcoin from our deposit were successfully sold on Binance. The exchange rate was almost identical. Additionally, Binance charges a fee for exchanging Bitcoin into Euros. This fee amounted to 0.01% of the amount. The credit to our euro account was thus almost equal to the amount the end customer paid in euros in our store.
So far, we have successfully implemented the sale of bitcoin from our deposit. We were thus able to virtually rule out any price risks. now we want to achieve that the deposit is also automatically replenished with the bitcoin that the end customer has paid.
To do this, we need automated forwarding of bitcoin from our internal BTCPay wallet to the bitcoin wallet at the bitcoin exchange we use.
The article “Automated forwarding to another Bitcoin address” explains how the Bitcoin are forwarded from the internal BTCPay wallet to the Bitcoin exchange.


Leave a Reply
Your email is safe with us.