BTCPay POS App via amount input
Accept Bitcoin via amount entry with the BTCPay POS App
Accepting Bitcoin in business has never been easier. If you operate a retail business such as brick-and-mortar retail, then you can use your smartphone to receive Bitcoin payments. Likewise, your employees can use their own smartphones to receive bitcoin payments for the store.
All you have to do is call up a specific Internet address and the Bitcoin will be credited to the store’s Bitcoin wallet after a successful payment.
Only the store owner, as the owner of the Bitcoin wallet, can dispose of the Bitcoin balance.
How to make the payment in the store
The customer is standing at the cash register in the store and the cashier asks:
“How would you like to pay? Cash, card or Bitcoin?”
If the customer wants to pay with Bitcoin, any internet-enabled device can be used to receive the payment. No software or app needs to be installed. Any device that can be used to access a website is able to receive Bitcoin payments. This can be the smartphone of the merchant or an employee. It can be a normal computer or a tablet.
Any internet-enabled device with a screen, without software installation is suitable to accept Bitcoin in the store.
The cashier opens the web page, which may look like this:
https://btcpay.coincharge.io/apps/3CFf53JwgRYUWVfpEopqxFsz2TeN/pos
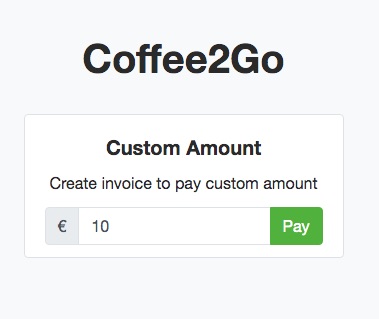
A web page opens in which the purchase amount in Euro (or any other fiat currency) is entered by the cashier.
Accept Bitcoin in retail store via amount input

After that click on Send. In the background, the BTCPay server determines the current Bitcoin exchange rate. The determined Bitcoin amount is displayed in the form of a QR code.
This QR code is shown to the customer for payment.
The customer scans the QR code with their Bitcoin mobile app and makes the payment.
After just a few milliseconds, the payment page of the store shows that the payment has been successfully executed.
The purchased and successful goods can then be handed over to the customer.
The following section explains how to accept Bitcoin payments in your own business.
btcpay.coincharge.io
Go to https://btcpay.coincharge.io and register there with your email address and set up an account.
You can find a detailed description of how to set up an account on a BTCPay server in the article: Setting up a BTCpay store.
In the instructions described here, we focus on the points that are important for the acceptance of Bitcoin payments in business.
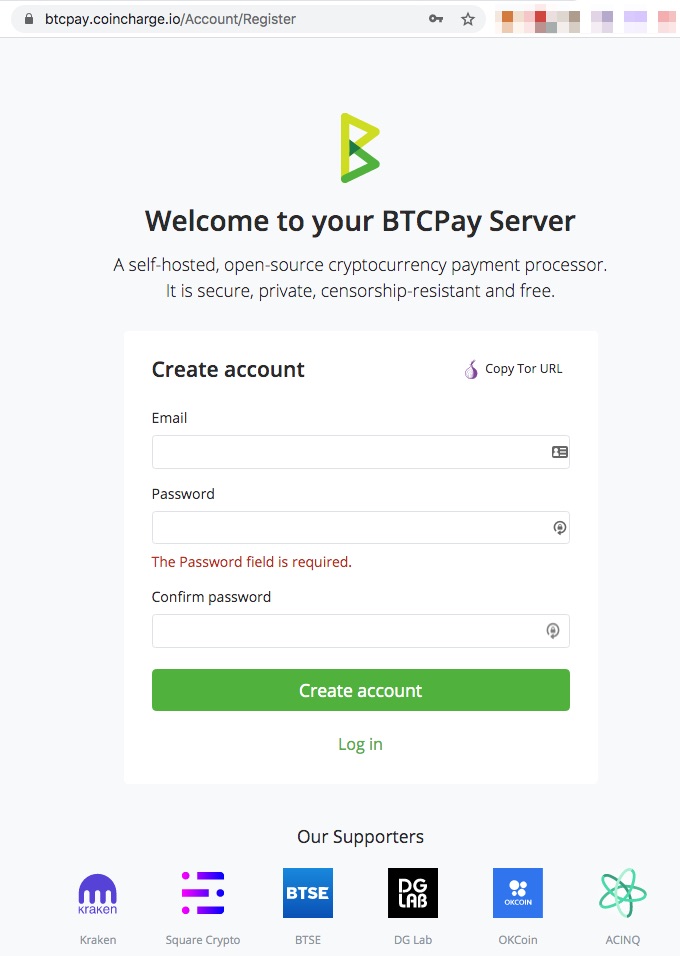
After we have successfully logged in to https://btcpay.coincharge.io/, we go to the Stores section and create a new store by clicking on the “Create a new store” button.

In our example, we give the store the name Retail Store. You use the name of your store at this point.
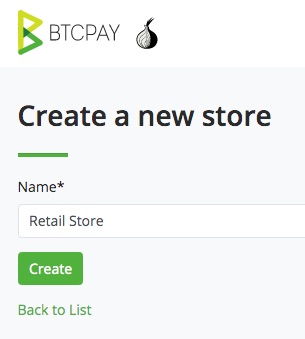
After that we click on Create. After that we will automatically get to the General Settings page of our BTCPay store.
The individual setting options are explained in detail in the article Administering the BTCPay Shop.
We focus on the settings that are relevant or important for our application.
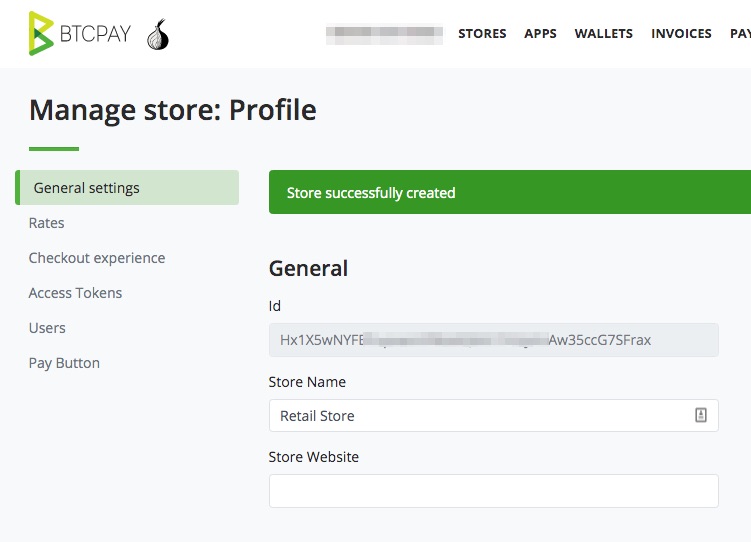
Within the General Settings, there is a setting for when a Bitcoin payment should be considered Confirmed, i.e. completed.

The default setting is after One Confirmation.
This means that once the payment has been confirmed on the Bitcoin network, then the payment is considered paid. This can be done in about 10 minutes. In some cases, a little longer.
If the customer is at your checkout, then it is not reasonable for the customer to wait 10 minutes or more for the purchase to be “guaranteed” complete.
We therefore set the value to zero and select “ls unconfirmed”
This means that a payment is already considered successful when the transaction is displayed in the mempool.

If you already accept card payments in your store, then this will not be unfamiliar to you. You will also receive the feedback via the terminal after a few seconds that the payment was successful. The actual crediting of your account will take place later.
When you make a Bitcoin payment, you will receive a positive feedback as soon as the transaction is in the mempool. The final crediting to your own Bitcoin wallet will take place only after 6 Confirmation.
Setting it to “ls unconfirmed” is useful for sales with smaller amounts that need to be done quickly.
In 99% of the cases, a “ls unconfirmed” setting is absolutely sufficient. As a jeweler or supplier of high-end luxury items, at least 1 Confirmation should be set.
Create Bitcoin Wallet
In the Derivation Scheme section, we deposit the Bitcoin wallet to which the Bitcoin sales are to be credited.
We have the option to deposit an XPub Key from an existing wallet. We can get an XPub key from our hardware wallet or, for example, via an Electrum wallet that we run on our home computer.
How to set up an Electrum Wallet and use the XPub Key from it, you will learn in the article “Create XPub Key with Electrum Wallet”.
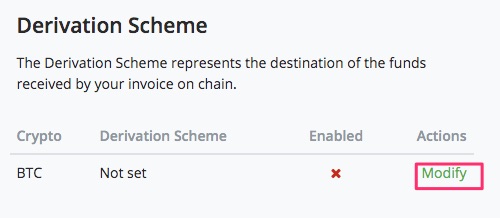
We click on Modify and get to the area to deposit a Derivation Scheme.
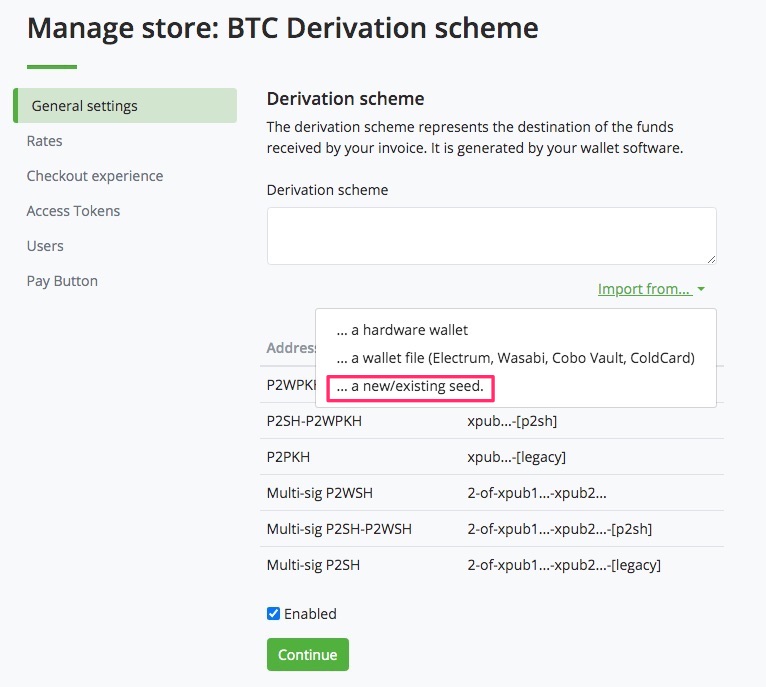
In our example, we will use the internal BTCPay Bitcoin wallet.
Here you will find a detailed description of how to create a BTCPay wallet.
Select the option “…a new/existing seed”.
I am text block. Click edit button to change this text. Lorem ipsum dolor sit amet, consectetur adipiscing elit. Ut elit tellus, luctus nec ullamcorper mattis, pulvinar dapibus leo.
Since we are creating a new Bitcoin wallet, we do not need to enter an existing seed or passphrase. These fields remain empty.
We choose the setting “Segwit wrapped” for Address type, because this allows us to enable all existing Bitcoin wallet to make payments in our store.
Then we check the boxes “Is hot wallet” and “Import keys to RPC”.
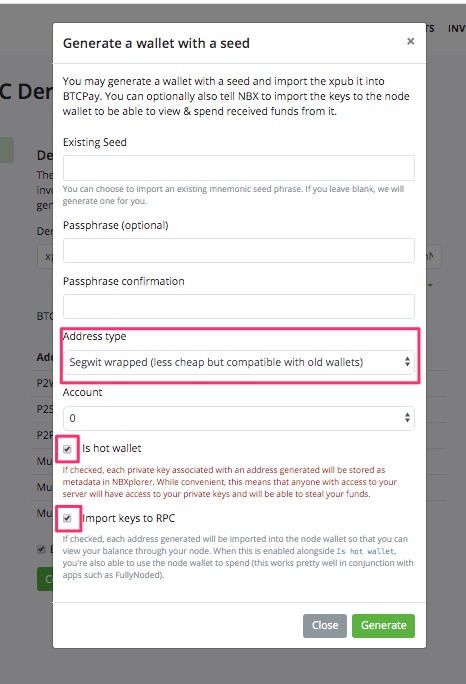
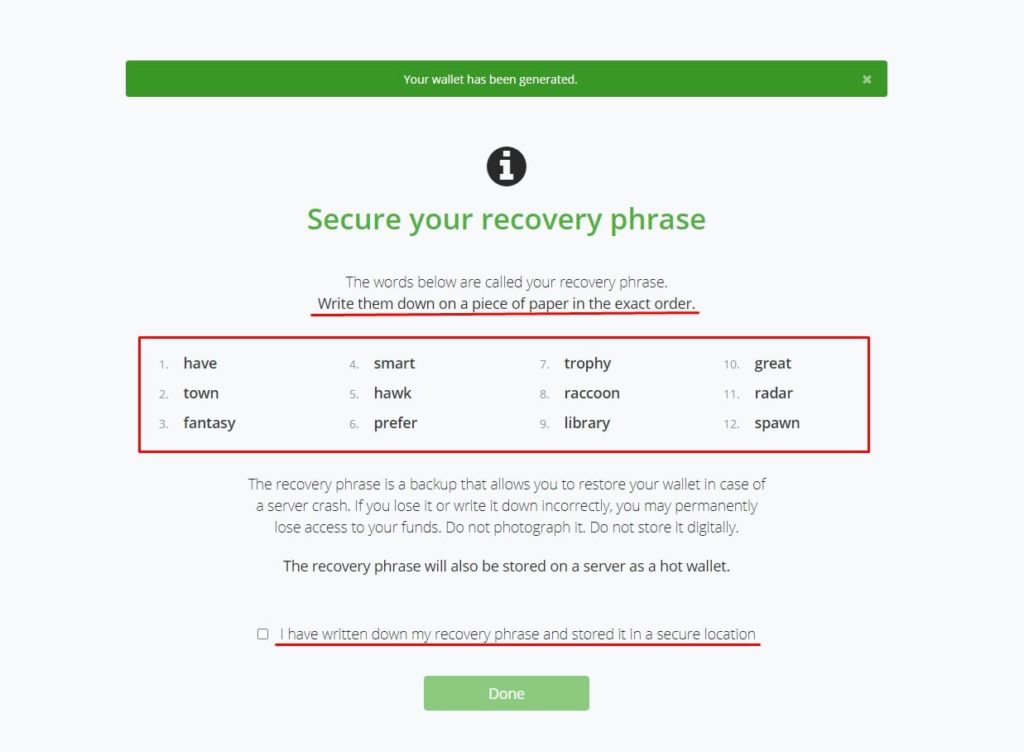
Then click on Generate and the 12 words of your seed will be displayed on the page that appears.
Write these 12 words down on a piece of paper and keep them in a safe place.
If you no longer have access to this account, you can use the 12 words to transfer your Bitcoin balance on the BTCPay wallet at Coincharge to a new Bitcoin wallet on another BTCPay server at any time.
You can transfer the Bitcoin balance to another Bitcoin address at any time. You can find the description of a BTCPay hot wallet sending.
After the 12 words have been safely noted and it has been confirmed that the words have been safely saved, we can move on to creating the application.
Create POS App
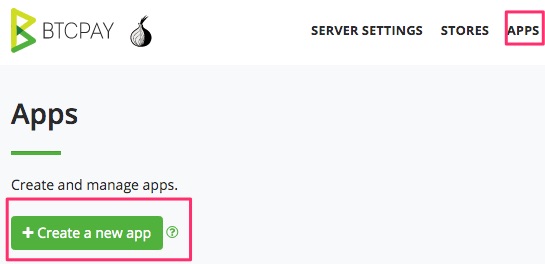
After successfully creating the BTCPay store and providing a Bitcoin address for the credits, we create the application.
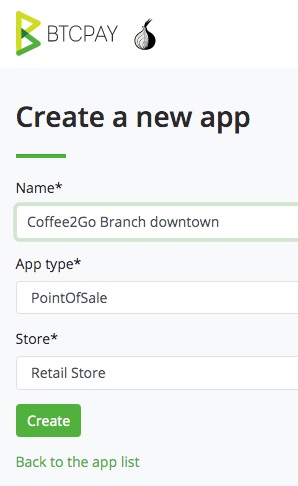
There is already a so-called app, which is provided by the BTCPay server. We will now use this PointOfSale app for our requirements.
We still give the app a unique name. In our example, we have a coffee shop called Coffee2Go and if we have multiple stores, we still call it Branch Downtown.
We then get into the area to customize the PointOfSale app for our needs. There are already numerous fields pre-filled in the template.
This is an example if you want to deposit your entire assortment of goods as well. This detailed description incl. of the deposit of the offered products we have described in the article Bitcoin POS Terminal.
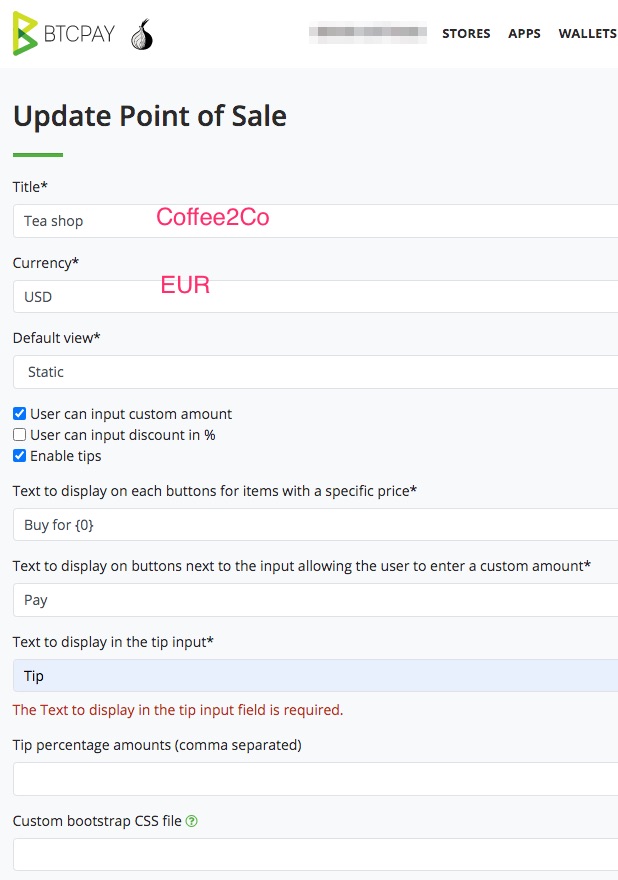
The listing of all products is not necessary for us. Therefore, we can greatly simplify it and remove the templates.
We will make appropriate changes until the fields are filled in this way.
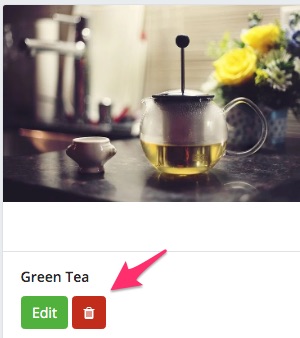
After that we remove all deposited products by clicking on the red trash can.
For the Redict invoice field, we leave it as is with “Use Store Settings”.
Then we click on Save Settings.
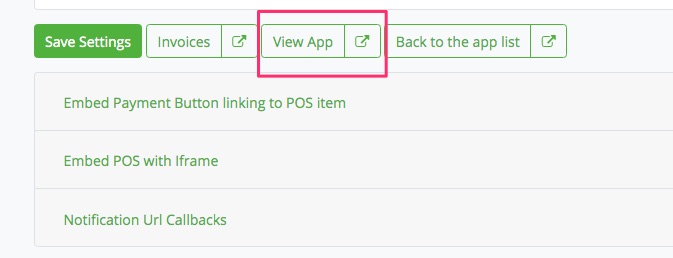
Next to it we find the View App button.
If we click on it, the Internet address for our page opens, in which the amount in euros that the end customer is to pay should be entered.
Now you can accept Bitcoin in the store
In order for you to accept Bitcoin in the store, you just need to store the web address. In our case, the Internet address is:
https://btcpay.coincharge.io/apps/3CFf53JwgRYUWVfpEopqxFsz2TeN/pos
This is also the address that employees can bookmark in your browser. This address will be called whenever a customer wants to pay with Bitcoin and you will be able to accept Bitcoin in the store.
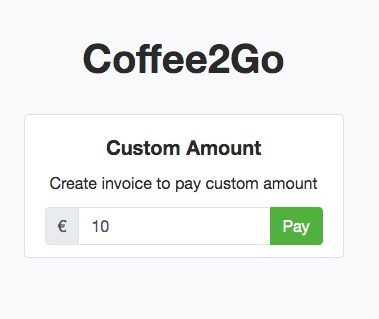
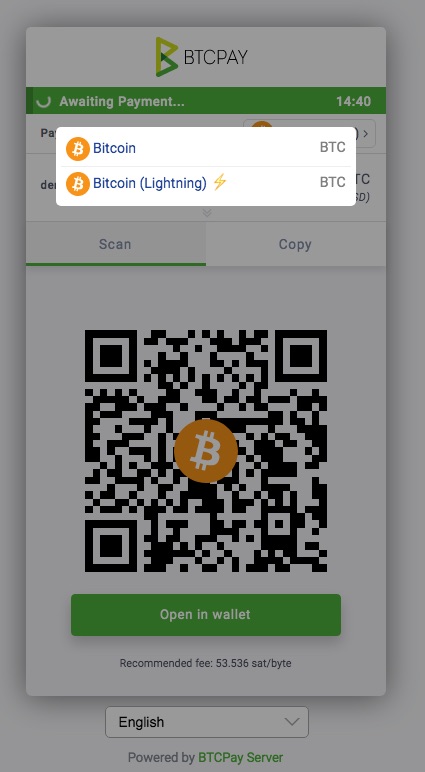
Once the amount has been entered, you will be taken to the payment page with the QR code. The default layout will look like the one on the left.
However, the Bitcoin payment page can also be customized and have the look and feel of the store.
You can find out how to change the design of this payment page on the “Customize Bitcoin payment page” page.
Now you can accept Bitcoin in-store using the BTCPay point-of-sale app.
Be it in a retail store, in a restaurant or the handyman services. Whenever the buyer and seller face each other in person, the Bitcoin payment can be made.
In the BTCPay point-of-sale app, we explained how to pay by entering an amount.
For example, if you want to store your menu or your services, the Point-of-Sale Terminal with Product Catalog application is an interesting alternative.
You can find the corresponding instructions at: Bitcoin Point-of-Sale Terminal with Product Catalog



Leave a Reply
Your email is safe with us.