Set up BTCPay Server
Run your own BTCPay server
This chapter is about how to set up and administer your own BTCPay server.
This chapter is helpful if you run your own BTCPay server.
If you are a co-user of a BTCPay server, these options will not be displayed.
As a co-user of a BTCPay server, the BTCPay Store section is relevant and you can skip this chapter.
If you run your own BTCPay server and are logged in as an administrator, you will learn here how to set up the BTCPay server, make the relevant settings and administer it.
Set up BTCPay server
This chapter deals with the setup and administration of an already installed BTCPay server.
If you don’t have a BTCPay server yet, read the BTCPay Server Hosting post first to learn how to set up a BTCPay server.
If you have set up a BTCPay server, this chapter will tell you how to set up and administer a BTCPay server.
Set up BTCPay Server
Once the BTCPay server is set up, you can register yourself with a username (email address) and password. The very first person to register on a newly set up BTCPay server is automatically created as an administrator.
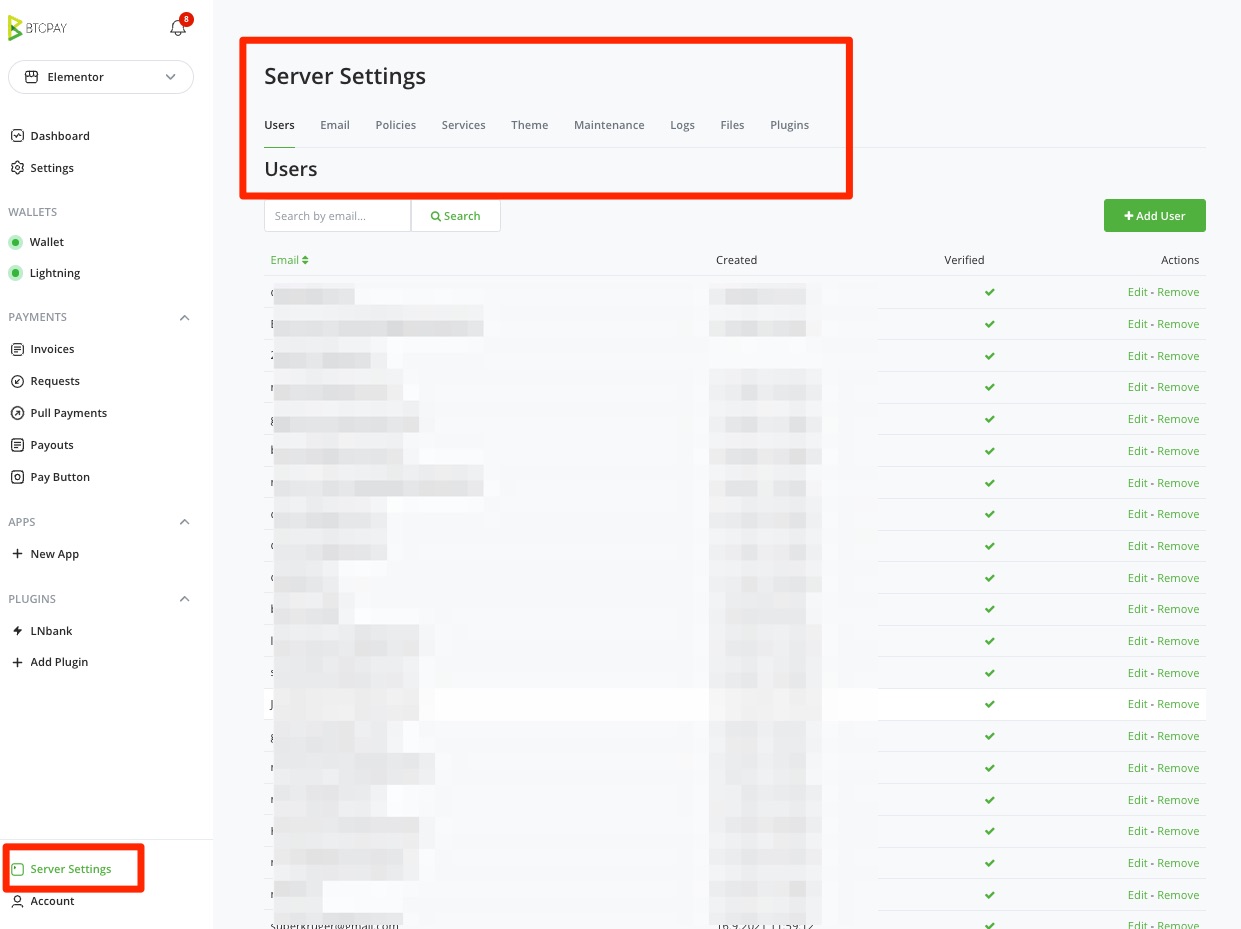
As an administrator, the Server Settings settings are also displayed.
The menu item is displayed in the lower left corner above Account. This menu item does not appear if you are logged in with a normal user account, i.e. if you do not have admin rights.
If you have the necessary admin rights, the corresponding submenu items will appear under Server Settings, which we will go through in detail here.
After you have clicked on Server Settings, you will get to the User Administration:
BTCPay Server Users
In the user administration all users logged on to the server are administered.
A distinction is made between the normal users, who are assigned to the respective BTCPay store, and admin users, who can administer the server settings.
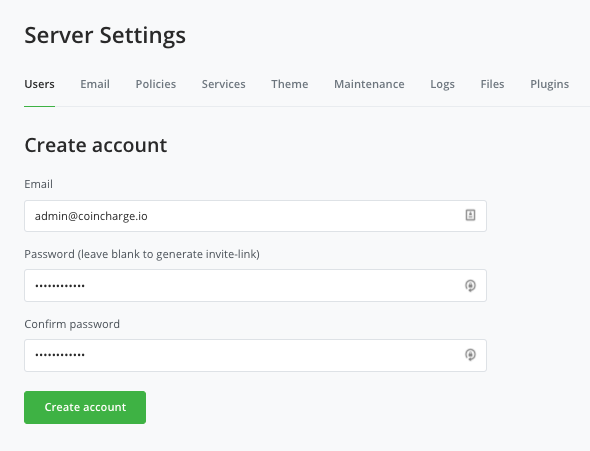
You can create additional users via Add User.
After the user is created, it is a normal standard user.
Admin rights can be assigned to the user via the Edit function.
As an admin, it is not possible to view or administer the stores of other users.
You can only administer the stores that you have created yourself.
If a store owner wants to allow another user to access his store, this user must be created on the server. After that, it can be assigned to its own store by the BTCPay store operator.
Policies
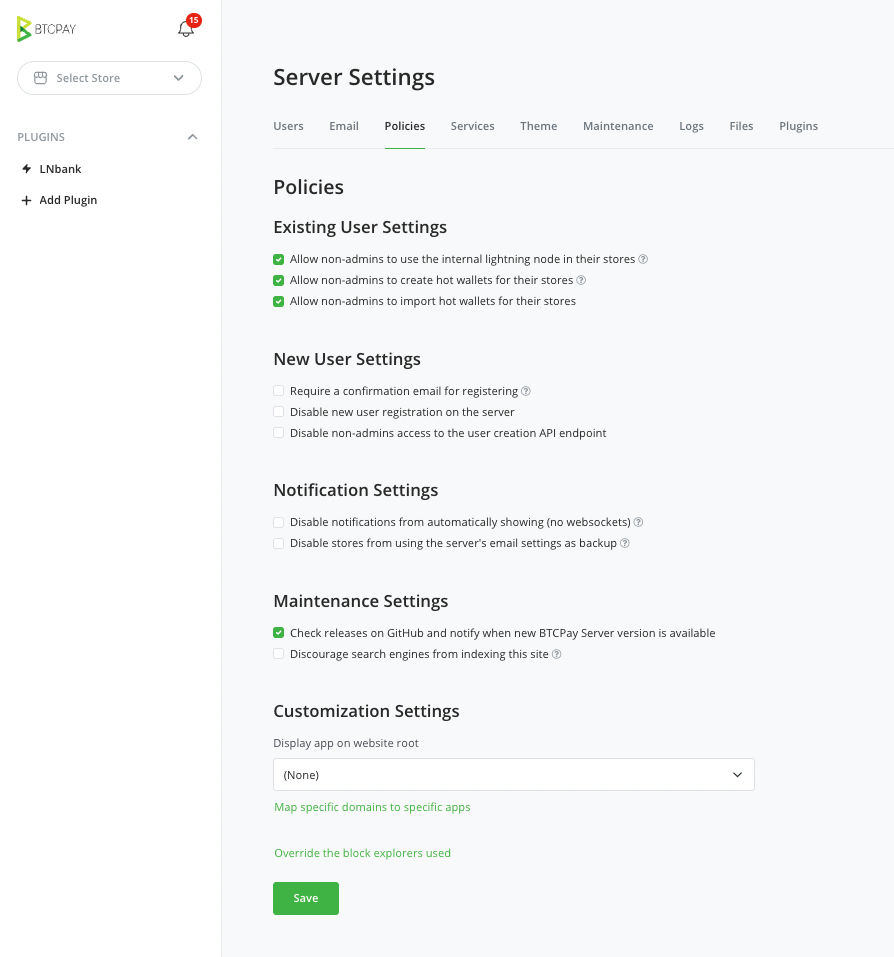
The BTCPay server can be used for third parties as well. At this point, the settings are made as to what these third parties are allowed to use on the BTCPay server.
In the Existing User Settings section, the first query is whether normal users are allowed to create their own BTCPay stores and what rights are granted to the operators of these BTCPay stores.
Are these BTCPay stores allowed to share the central Lightning Node? All Lightning sales from the BTCPay store are then credited to the central Lightning node.
May an internal hot wallet be created for a BTCPay store? If this is not allowed, the xPub key of an external hardware wallet must be used.
The New User Settings define how new users are allowed to register. Is it necessary to verify the email with which a new user registers?
Is the registration of new users allowed at all. Are users who do not have admin rights allowed to create API endpoint.
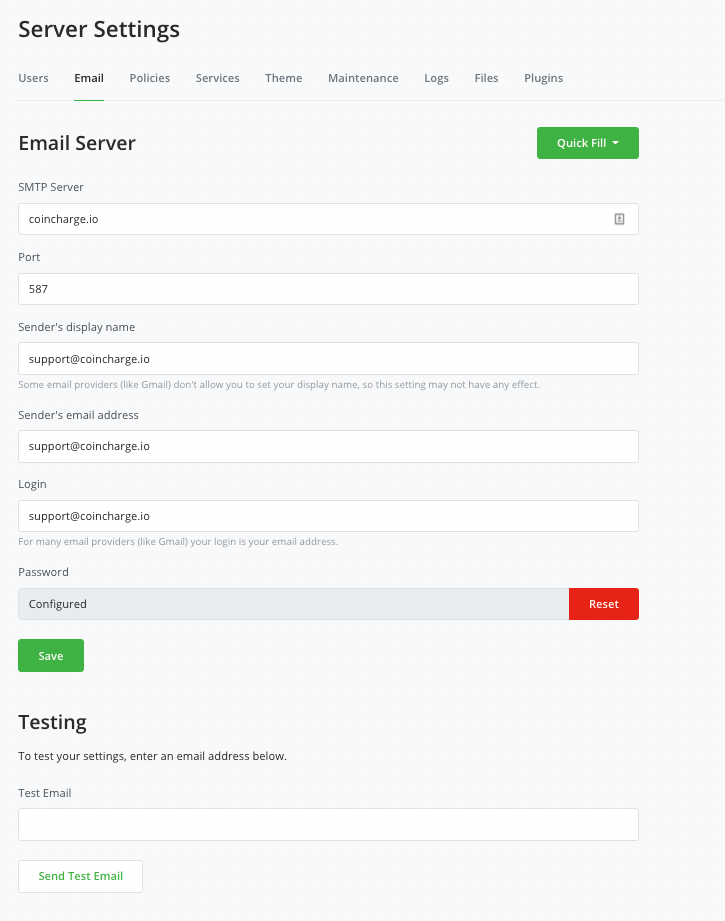
In the Notification Settings you can define if notifications should be displayed and if the users of a BTCPay Store are allowed to share the sending of emails via the email server.
By default, registering from the home page is disabled. As an admin, new users can then be created manually via the User setting. If you deactivate the button, new users can log in directly.
This makes sense if you want to make the multi-shop function available to other store operators. If these new users are to verify the email address, “Requires a confirmation mail for registering” must be set.
If search engines are to be prevented from indexing the page, “Discourage search engines from indexing this site” must be activated.
If you operate several online stores and want to offer the Lightning payment option to all of them, activate the function “Allow non-admins to use the internal lightning node in their stores”.
The Lightning payment option is reserved for the operator of the own server, as all Lightning payments go only to a Lightning wallet. If you operate several stores, the sales can be collected in one wallet. This makes no sense if the other stores have no economic connection with the payment server operator. This makes no sense if the other stores have no economic connection with the payment server operator.
The same applies to the item “Allow non-admins to create hot wallets for their stores”. Normal users are referred to as non-admins. If you want to allow the operators of your own store to send the Bitcoin sales to your own wallet, this item is activated.
Services – Crypto Services
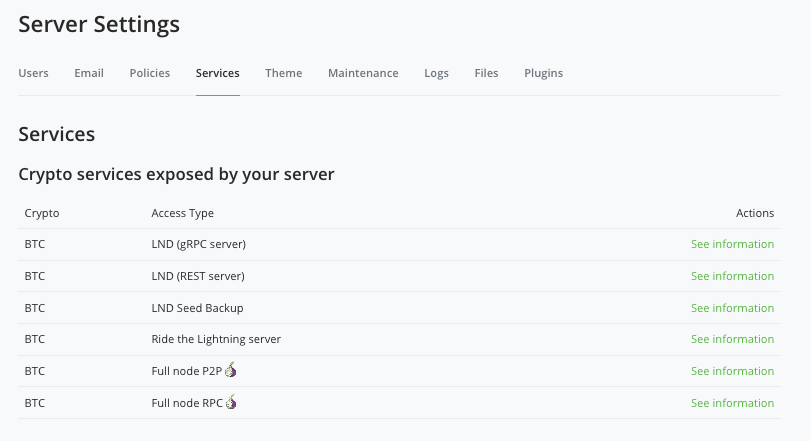
This section is about the settings for using the Lightning Node.
When installing the BTCPay server, there was an option to choose the Lightning variant from the provider LND or C-Lightning.
Those who have chosen the LND variant will then be presented with this view:
If you use a Non-Custodial Lightning Wallet, then you can connect this Lightning Wallet to your own Lightning Node.
You can use a Lightning Wallet on your smartphone, which interacts in the background with the Lightning Node on the BTCPay server.
You can connect the Lightning Wallets from ZAP (gRPC) , Joule and Zeus (REST) to the Lightning Node.
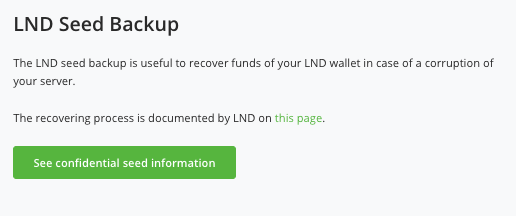
With LND Seed Backup you can backup your seed from your Lightning Server.
The 24 seed words and the password should be written down in a safe place. If the server is no longer available, you have access to the credit on the LND Lightning Node.
This is about the credit on the Lightning Node. The on-chain Bitcoin balance is managed through the individual BTCPay stores.
The Lightning credit of all BTCPay stores of a BTCPay server is managed together on the Lightning Node.
To be able to administer the Lightning Node, Ride the Lightning is available.
One can access RTL via the web browser or via QR code.
Detailed instructions on how to administer the Lightning Node using Ride the Lightning can be found at: Instructions for Ride the Lightning
Theme
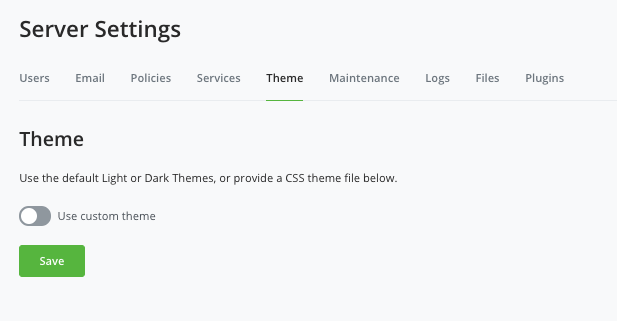
In the Theme chapter you can customize the look of the BTCPay server.
At this point we are talking about the appearance of the server, the login page and the backend.
The visual appearance of the stores or the payment page is made in the respective settings of the BTCPay Store under Store Settings – Checkout Appearance.
Maintenance
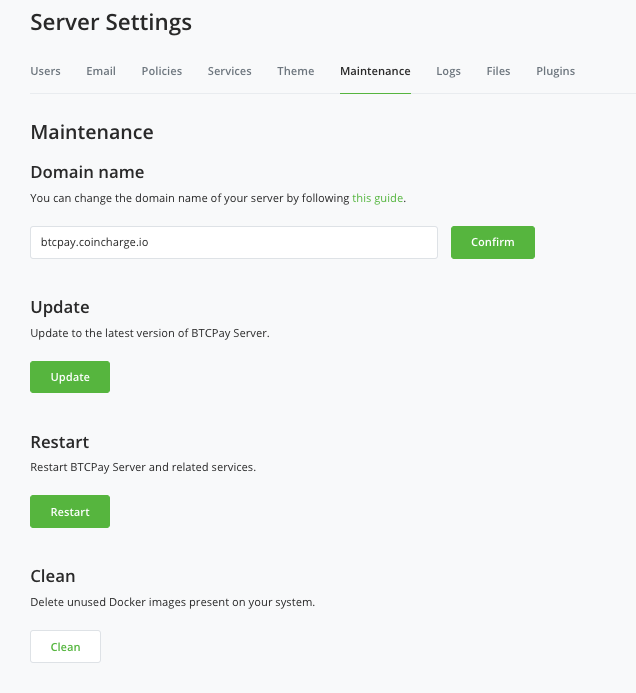
In the Maintenance section you can change the url of the BTCPay server, update it if new versions of BTCPay server are available or restart the server.
If you have set up your own BTCPay server, then this server is running at a hoster or on another computer.
If you want the BTCPay server to be on its own unique url instead of an IP address or the lunanode url, you can specify the domain at this point.
In DNS management, you then create an A record and enter the name of the subdomain.
This sub-domain can be for example: btcpay.your-domain.com
After you have created this sub-domain with the corresponding IP address at your domain provider, you deposit this sub-domain at this location.
In the future you will be able to access the BTCPay server directly by calling this sub-domain.
Logs
The log file of the server is located here and documents the activities on the server.
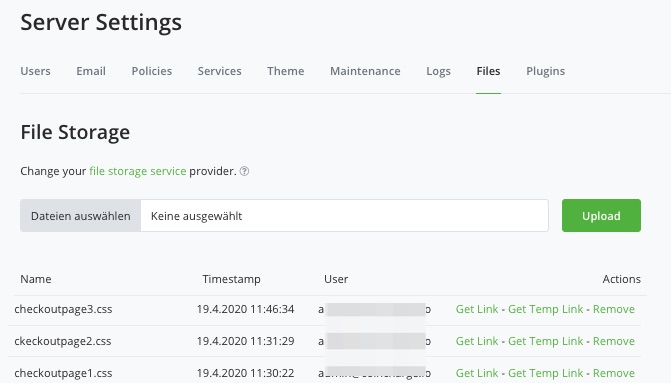
Files
In the Files area, you can store additional data that is needed to use the server. This can be logos or images for the visual appearance of the server and stores.
In our case, the different CSS files for the different payment pages are located here. If you want to create an individual payment page for your BTCPay store, you can save the CSS file here.
After you have familiarized yourself with the settings of the BTCPay server, you can start creating a BTCPay store.
How to create a BTCPay store on a BTCPay server, you will learn in the tutorial: Create, set up and administer BTCPay store.





Leave a Reply
Your email is safe with us.