Accept Bitcoin with Shopware
Accept Lightning and Bitcoin payments in a Shopware online store. In this article, we explain how you can accept Lightning and Bitcoin payments in a Shopware online store. We present the Bitcoin payment providers that provide a Shopware Bitcoin plugin.
Integrating Bitcoin and Lightning payments into Shopware
Coincharge integrates Bitcoin payments into your Shopware webshop so that your customers can pay with Bitcoin and Lightning. If you want to keep the Bitcoins, using a BTCPay server is the first choice. You can either run your own BTCPay server, share Coincharge’s BTCPay server, or use Coinsnap. If you prefer to receive the purchase amount in your bank account in euros instead of Bitcoin, you can use Bitcoin payment providers such as Opennode or Coingate. No matter which provider you choose, we at Coincharge can take care of the integration into your Shopware store for you.
This is how you can commission Coincharge to integrate Bitcoin and Lightning into your Shopware store: https://coincharge.io/produkt/bitcoin-und-lightning-zahlung-fuer-shopware/
The Bitcoin Shopware plugin from Coincharge
We at Coincharge have developed a Bitcoin Shopware plugin that allows you to accept Bitcoin and Lightning payments. With the help of this Bitcoin Shopware plugin, you can connect your Shopware store to various Bitcoin payment providers and process Bitcoin and Lightning payments through them. With the Bitcoin Shopware plugin you can connect your Shopware store with the following Bitcoin payment providers:
- your own BTCPay server
- use the BTCPay server from Coincharge
- Coinsnap
- Further Bitcoin payment processors on request
Pay with Bitcoin in Shopware Shop
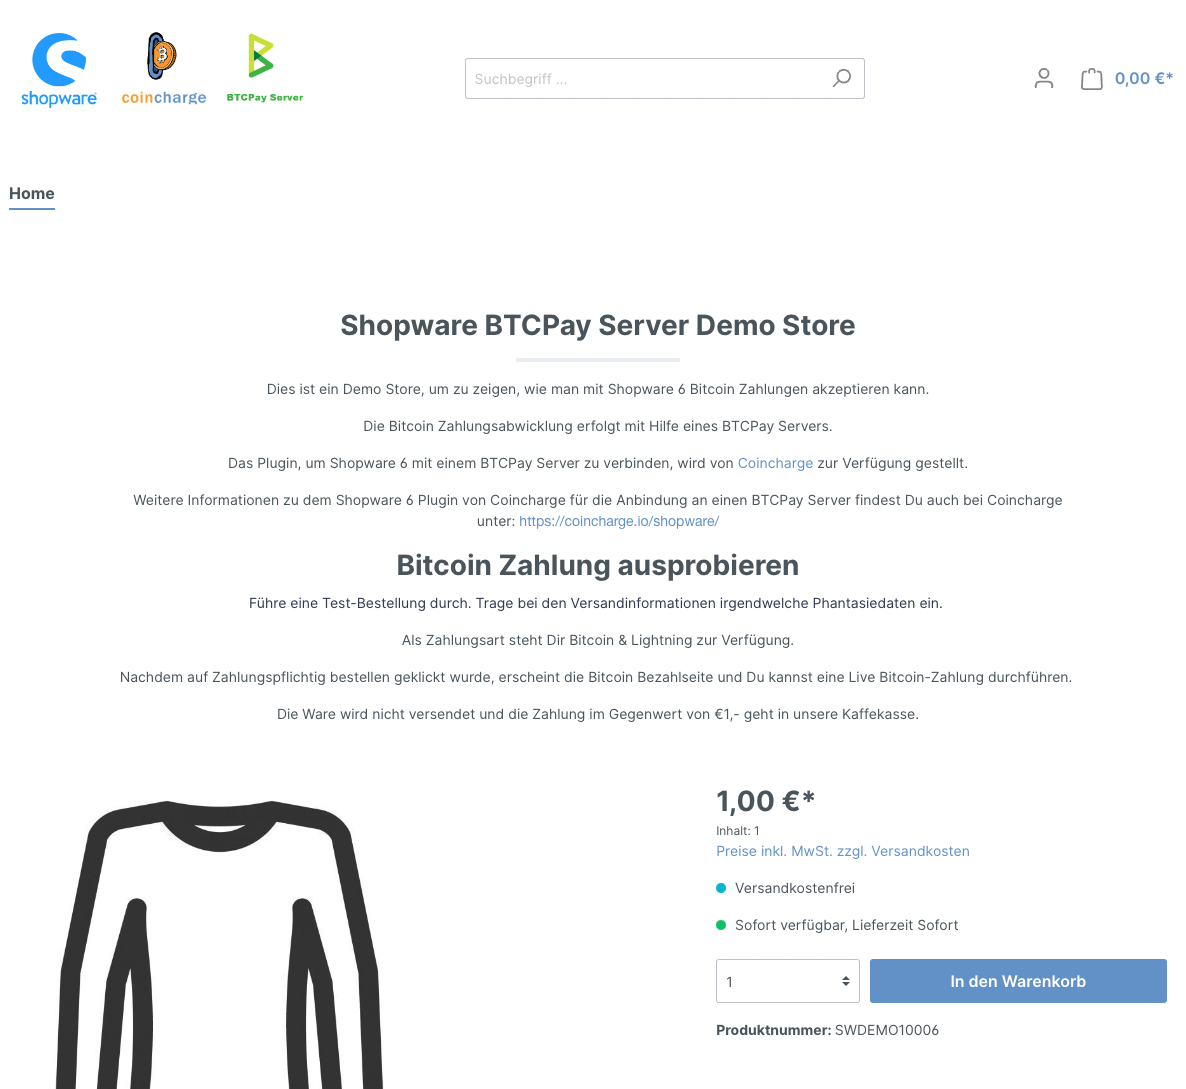
To get an idea of how payment with Bitcoin and Lightning can look like in a Shopware store, we have set up a demo store at the address: https://shopware.coincharge.io/.
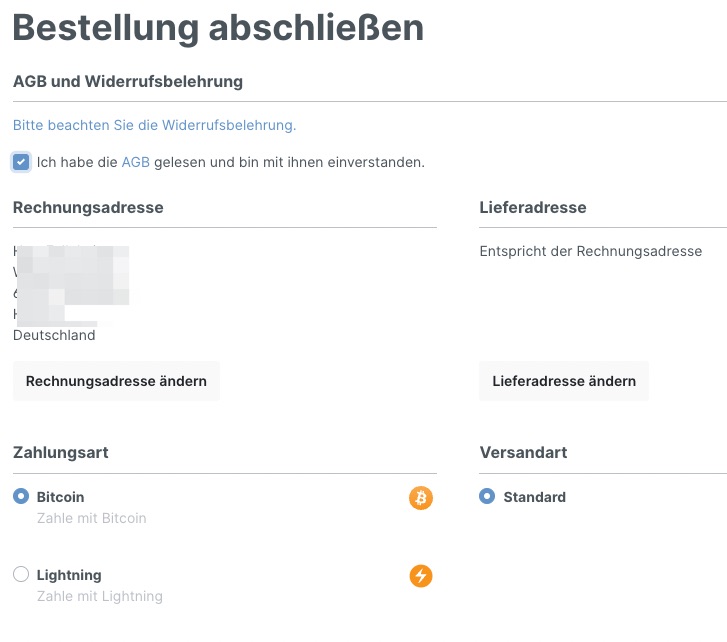
When the order is completed, you will be shown Bitcoin and Lightning as payment methods.
Select your desired payment method and click on “Order with obligation to pay”.
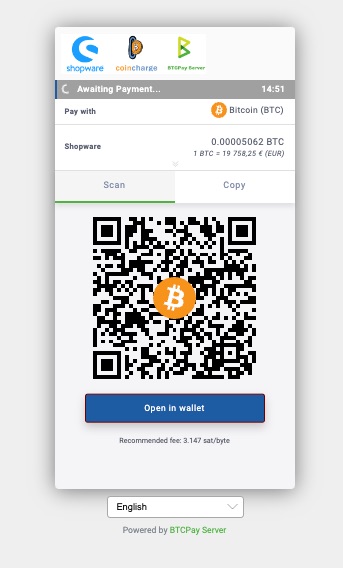
The payment page will open and a QR code will be displayed. Scan this QR code and make the Bitcoin or Lightning payment.
The goods will not be shipped and the payments received will go as a donation to our coffee fund. Thanks for that 😉
Try the demo store including a real Bitcoin payment to get a feel of how a Bitcoin payment works with Shopware.
Test the payment with Bitcoin in our Bitcoin Shopware Demo Store.
Go to Bitcoin Shopware StoreAccept Bitcoin with Shopware & BTCPay Server
In order for the Shopware webshop to interact with the BTCPay server, a Shopware extension is required.
There are now Shopware extensions to the BTCPay server for Shopware 5 and Shopware 6.
Shopware 5 with the BTCPay Server
If you run your online store under Shopware 5, you can find the extension on Github at: https://github.com/lampsolutions/LampSBtcPayShopware
Shopware 6 for BTCPay Server and Coinsnap
We at Coincharge, have developed an extension for Shopware 6.
The Shopware extension is available as a free version for self-managed Shopware stores.
CoinchargeBTCPayShopware at Github
You can find the Bitcoin Shopware extension on Github at:
CoinchargeBTCPayShopware at Shopware
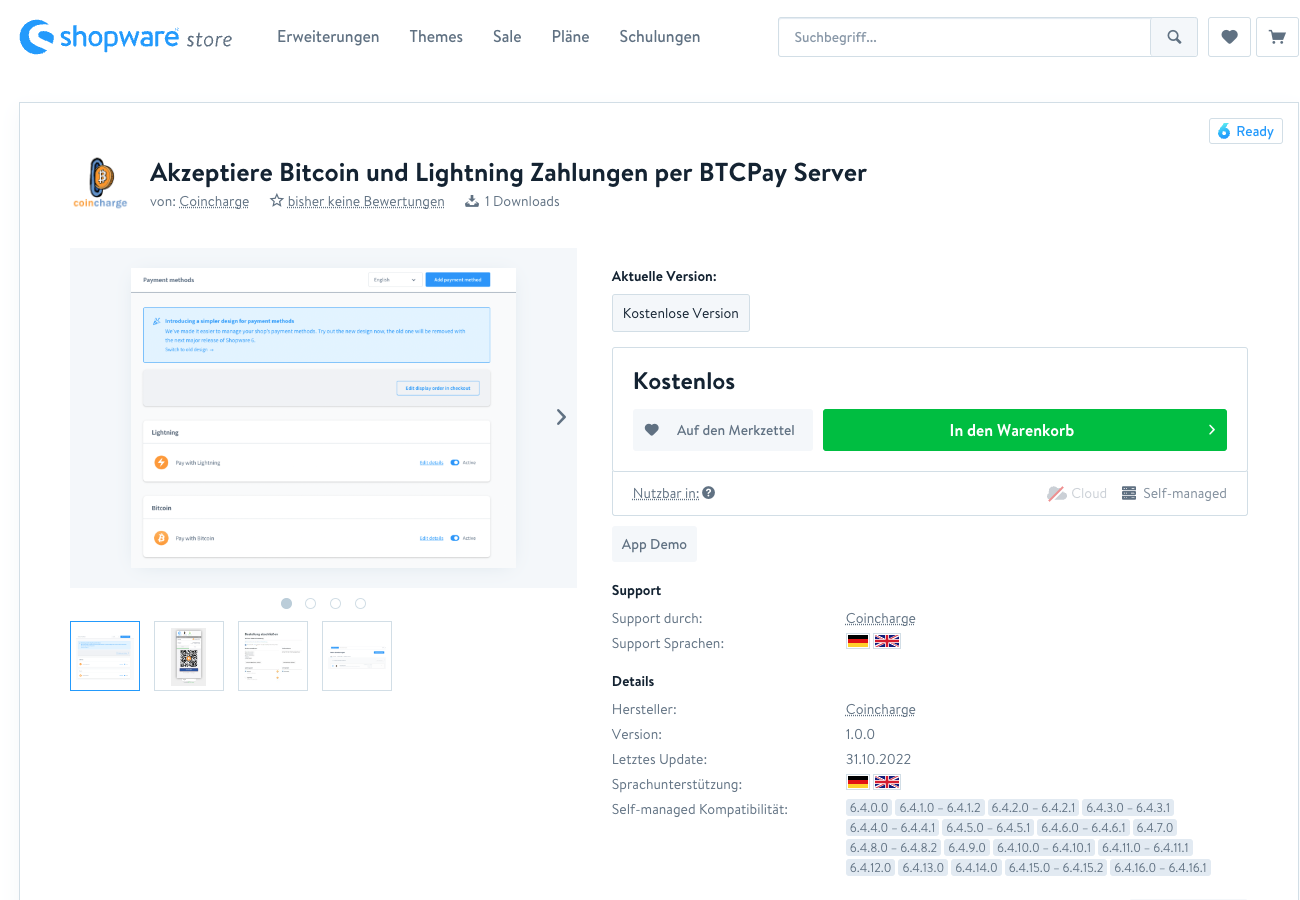
You can also find the Bitcoin extension in the Shopware Store under the link: https://store.shopware.com/coinc71249255720f/coinchargebtcpayshopware.html
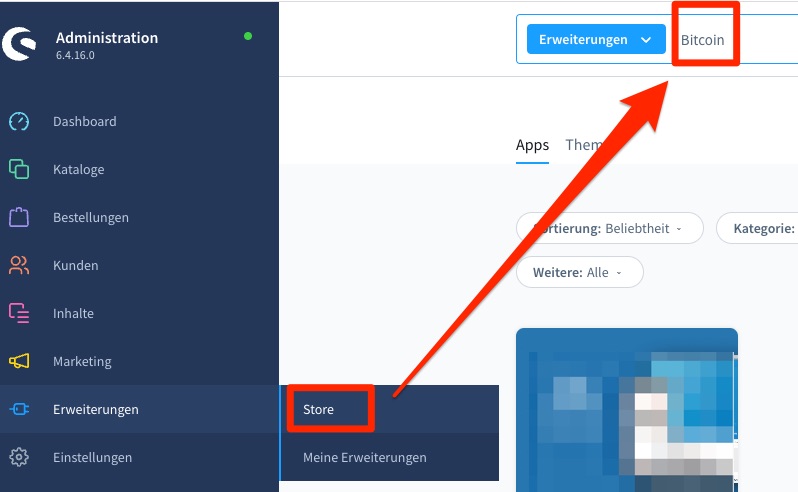
Or you can use the search on the Shopware page under extension and search for Bitcoin, Coincharge or BTCPay Server.
Then you can install the Shopware 6 Bitcoin extension for the BTCPay server directly.
You can also order the Shopware Bitcoin extension for the BTCPay server and Coinsnap including support.
The extension will then be integrated into your online store, connected to your BTCPay server or Coinsnap account and you will receive updates and support for one year.
Order Coincharge with the Shopware integration including support: https://coincharge.io/produkt/bitcoin-und-lightning-zahlung-fuer-shopware/
Install Shopware extension for BTCPay server by yourself
How to install the Bitcoin Shopware extension, set it up and connect it to a BTCPay server, we explain here or as a video in German language on our YouTube channel.
You can search for the BTCPay Server Shopware extension via the Shopware backend in the Extensions section. If you search for Bitcoin or BTCPay here, you will see the BTCPay extension of Coincharge.
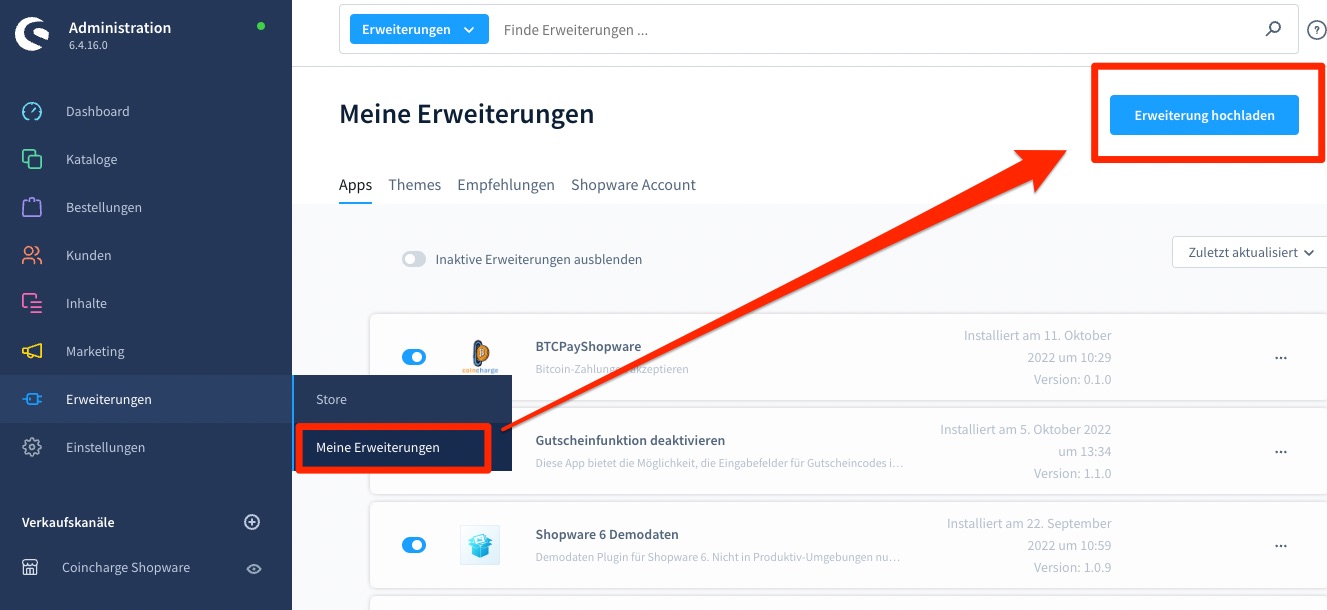
Another option is via the “My Extensions” menu item. Here you can upload extensions.
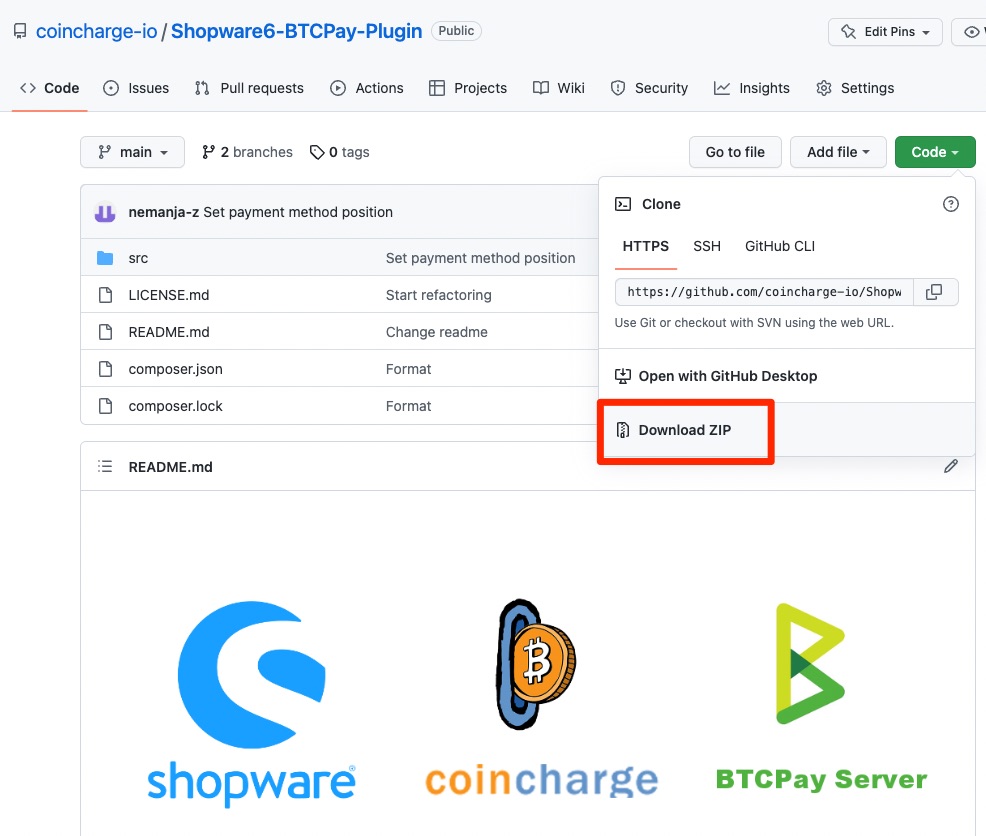
On Github, the BTCPay extensions are made available for download via the page: https://github.com/coincharge-io/CoinchargeBTCPayShopware.
After you have downloaded the extension, you can then upload the extension to Shopware via My Extensions.
YouTube Video: How to set up the BTCPay extension in Shopware.
About the article, “How to set up Bitcoin payment with the BTCPay extension in Shopware” there is an explanatory video from Coincharge on the YouTube channel of Coincharge in German language.
Download Shopware extension for BTCPay Server and Coinsnap from Github.
On Github page: https://github.com/coincharge-io/CoinchargeBTCPayShopware you can download the BTCpay Shopware extension.
Install the Bitcoin Shopware extension via the Shopware Store.
You can also install the Bitcoin Shopware extension via the Shopware Store.
In the search field, enter Bitcoin or BTCPay or Coincharge as the search term.
You will then see a list of all extensions from the providers that enable payment processing for Bitcoin.
There you will also find the Bitcoin Shopware extension from Coincharge.
You can then install and configure the extension directly from the Shopware Store.
Shopware Bitcoin payment processor
The Shopware plugin for Bitcoin payments from Coincharge has a connection to various Bitcoin payment providers. You can process Bitcoin payments through Coinsnap or through a BTCPay server. You can operate your own BTCPay server or use the BTCPay server from Coincharge. We present the Coinsnap and BTCPay Server options in more detail:
Shopware for Coinsnap
An account with Coinsnap is required to process Bitcoin payments via Coinsnap. To be able to use Coinsnap, you only need a Lightning address, which is provided by your Lightning wallet. This Lightning address is deposited with Coinsnap and you can receive Bitcoin and Lightning payments from your customers without having to operate your own technical infrastructure. Your customers’ Bitcoin and Lightning payments are credited directly to your Lightning Wallet.
Shopware for BTCPay Server
A BTCPay store is required for Bitcoin payment processing. If you run your own BTCPay server, you can create a separate BTCPay store for your Shopware store on it.
If you don’t run your own BTCPay store, you can share Coincharge’s BTCPay server.
If you want to create a BTCPay store on Coincharge’s BTCPay server, you can find the helpful information at: Coincharge BTCPay Store
How to set up and administer a BTCPay Store can be found on the page: Create BTCPay Store
You can also have Coincharge install and set up your own BTCPay server with the hoster.
This also includes the creation of a BTCPay store on this BTCPay server to be used for Bitcoin payment processing by your Shopware stores.
Further information about the product: BTCPay Server setup and setup
BTCPayShopware Extension Setup
After a BTCPay store has been created, we can start connecting Shopware to this BTCPay store.
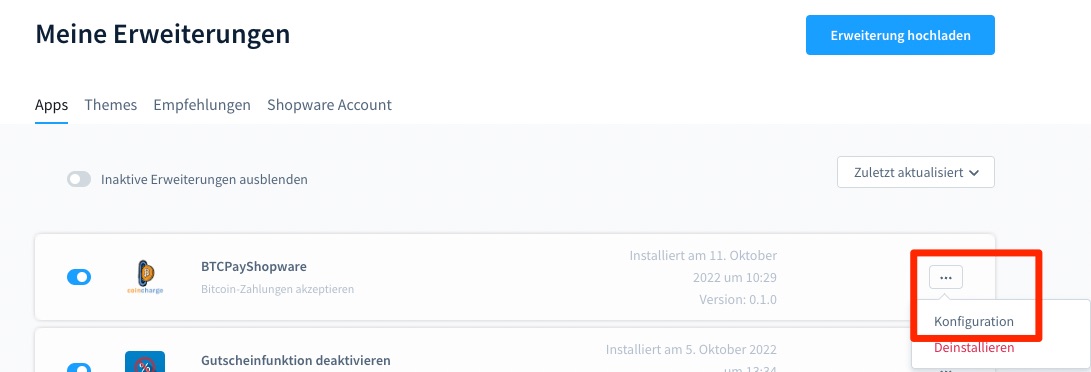
In the “My Extensions” section we can find the BTCPayShopware extension. We click on the three dots on the right and can start the configuration.
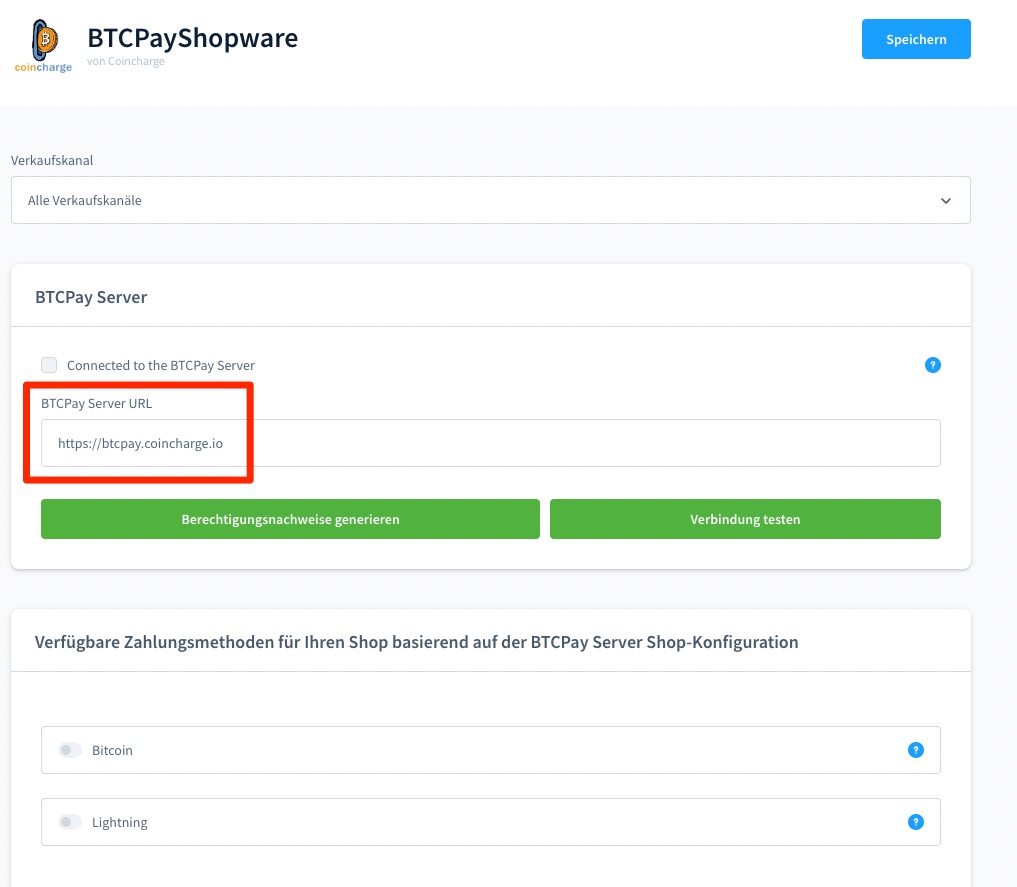
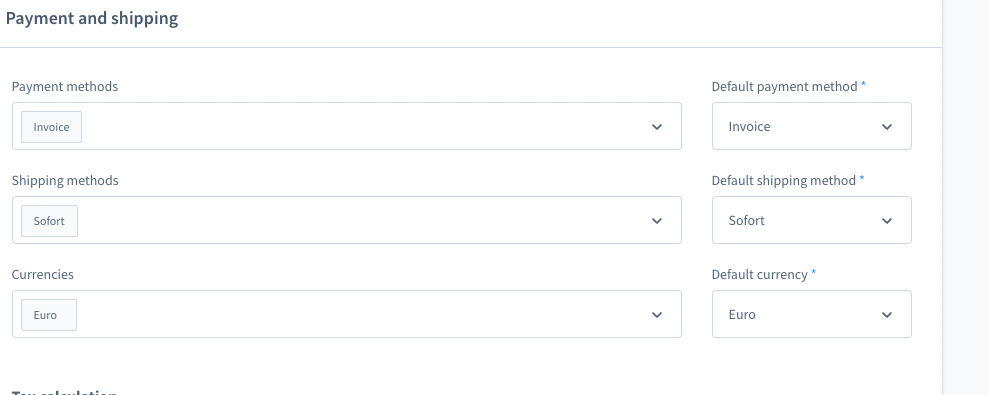
In the Sales Channel section, you set the sales channels for which the Bitcoin payment should be used.
In our example we have enabled it for all sales channels.
In the field “BTCPay Server URL” we enter the url of our BTCPay server. If we share Coincharge’s BTCpay server, then it would be the address shown.
If you use your own BTCPay server (which we recommend), then accordingly the URL of your own BTCPay server.
After that we click on “Generate credentials” and we will be automatically redirected to the login area of our BTCPay server.
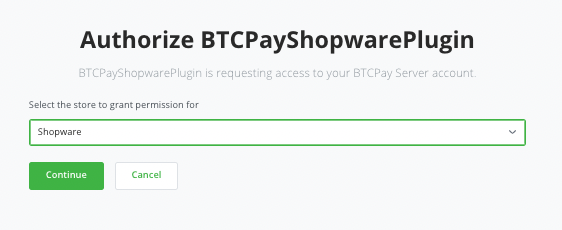
Once we have logged in with our account, we are automatically taken to the area where we can select our BTCPay Store.
We have given our BTCPay Store the name Shopware and select this BTCPay Store accordingly.
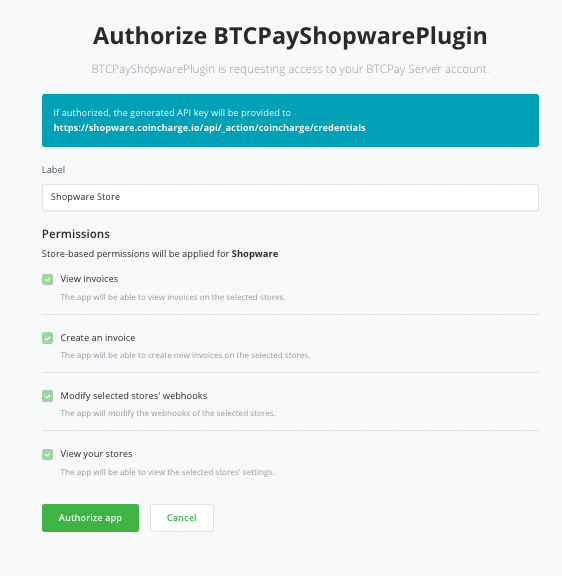
We grant the four authorizations that the BTCPay Shopware extension needs to be able to communicate between Shopware and BTCPay.
The checkboxes must be set everywhere and then we can click on Authorize App.
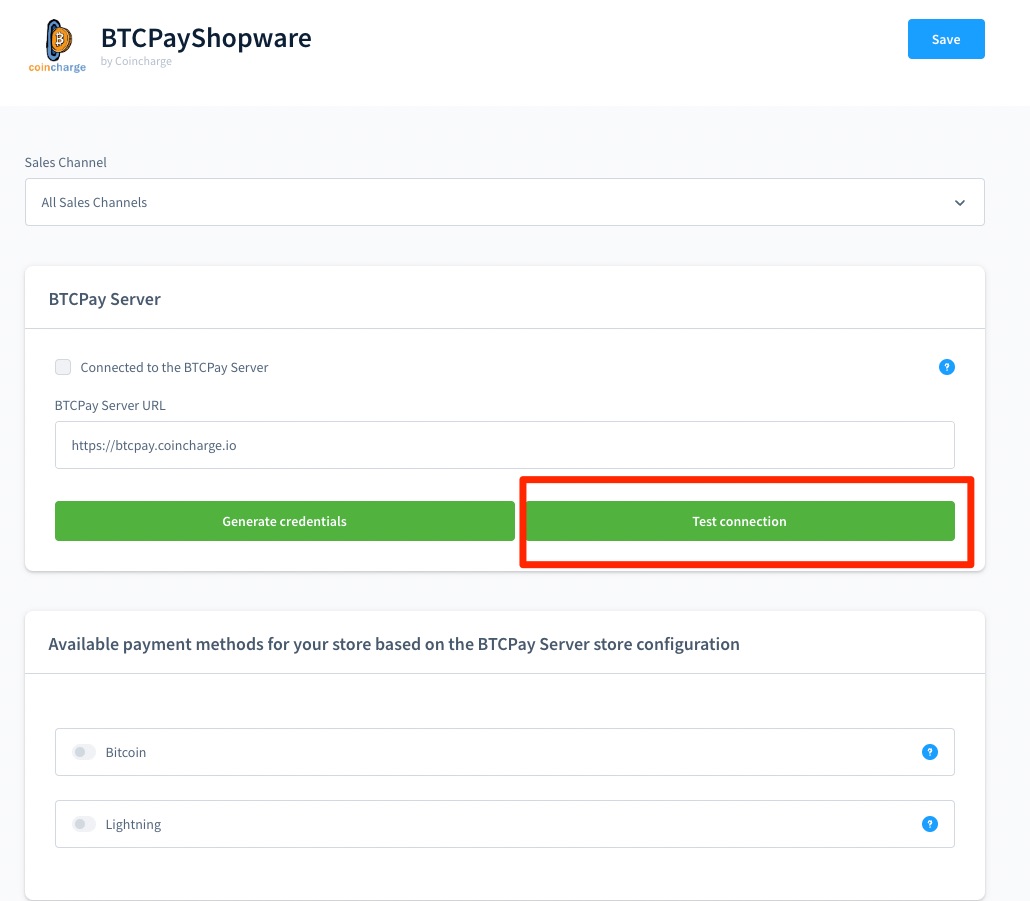
We will then return to the overview page. In order for us to see a change, we must click on “Test Connection“
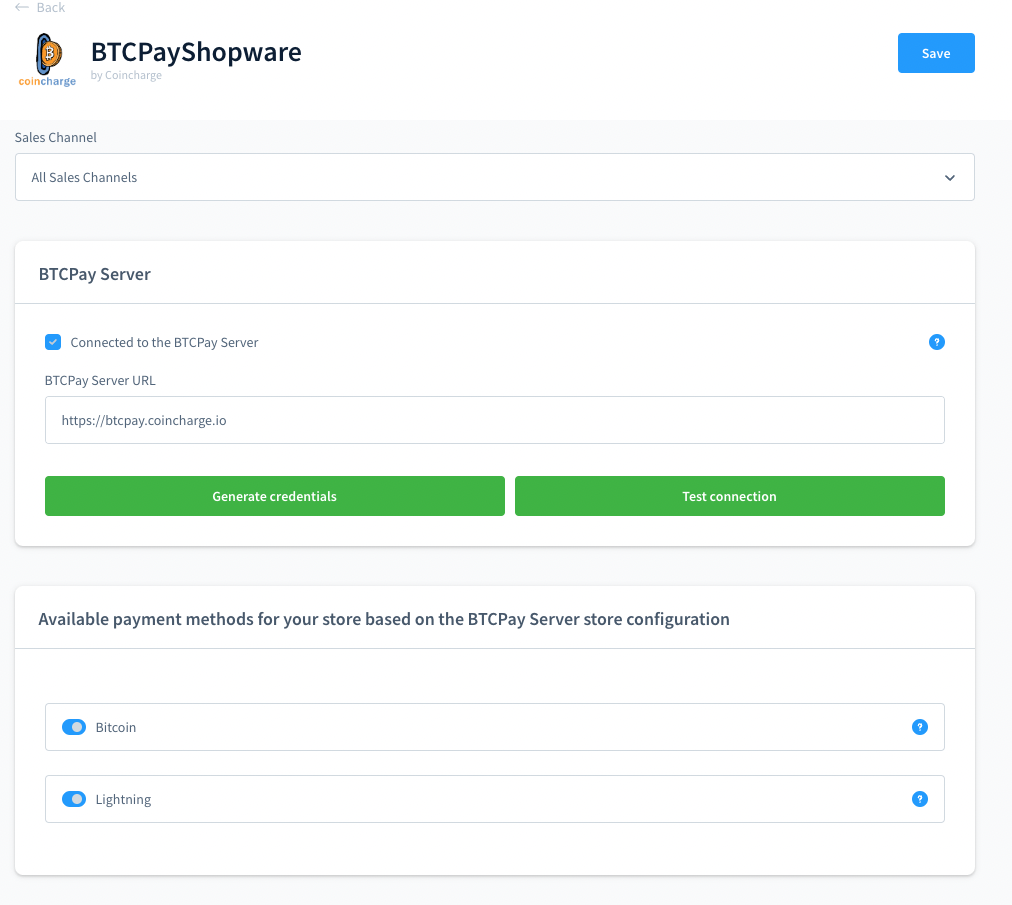
If you can see the blue check mark in front of the phrase “Connected to the BTCPay Server”, then the connection has been successfully established.
Further down we also see the checkmarks in front of the Bitcoin or Lightning payment methods.
This requires that the BTCPay Store also has these two payment methods set up and enabled. If you have only activated one of the two payment methods in the BTCPay Store, then only this payment method will be displayed here.
If you want to make changes later such as activate another payment method, then change it accordingly in the BTCPay Store and click Generate Credentials again. Then the old connection is deleted and replaced by the new one.
Shopware payment methods settings
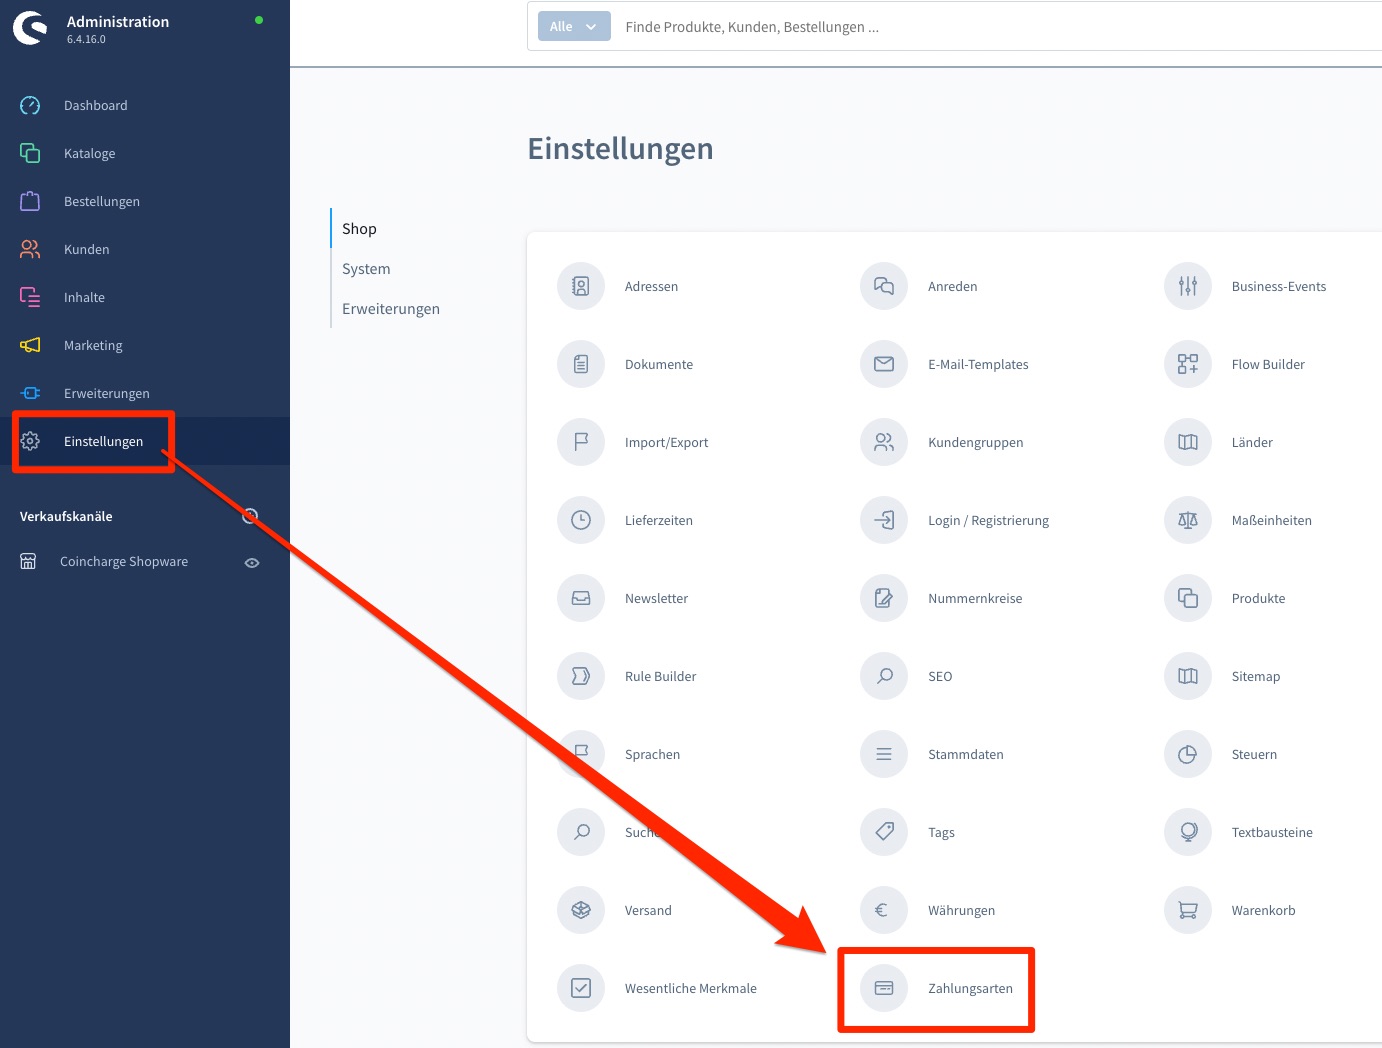
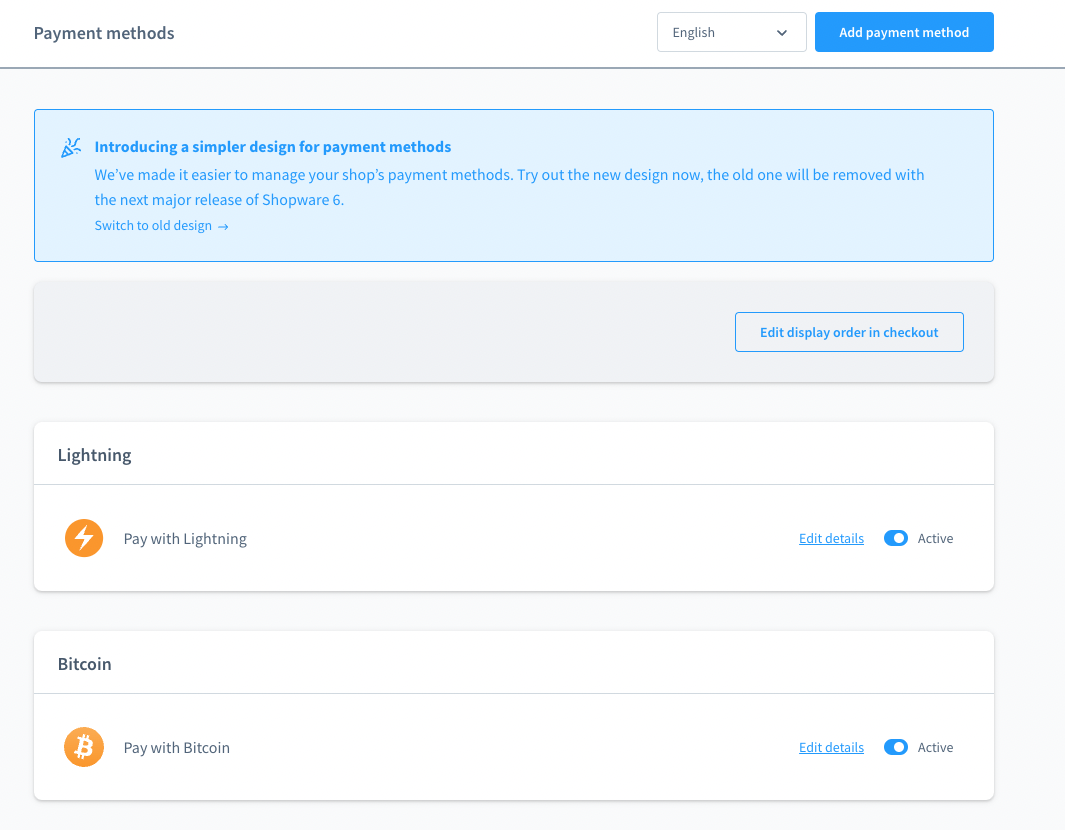
In the Settings section, under Payment types, the text for the payment type notes can be changed.
In addition to the general payment methods, we also find the Bitcoin and Lightning payment methods there.
The activated payment methods are marked in blue.
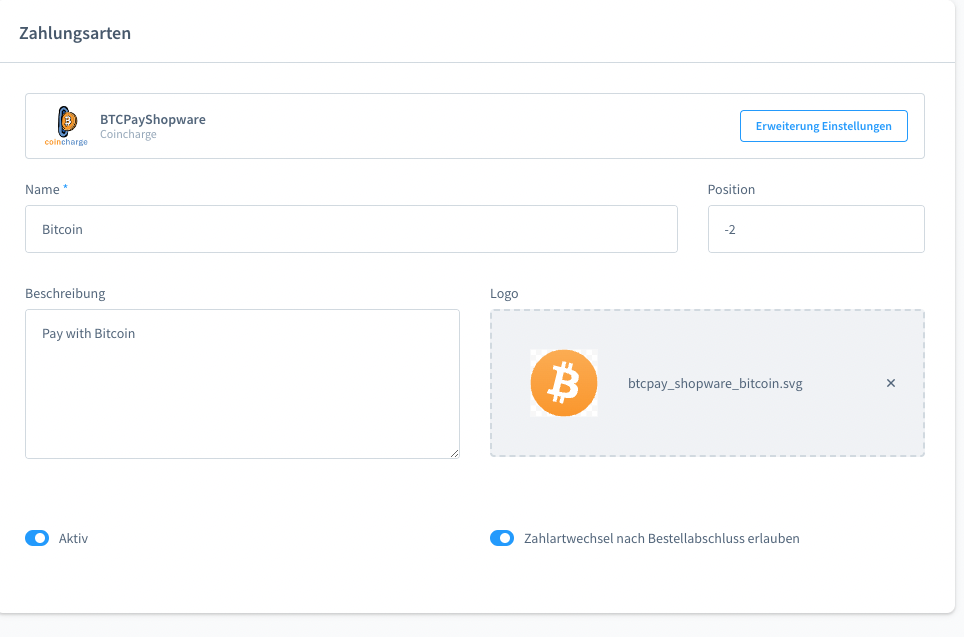
We can make individual settings via the Edit details item.
We can change the name that is displayed to the payer. In our example Bitcoin.
Then the position of the payment method in the listing of all available payment methods.
Then the description text and the logo for the payment method.
It is recommended to activate the option “Allow payment method change after order completion”. If a payer selects the payment method Bitcoin but then does not want to pay with Bitcoin, then there is the possibility to switch to another payment method.
Summary
With the Shopware extension from Coincharge, it is very easy to equip a Shopware 6 online store with the payment methods Bitcoin and Lightning. In addition to the Shopware extension, you need your own BTCPay server or you can use the BTCPay server from Coincharge or you can use the Bitcoin payment provider Coinsnap. If you don’t want to keep the bitcoins you earn, but would rather have them paid out to your bank account in euros, you can use the Bitcoin payment providers CoinGate and Opennode.
Accept Bitcoin in the Shopware store with Coincharge
Coincharge advises and implements Bitcoin and Lightning payments in your Shopware store. If you run an online store with Shopware and want to accept Bitcoin payments, Coincharge will help you with advice and technical implementation. We will select the right Bitcoin payment provider for you based on your individual requirements and integrate the appropriate Bitcoin payment module into your Shopware store. If you already know which Bitcoin payment provider you would like to work with, you can order the integration into your Shopware store here: Integration Bitcoin Payment in Shopware
If you are still unsure, then arrange a no-obligation consultation so that we can discuss all the options and find the right provider for you.

