Sell digital products with Bitcoin and deliver them via email.

Sell digital products with Bitcoin and deliver them via email.
Do you want to sell digital products such as software keys, access rights, download links or files to be sent to the customer by email.
In this post, we’ll show you how you can create a store using the Point of Sale app. With the help of BTC Transmuter, after payment the buyer receives the digital goods delivered via email in an automated way.
In the post “Email Notification on Receipt of a Bitcoin Payment” it was shown how to be notified by email as a merchant when a Bitcoin payment has been received on your Bitcoin wallet.
This service can be extended to email customers a download link, attachment or software key.
Any form of digital data can be sold via Lightning and Bitcoin and sent to customers via automated email after a successful payment.
Sale of a ticket
We show this function with the example of a ticket store, where a ticket is sold and the paid ticket is sent by email.
To try it yourself, you can go to the Demo Ticket Shop via this link and place an order yourself. Your payment will be processed successfully and you will receive a demo link to the event. This example is intended to illustrate how the purchase of a digital product can be made. We use the payment as a donation with us.
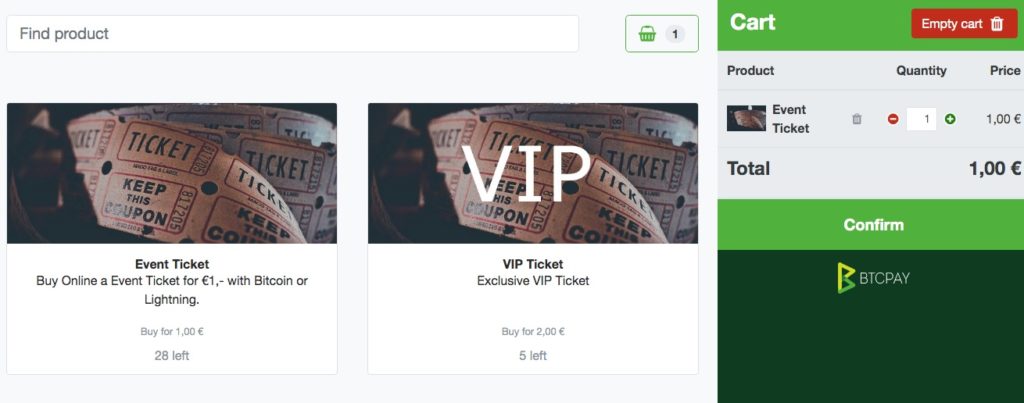
The following example is about the sale of a ticket, which is sent to the payer in digital form via email.
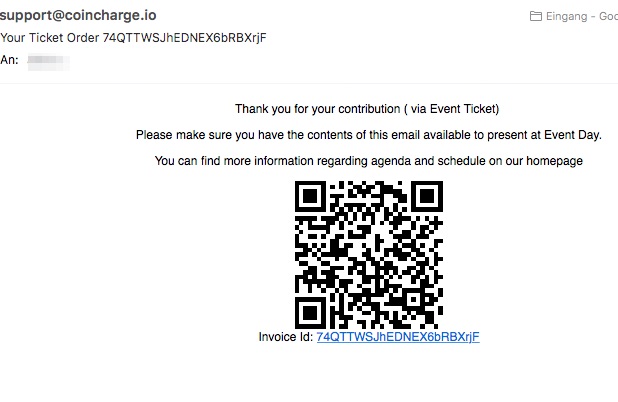
This email contains the confirmation of the successful payment in the form of a QR code. This QC code is shown at the entrance control during the event and thus proves that you have a valid ticket.
To implement a ticket sale system we need a BTCPay Shop, Point of Sale App, BTC Transmuter and QR Code Generator.
The project was implemented by Kukks for a meetup of BTCPay.
You can find the description at: https://github.com/btcpayserver/btcTransmuter/blob/master/docs/EmailReceiptsPreset.md
We have rebuilt it again to adapt it for further applications afterwards.
We go to the BTCPay server and create a store called Ticket Shop.
In the settings of the store (General Settings) we create an internal BTCPay wallet. How to create an internal BTCPay wallet you can read in the article: https://coincharge.io/btcpay-wallet/
You can also use an external wallet and store the corresponding Xpub key.
For a detailed description of how to set up and administer the store, see Administering BTCPay Shop.
When creating the store for the sale of digital products, it is necessary that we receive the email address of the customer. Therefore, under Checkout Experience, make sure that “Requires a refund email” is checked.
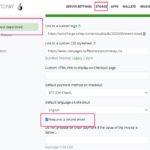
The buyer must necessarily specify his email address, otherwise we can not send to this address the email with the event ticket.
After we set up the store, we create a ticket app based on the point of sale app.
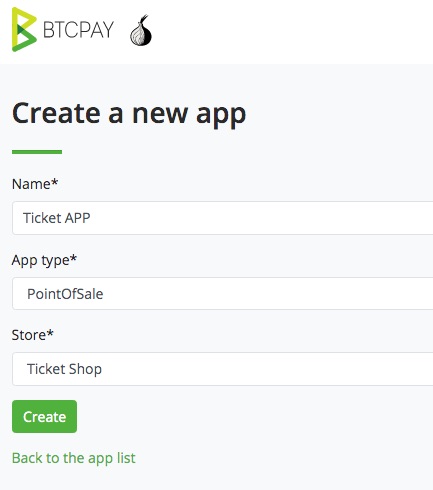
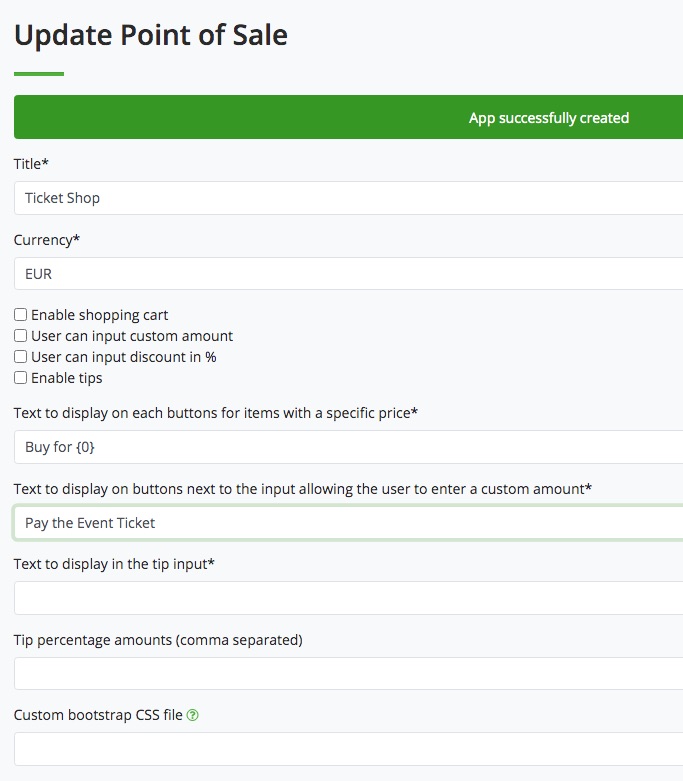
The Point of Sale app is preset for restaurants. We customize this app to sell a single product. In this case, a ticket.
We disable all the functions we don’t need and change the text on the button.
If we disable the “Enable shopping cart” function, then the customer can only buy one product at a time. So in this case also only one ticket. If the customer should be able to buy several tickets or for different categories, then the Shopping Cart function must be activated.
After that we add the product ticket:
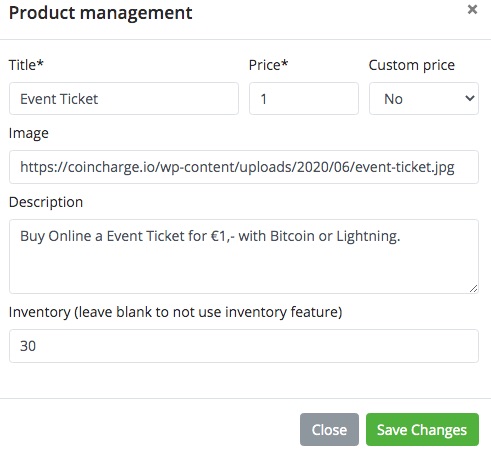
We have stored the product image on a web server and link to the image.
The stock (inventory) is set to a maximum of 30 tickets and the price is fixed.
The store can be reached via the url https://btcpay.coincharge.io/apps/CZ2gpX1Cb81D8f2L5YaDdh23oTE/pos
and looks like this as a one-product store, for example:
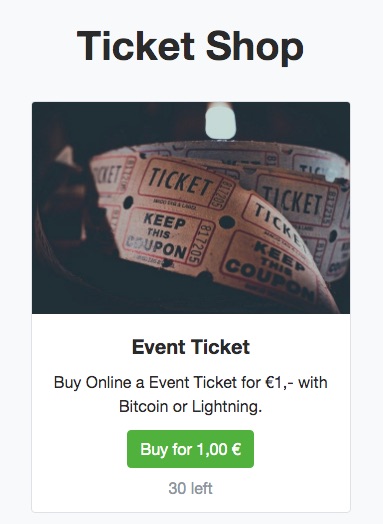
If the customer wants to buy the ticket, the first step is to ask for the email address:
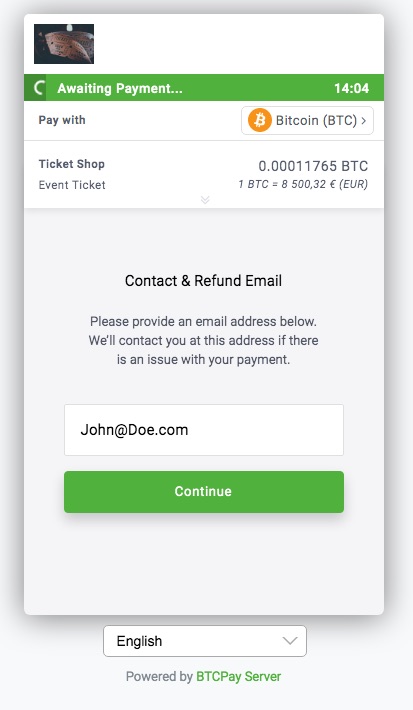
In the next step the payment window opens and you can pay by Bitcoin or Lightning.
Delivery of the event ticket
When the customer has successfully paid for the ticket, we as the organizer would like to be informed by email about the successful payment.
In addition, the customer should receive a digital ticket with which he can prove his payment on the day of the event.
With the help of BTC Transmuter we can be informed about the successful payment and the delivery of the digital ticket can be organized.
You need to have a store set up at BTCPay, such as our ticket store created above. Additionally an account at BTC Transmuter. How to extend your own BTCPay server with BTC Transmuter, you will learn in the article BTC Transmuter.
However, you can also create a Transmuter account for your BTCPay store at https://btcpay.coincharge.io/btctransmuter/and use the features.
Your BTCPay store can run on your own server or on another third party provider. So it is not mandatory that the store must be running at https://btcpay.coincharge.io.
BTC Transmuter Presets
If you have logged in to BTC Transmuter, you will find a pre-selection of different templates under the Presets menu item. One of the templates is BTCPay Email Receipts.

When we select this template (Preset), in the first step we need to specify for which store (Choose your BTCPay store) we want to use Transmuter and through which email address we want to send the order (Choose your email sending service).
If you are using Transmuter for the first time, you can use the displayed link to set up these two External Services. How this works in detail, you will learn in the article: Email notification on receipt of a Bitcoin payment.
If you have already created another store, you will see an overview of the stores that are already available. If you want to create another store, you have to do this beforehand via the menu item External Services.
There we click on Create New.
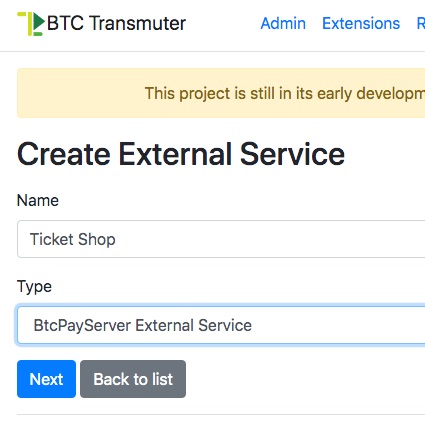
Then we need to connect Transmuter to our store on the corresponding BTCPay server (pairing).
We enter the url of the BTCPay server in the BTCPay Host Url field.
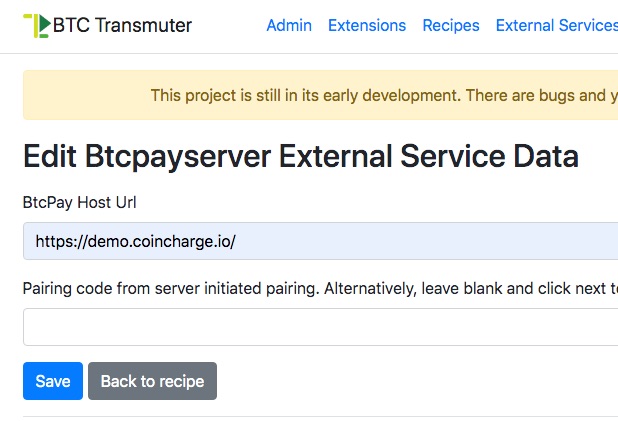
We leave the second line blank and click Save.
After that the message “Cannot proceed until paired” appears.
In addition, a link that we can click.
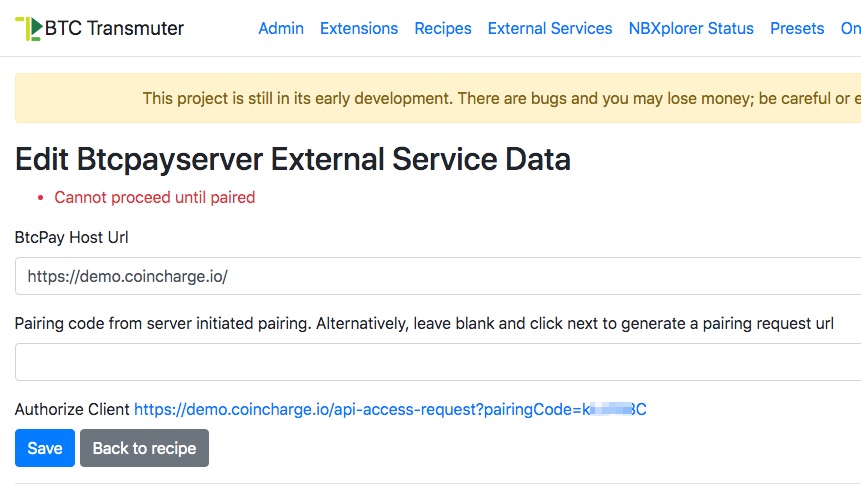
If we click on the link, then we will be connected to the specified BTCPay server and give permission for pairing there.
We select the appropriate store. In our case, the Ticket Shop, which we created as described above.
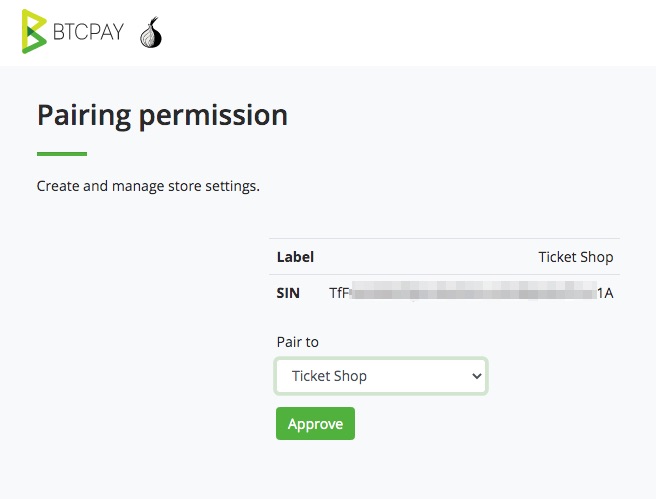
We confirm this with Approve and then receive the message that the pairing was successful.
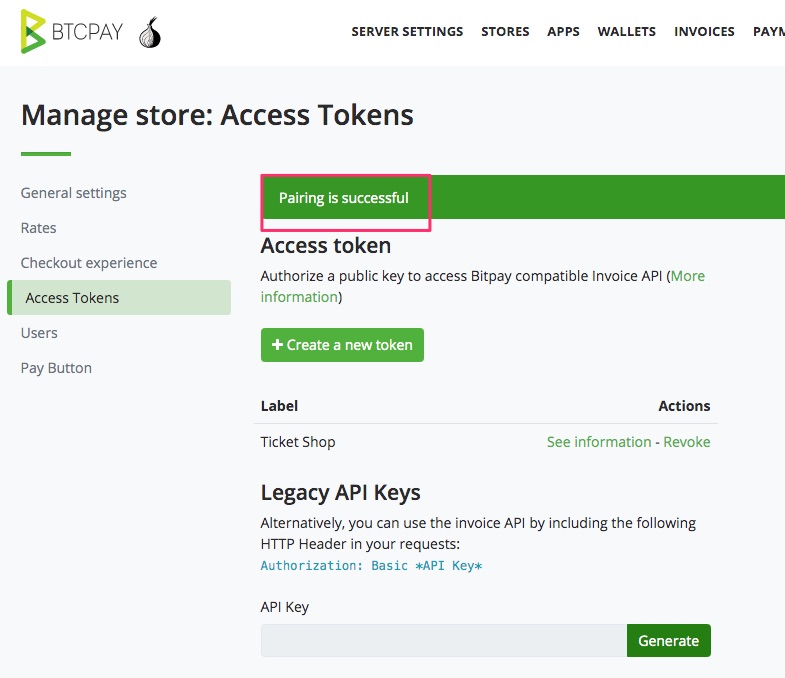
We don’t have to do anything more at this point and switch back to BTC Transmuter and click Save twice there. After that, it looks like this:
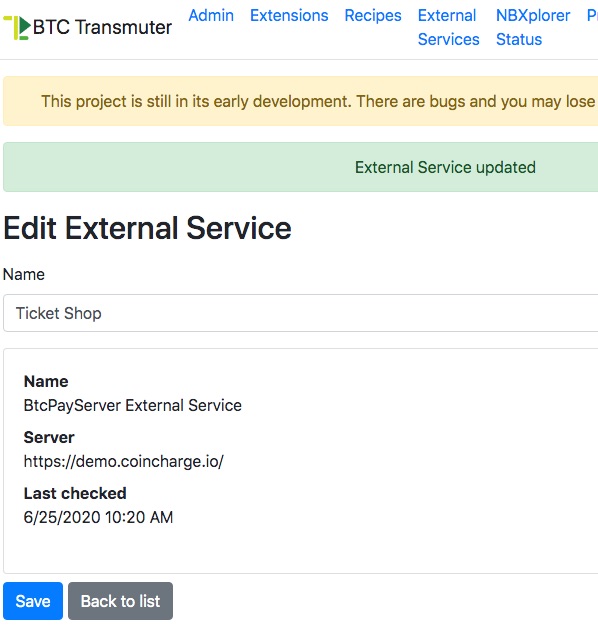
After that we switch back to Presets and then to BTCPay Email Receipts.
In the selection Coose your BTCPay store we choose our Ticket Shop and as Email Sending Service our created email address.
Then we specify that the delivery of the goods should take place when the invoice reaches the Complete status.
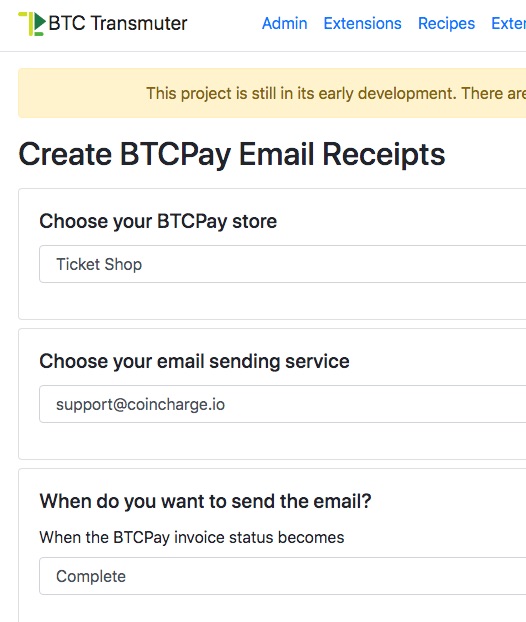
Then we specify that the message should be sent to the email address that was specified in the payment window.
Therefore, when creating the store, we had activated the field “”Requires a refund email” in the checkout experiences.
In addition, we also enter our own email address so that we, as the operator of the ticket store, are also informed about the order.
After that, the information to be displayed in the email message is specified.
This includes the email sender address and the email subject.
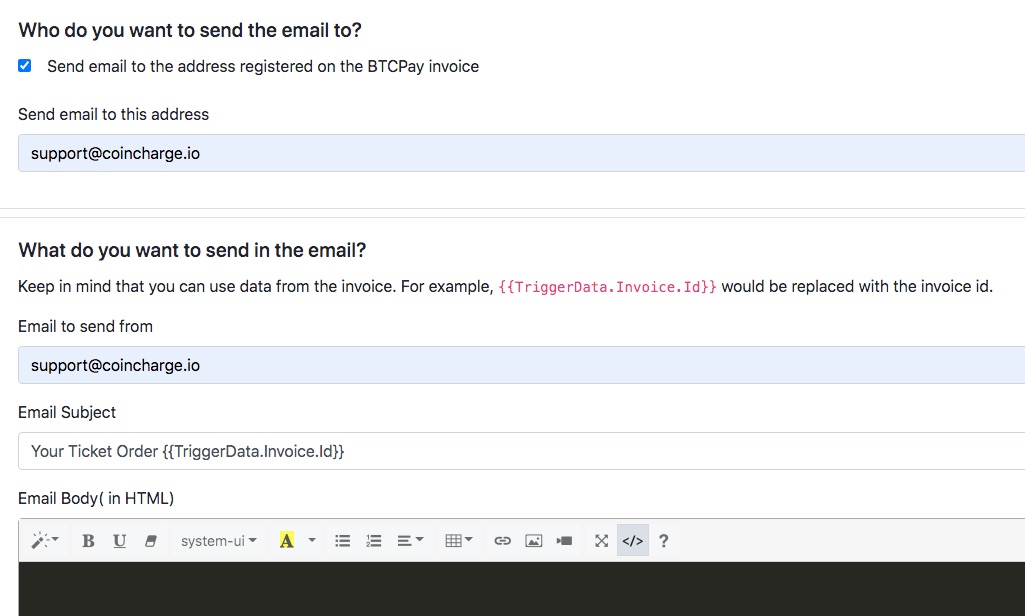
You can copy the data generated by the system during the order in the e-mail message.
We would like to inform the orderer about the Invoice ID and take over the corresponding call: {{TriggerData.Invoice.Id}}
We can design the email body with normal HTML according to our wishes and ideas.
Then click on Save.
A template for the email text is already available in the Action Groups section. This template can be edited accordingly.
To do this, you should click Edit and Next twice. We then have two actions to choose from. One action is the email message to the buyer and the second message goes to the store operator.
These two email messages can be customized via Edit. After we click on Edit, the following view appears.
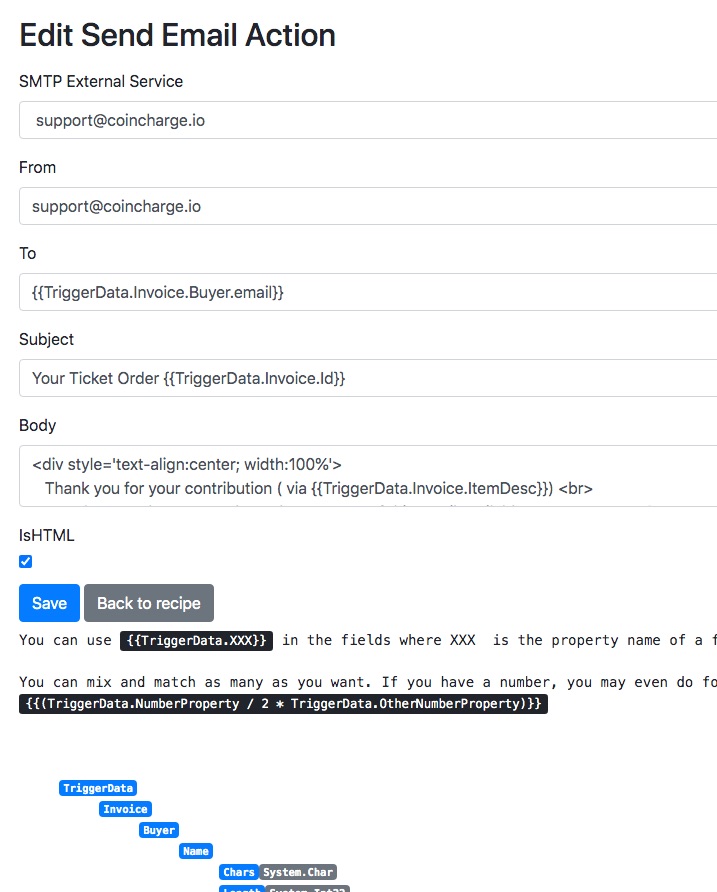
In the Body section, you can now make appropriate changes.
For the Event Ticket application, a QR code is to be sent to the customer to present on the day of the event.
The following link is included for this purpose:
<img src='https://api.qrserver.com/v1/create-qr-code/?size=150x150&data={{TriggerData.Invoice.Url}}'><br> Invoice Id: <a target='_blank' href='{{TriggerData.Invoice.Url}}'>{{TriggerData.Invoice.Id}}</a>
The external service provider qrserver.com offers a QR code generator, which is called with this link and displays our invoice number in the form of a QR code.
Any QR code reader can then be used to access the invoice url about the successful payment.
After that we click Save.
Instead of a QR code, we can also transfer any other product with the email.
One could submit a download link, a software key, an access authorization or an attachment in the form of a PDF or any other file.
The second action group is the message to the store operator.
Here we can have other information communicated to us, if desired.
For example, we have deposited the following text to the store owner:
<div style='text-align:center; width:100%'>
You got a new Ticket Order for {{TriggerData.Invoice.ItemDesc> <br>
<p>The order comes from the customer: {{TriggerData.Invoice.Buyer.email}}</p>
<p> The Invoice status is: {{TriggerData.Invoice.Status}} </p>
<p>You can read the status here: {{TriggerData.Invoice.Url}}</p>
<p>The amount paid in BTC is: {{TriggerData.Invoice.BtcPaid}}</p>
<p> The amount paid in {{TriggerData.Invoice.Currency}} is: {{TriggerData.Invoice.Price}} {{TriggerData.Invoice.Currency}}
</div>
Do not forget to save your changes. We have also renamed the recipe accordingly and enabled it.
Under the menu item Recipes we can find all the created recipes.

Now we can try out with a live test whether everything works as we imagine it. Under the item Logs we can later check if everything worked and if the emails were sent properly to the customers.
To try it out we go to the store at the url:
https://btcpay.coincharge.io/apps/CZ2gpX1Cb81D8f2L5YaDdh23oTE/pos
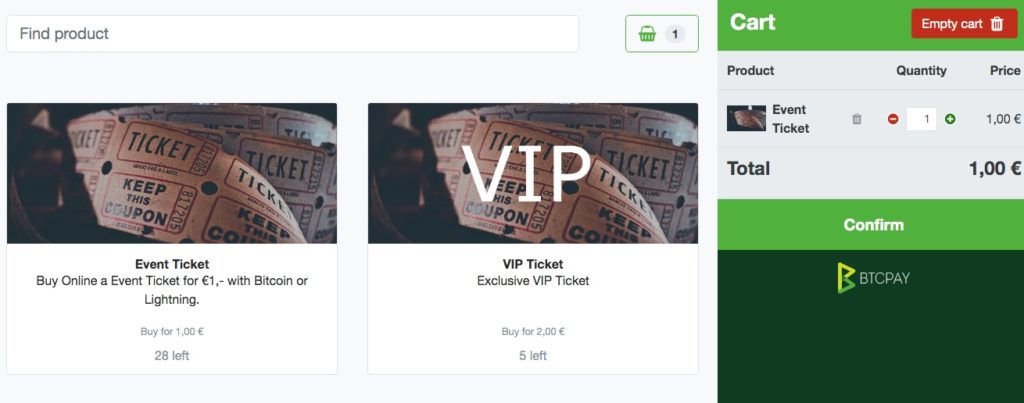
There we place an order for a ticket and pay by Bitcoin or Lightning.
As a customer, we then receive an email that looks something like this:
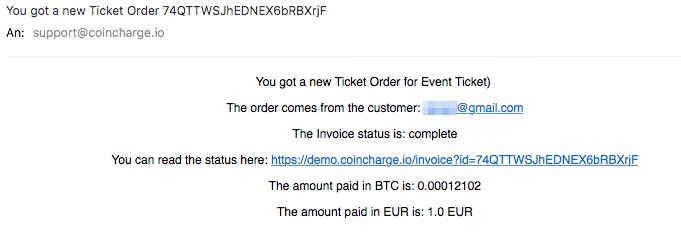
The store owner will receive an email with this content:
This example application is meant to illustrate how easy it is to sell digital content via Bitcoin.
Any digital content, files, access data or software keys can be sold this way.
You don’t need any special store software for this, but can implement this with the PointofSale app, which is already implemented on the BTCPay server. If you don’t want to run your own BTCPay server, you can create a demo store at https://btcpay.coincharge.io.
Additionally, you connect the BTC Transmuter service to this store and you can sell digital content for Bitcoin.


Leave a Reply
Your email is safe with us.