Accept Bitcoin payments on Shopify with Coinsnap
Coinsnap is a Bitcoin and Lightning payment provider and offers the possibility to accept Bitcoin and Lightning payments on Shopify. If you run a store on Shopify, your customers can pay you with Bitcoin and Lightning. Incoming Bitcoin payments are credited directly to your own Lightning Wallet or can optionally be paid out to your bank account.
In this article, we explain how you can accept Bitcoin and Lightning payments with Coinsnap on your Shopify store.
Online merchants who offer their products online via Shopify can easily offer their customers payment via Bitcoin and Lightning.
Coinsnap provides a Shopify payment module that establishes a connection between the Shopify online store and Coinsnap to enable the processing of Bitcoin and Lightning payments.
In the first step, we show how an end customer makes a payment with Bitcoin and Lightning in a Shopify store. We will then show you how you as a merchant can accept Bitcoin and Lightning payments in your Shopify store.
Bitcoin payments on Shopify with Coinsnap
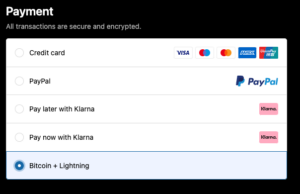
The end customer selects his products and places them in the shopping cart. They are given an overview of the available payment methods and are also offered the option of Bitcoin + Lightning payments.
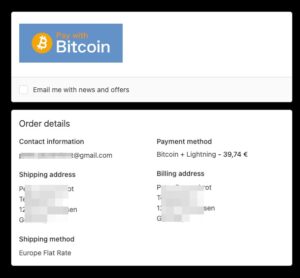
The customer receives an overview of his order and can finalize it. After completing the order, the customer is redirected to the payment page.

The customer is taken to the payment page and asked to click on the Pay with Bitcoin button.
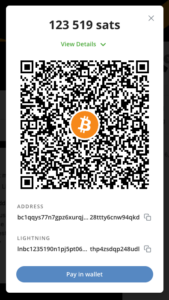
The Bitcoin payment window then opens and the customer can pay with Bitcoin and Lightning by scanning the QR code. The displayed QR code contains both payment options.
After successful payment, the customer receives a notification that the payment has been successfully completed.
During the ordering and payment process, the customer is informed by e-mail about the status of his order.
The customer receives the first notification by e-mail after the order has been successfully placed and a further notification after the payment has been successfully completed.
Shopify Manual payment methods
With Shopify Payments, Shopify offers its own payment processing for various payment methods such as credit card, Google Pay and Apple Pay. In addition to the payment methods offered by Shopify Payments, further payment methods can be integrated into Shopify using the Manual payment methods function. .
These manual payment methods can be payments by cash on delivery or bank transfer and in our case they are Bitcoin and Lightning payments.
The payment methods offered by Shopify Payments are prominently placed by Shopify to promote the use of these payment methods.
Shopify also does not offer the option of specifying an individual order of the payment methods offered, for example to position Bitcoin and Lightning payments higher up.
The order can be changed via paid apps. The display of a Bitcoin or Lightning symbol is not supported by Shopify.
A payment via Bitcoin and Lightning Payments is considered a manual payment by Shopify and Shopify does not charge any additional fees for this.
Open a Coinsnap account
In order to be able to use the Bitcoin and Lightning payment processing at Coinsnap, we open an account with Coinsnap. All we need is an e-mail address. No further information is required.
On the Coinsnap website, you will find the option to open a Coinsnap account in the top right-hand menu.
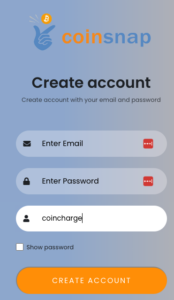
You will be asked to enter your e-mail address, choose a password and enter a Coinsnap discount code.
Enter coincharge in the Referrer Code field. This saves you 0.25% on the Coinsnap fees.
You will then receive an e-mail which you must confirm.
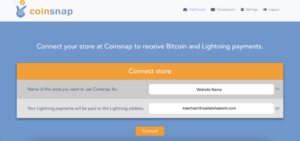
When you register with Coinsnap for the first time, you will be asked for the name of your business. This name will later be displayed to your customers so that they know which store they are paying at.
You will then be asked to enter a Lightning address.
A Lightning address looks like an e-mail address, but instead of messages you can use it to send and receive Bitcoin and Lightning payments.
Lightning Address
A Lightning address is like an e-mail address, except that you can use it to send and receive bitcoins via the Lightning network. If you would like to learn more about Lightning address, we recommend our article about Lightning address.
In this article, we have also listed all Lightning Wallet providers where you can get a Lightning address.
The following describes how to obtain a Lightning address from this provider using the Alby Lightning Wallet as an example.
The provider will give you a Lightning address including a Lightning wallet. Your Bitcoin and Lightning transactions at Coinsnap are then credited directly to the Alby Lightning Wallet.
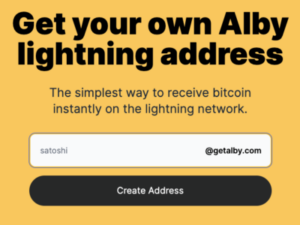
To get a Lightning address, open the following link: https://getalby.com/lightning-address
There you can create a Lightning address with your name.
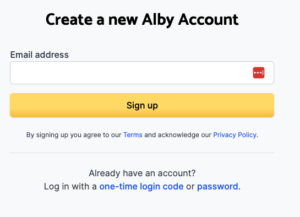
If your desired name is available, create an account with Alby. You can find a detailed description with all its functions in the article: Setting up and using the Alby Lightning Wallet.
Connect Shopify with Coinsnap
Click on the image to enlarge it.
After you have created an account with Coinsnap and entered your Lightning address, the Shopify store must be connected to Coinsnap. You can either set up the connection between Coinsnap and Shopify yourself or have Coincharge set it up for free.
Below we describe how to authorize Coincharge in your Shopify store so that Coincharge can establish a connection between Shopify and Coinsnap for you.
We will then explain how you can establish a connection between Shopify and Coinsnap yourself.
Integrate Coinsnap into Shopify
Below we introduce you to the Coincharge integration service. Here we integrate Coinsnap as a payment service provider into your Shopify store so that you can accept Bitcoin and Lightning payments.
In order for Coincharge to make the settings, the user shopify@coincharge.io must be stored as an employee in your Shopify store.
In order for Coincharge to make the settings, the user shopify@coincharge.io must be stored as an employee in your Shopify store.
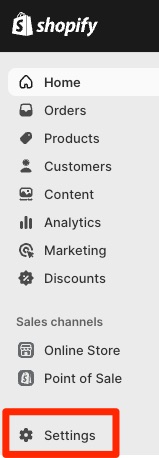
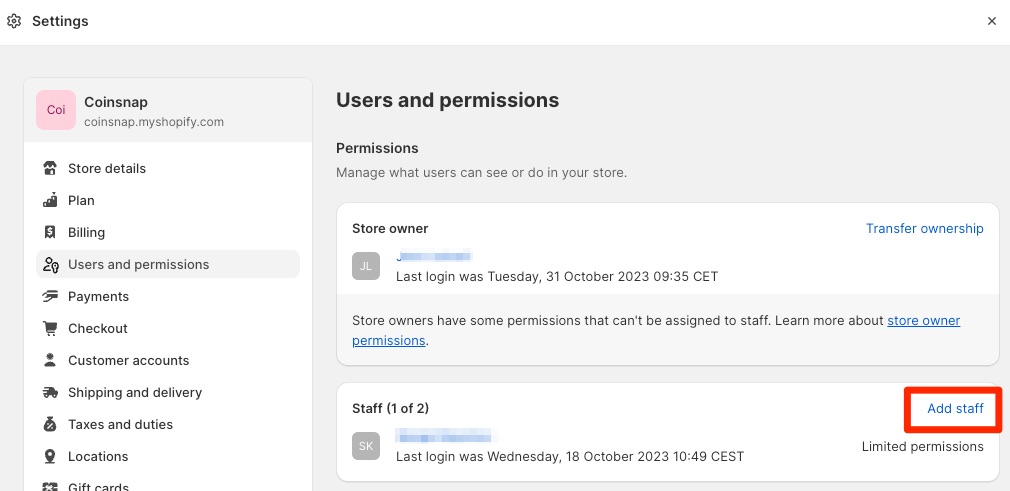
When you log in to Shopify, you will find the Settings item at the bottom of the left-hand menu bar.
Click on it there.
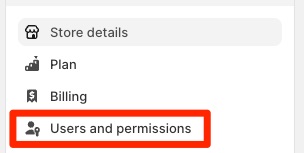
You will then be taken to the settings of your Shopify store and there to the Users and permissions menu item.
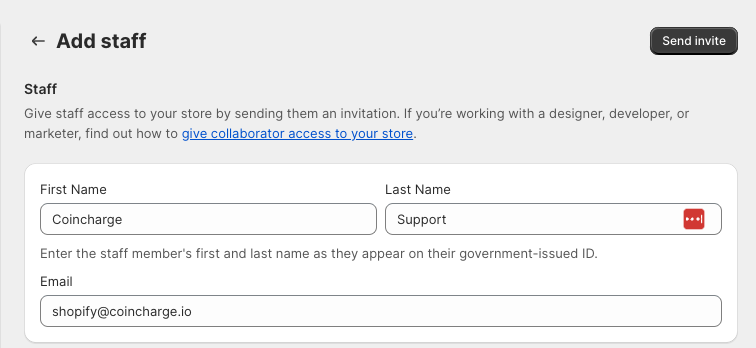
In this area, you can add employees and assign them various authorizations. To add an employee, click on Add staff.
You can store the user shopify@coincharge.io there. For example, you can enter Coincharge and Support in the First Name and Last Name fields.
Authorizations must be set up after the employee has been deposited at shopify@coincharge.io. This allows the registered employee to make settings and changes in the Shopify store. The employee and the assigned authorizations are only required for setting up the app. Once set up, the employee can be deleted again, including the corresponding authorizations, and no longer has any insight into the store’s activities.
Store Permissions
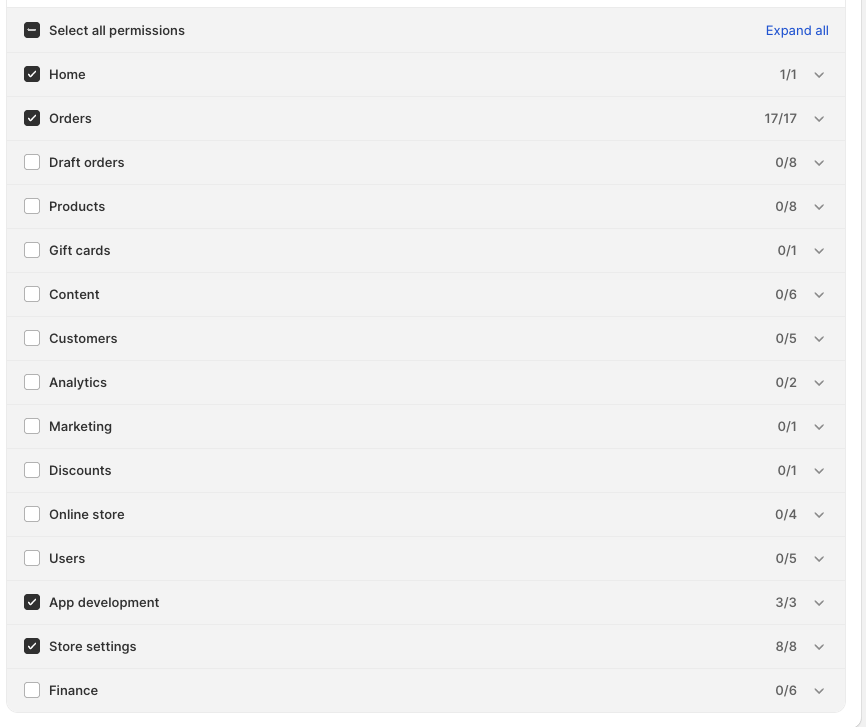
In the store permissions, corresponding authorizations can be assigned for individual areas. You can make it easy for yourself and select “Select all permissions” in the first item. However, it is not necessary to assign corresponding authorizations for all areas.
The authorizations for the areas with the corresponding sub-areas for Home, Orders, App development and Store Settings are required.
App Permissions
Since Coinsnap is stored as an app, app authorizations are still required.
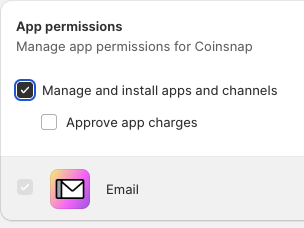
Here it is sufficient if the app authorization allows “Manage and install apps and channels”.
Then click on Send invite.
After clicking on “Send invitation”, we will be informed by e-mail that we have been registered as a new employee.
Now the installation can begin.
After successfully setting up Coinsnap in your Shopify store, the employee is no longer needed and must be deleted.
Connect Shopify with Coinsnap yourself
The following describes how you can establish a connection between Shopify and Coinsnap yourself.
The connection between Shopify and Coinsnap takes place in three steps:
- Creation of Bitcoin as a manual payment method with Shopify
- Generation of API data at Coinsnap
- Deposit of the API data from Coinsnap with Shopify
Once you are registered with Coinsnap, you can log in to your Shopify store and access the Shopify backend. If you have not yet set up your Coinsnap account, you can create it via this link.
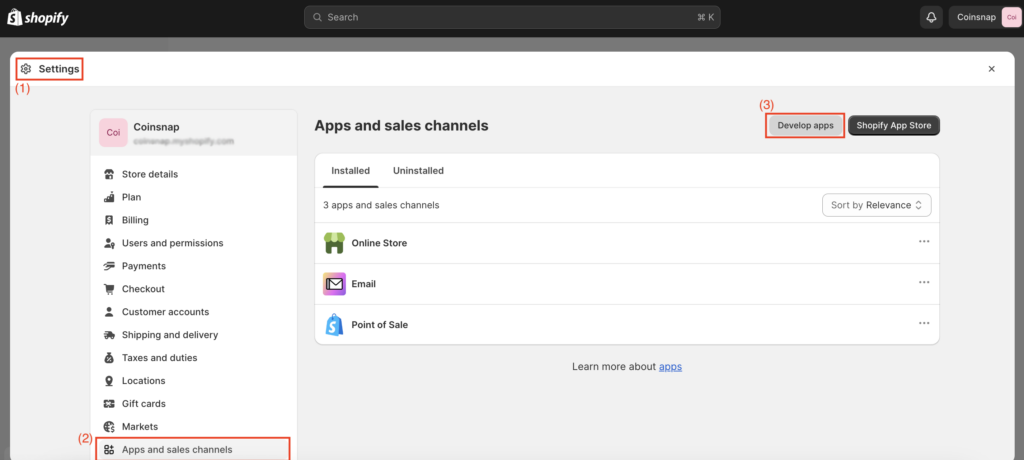
If you are accessing the Shopify backend, go to:
(1) “Settings” > (2) “Apps and sales channels” > (3) “Develop apps”.
After you have selected “Develop apps”, click on the button (1) “Create an app”.
This will open a window in which you can enter (2) the name of your app.
After you have given your app a name, click on the button (3) “Create app”.
On the main page of the app, under the “Overview” tab, select the “Configure Admin API areas” option (highlighted by a red rectangle in the illustration).
Enter “Orders” in the “Filter Admin Access Scopes” field or simply scroll down to the “Orders” section.
(1) Install app
Click on “Install app” in the top right corner.
As soon as the pop-up window appears, select “Install”. Then display the Admin API access token and copy it.
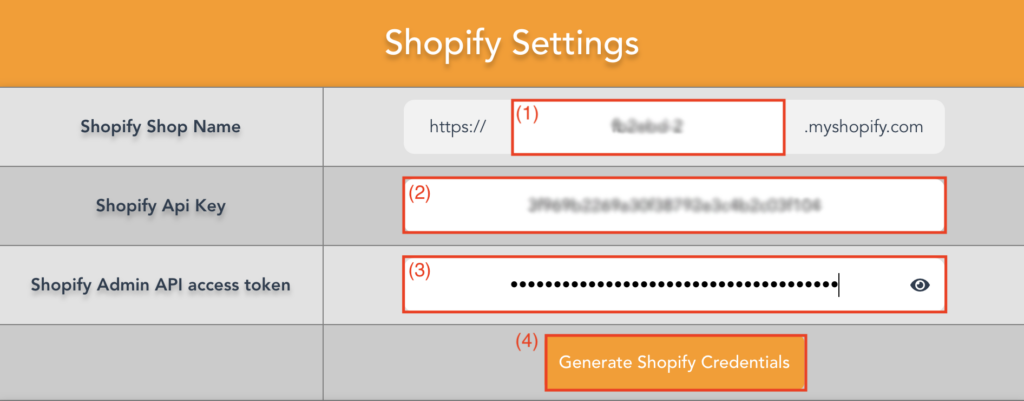
Navigate within the Coinsnap app (app.coinsnap.io) to “Settings” > “Shopify settings”.
(1) Name of the Shopify store
Enter the name of your Shopify store in the first field.
(2) Shopify API key
In the “Shopify API Key” field, enter the corresponding API key that you received from Shopify.
(3) Shopify Admin API access token
In the “Shopify Admin API Access Token” field, enter the Admin API Access Token obtained from Shopify.
(4) Generate Shopify login information
Click on the “Generate Shopify Credentials” button to get a js script code that you will provide to Shopify.
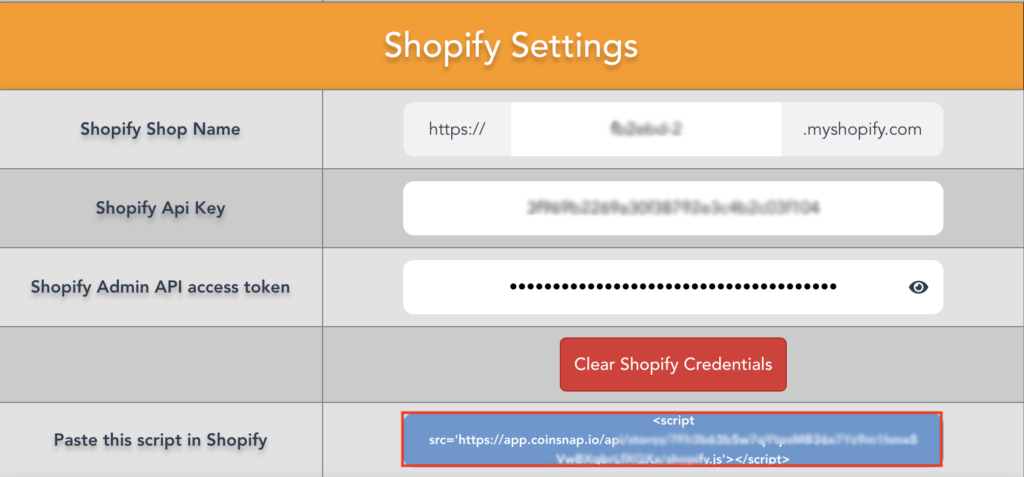
If you select “Generate Shopify Credentials”, a new field will appear.
Click on the “Paste this script into Shopify” field to copy the js-script code. (You know it has been copied when the background turns blue after you click on it with the mouse).
We then have to insert this script into the Shopify backend.
Once you have collected all the necessary information, return to Shopify.
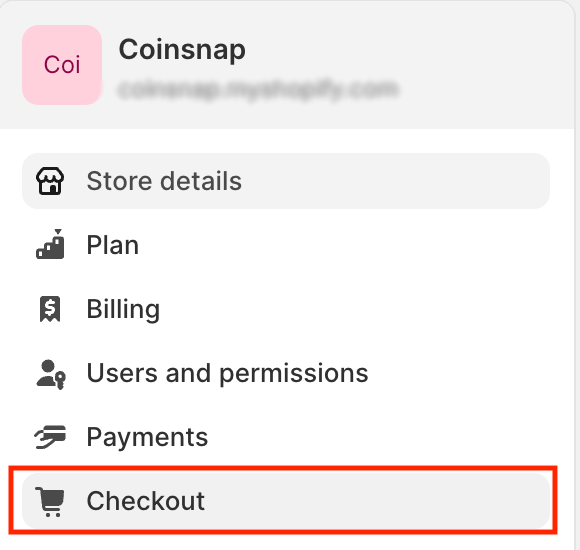
First navigate to the “Checkout” section in the Shopify store settings.
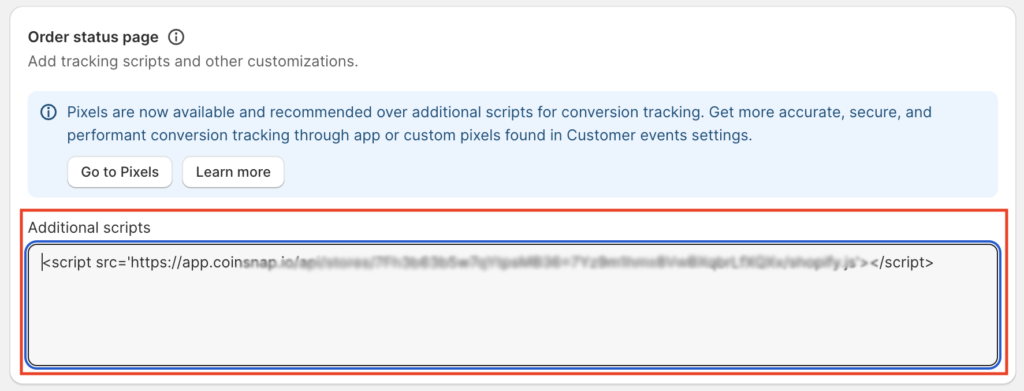
From there, scroll down to find the “Order Status Page” section and look for the “Additional Script” section.
Paste the script code you just created in the Coinsnap backend here and make sure that both the opening and closing </script> tags are included.
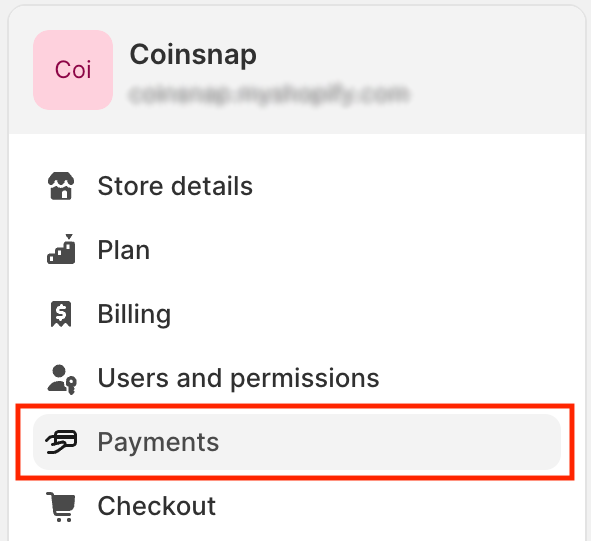
Navigate to the “Payments” section in the Shopify store settings to allow Bitcoin and Lightning payments.
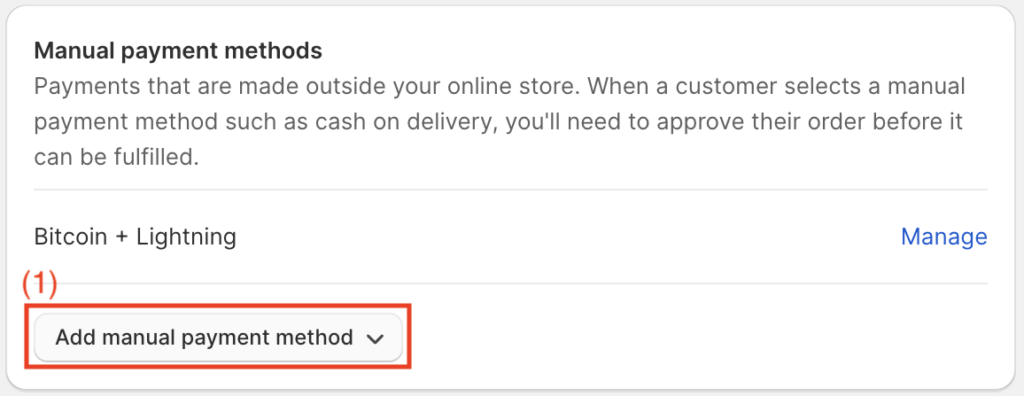
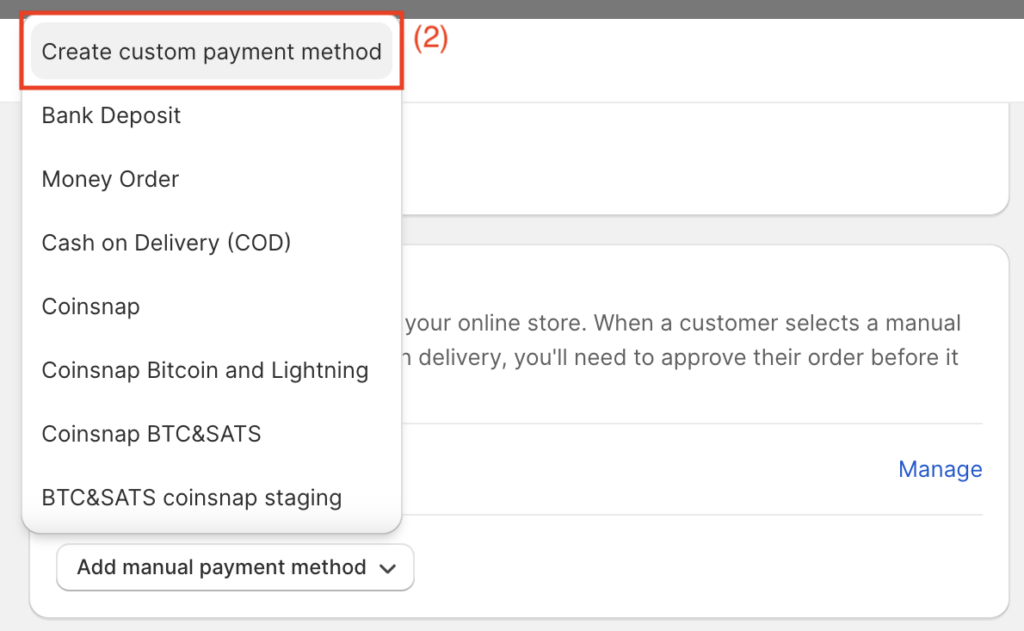
From there, scroll down to find the “Manual payment methods” and click on (1) “Add manual payment method”.
(2) Set up a user-defined payment method
Select “Create custom payment method” to open a window.
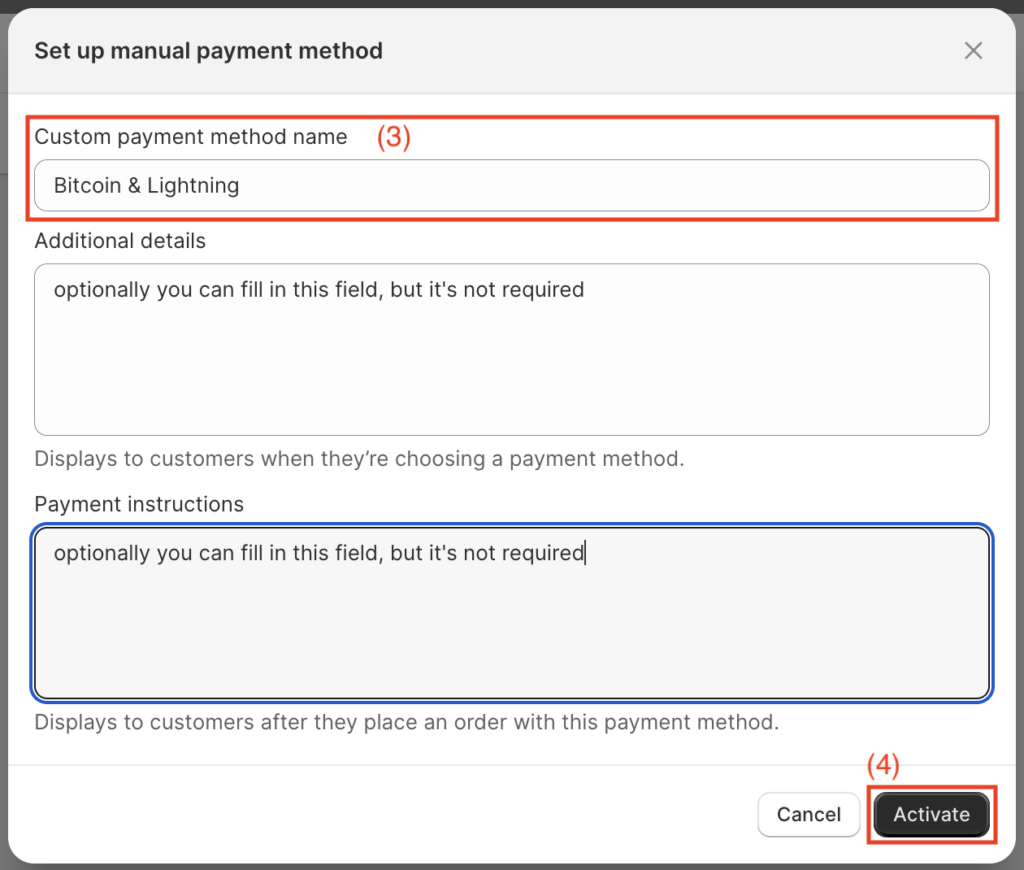
There you must enter a name for your payment method and add any optional requirements.
(3) Name of the user-defined payment method
Enter “Bitcoin + Lightning” in the “Custom payment method name” field. There are other optional fields that you can fill in, but they are not mandatory. You can choose the name freely, but you must make sure that the name Bitcoin is used. So you can write. “Pay with Bitcoin”, “Pay with Bitcoin and Lightning” or simply “Bitcoin + Lightning”.
(4) Activation
Finally, click on the “Activate” button. You have now successfully set up and connected Shopify and Coinsnap.
Now you can place a test order and check whether all functions work correctly.

