Lunanode Setup
Lunanode Hosting
Lunanode is a Canadian hoster specializing in hosting BTCPay Server and partner and sponsor of BTCPay Server.
For about €5,- per month you can run your own BTCPay server at Lunanode. This BTCPay server can be used to receive payments via Bitcoin and Lightning in your own online store or at the POS.
The installation can be done without any previous knowledge is a few clicks. Here you will find a step-by-step guide to set up your own BTCPay server including a full Bitcoin Node and the LND Lightning Network.
YouTube Video: How to set up a BTCPay server at Lunanode
About the article, “BTCPay Server at Lunanode – How to set up a BTCPay Server at Lunanode.” there is an explanatory video from Coincharge on the YouTube channel of Coincharge in German language.
Create an account with Lunanode
To register with Lunanode, an email address and a cell phone number are required for SMS authorization.
Personal data and details are not collected.
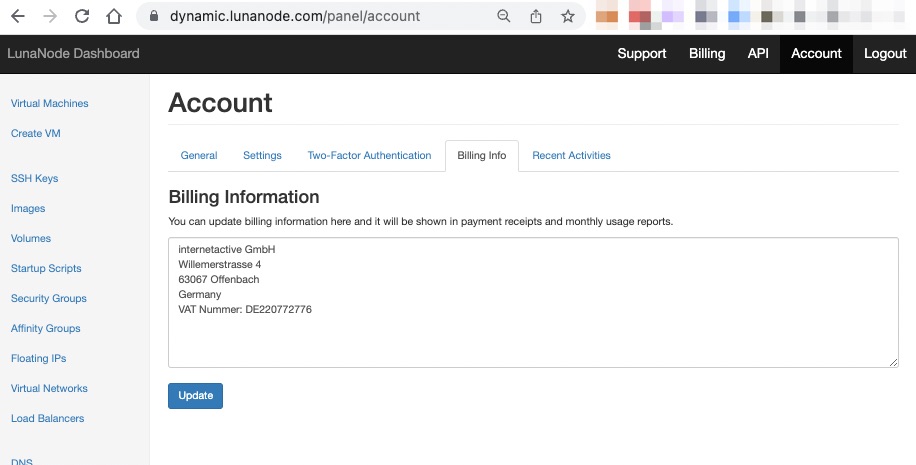
If you need an invoice in your name or company, you can optionally enter this information in LunaNode.
In the Account section, under Billing Info, there is the option to enter the relevant information.
Each time a deposit is made to the hosting account, one will receive a corresponding invoice with the details that have been provided. Subsequent creation of the invoice is not possible. Therefore, you should do this before making your first deposit.
This information is optional and can be omitted if no invoice is required.

After creating an account, the account must be topped up with credit.
This credit is used to pay for hosting on a daily basis.
Lunanode offers payment via PayPal and credit card.
Additionally, payment via cryptocurrencies.
The Coinbase option can be used to pay via ETH, LTC, BCH, DAI, LTC and USDC.
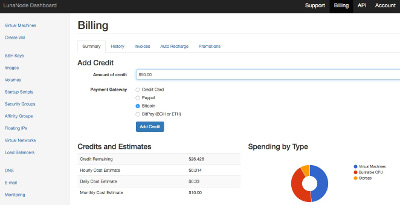
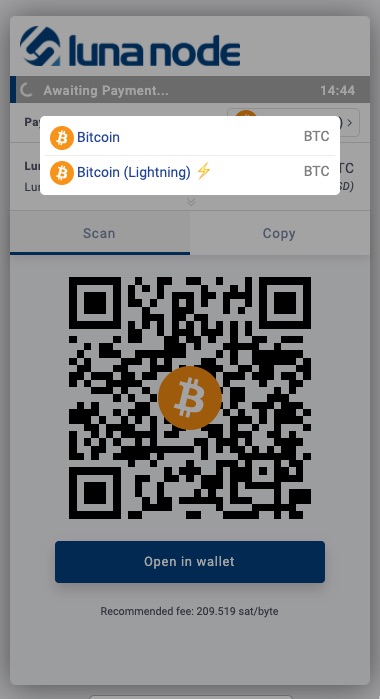
Via the Bitcoin via BTCPay option, payments can be made by Bitcoin and by Lightning.
Generate API Key
After the credit has been made, click on the API button in the upper right corner of the navigation menu.

You will be taken to the following page, where an API key must be generated.
No entries need to be made in the fields. These are options that can be ignored.
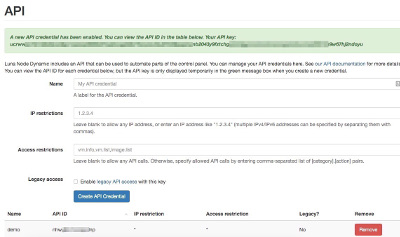
After clicking Create API, you will get an API ID and a longer API Key.
Set up BTCPay server
After that, go to the website https://launchbtcpay.lunanode.com/.
On this page the previously generated API ID and API Key will be entered.
At this point, one orders the LunaNode package m.2 for $7 a month. This is absolutely sufficient to run a BTCPay server for bitcoin payment processing with Lightning.
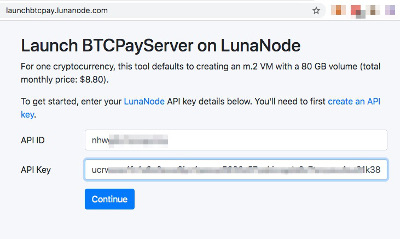
After clicking Continue, the following page will appear.
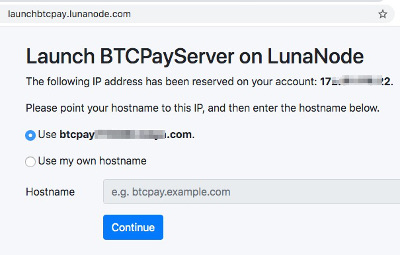
A separate sub-domain is generated for the BTCPayServer. But you can also use your own sub-domain. However, you can change this at a later time. Therefore, it is recommended to continue with the domain suggested by Lunanode at this point.
On the next page, you specify which cryptocurrencies you want to accept. Bitcoin and Lightning is already selected with BTC.
If one selects even more cryptocurrencies, additional storage space is required because the respective blockchain has to be stored on the server.
This would increase the original price accordingly.
Lunanode recommends the m.4 package for about $14 per month if you use Bitcoin and Lightning.
If you want it a little cheaper, you can also set up Bitcoin and Lightning payments with m.2 for $7 a month. We have already set up a few projects under m.2 and have had good experiences.
You can also start with m.2 now and upgrade to m.4 at a later date.
Optionally, an email address can be stored, via which one is informed when the installation is completed. If you don’t enter an address, you will receive the corresponding hints via the email address of the Lunanode account.
As a network, you leave it at Mainnet.
Lightning implementation relies on LND or on C-Lightning to be able to receive Lightning payments as well.
If you are unsure which version to use, we recommend LND.
The check mark for Acceleration should remain set if you book additional computing power for a one-time fee of $3. This makes sense so that the blockchain can be synchronized more quickly. Without the addition, the process then takes about a week. For the additional price, the synchronization process is already completed after 2-3 days.
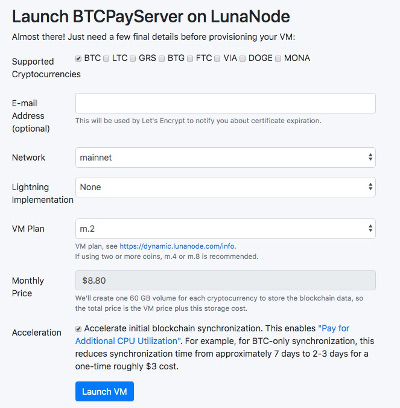
All other settings are optional. It is recommended that no changes or settings are made at this point for the time being.
All settings can still be changed at a later time.
We click on Launch VM and the following message appears.

Then you have to wait about 5 minutes and can then click on the link displayed.
At the same time you will be informed by email that everything has been set up.
The following page then appears:
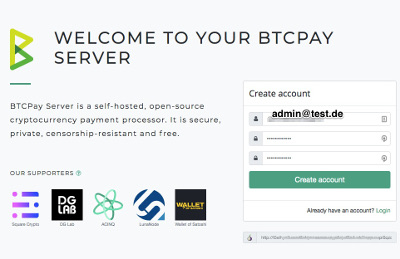
Here you can now log in to your new BTCPay server. The first account that is created is automatically the admin account.
After logging in, a message appears in the next 3-4 days that the blockchain is still being synchronized.
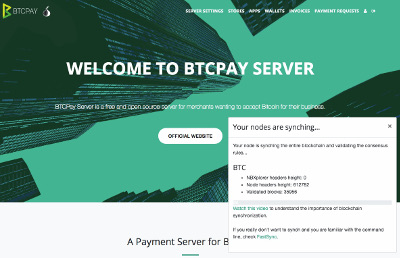
Once the synchronization process is complete, this message disappears.
You can then start configuring your BTCPayServer individually.
You can find more information on this at Configure BTCPayServer
DNS Setup
You have received a domain from Lunanode something like btcpay9531754.lndyn.com.
You can also hang this address under your own domain so you can use a domain call like btcpay.my-domain.com.
This is useful if you want to avoid warnings for potential pishing attacks or deceptive warnings. Then the BTCPay server is behind the https key of your own website.
Likewise, it looks better and more trustworthy for one’s customers if the Bitcoin payment page is associated with the store’s accessed domain.
For this you have to look up the External IP of the BTCPayServer at Lunanode.
You can find the External IPv4 under Virtual Machines on the dashboard.
After that you have to create a corresponding DNS entry for the domain. You do this with the provider who manages the domain.
An A record must be created within DNS Management.
For the domain btcpay.my-domain.com an A-record btcpaywith the Lunanode IPv4 address is created.
After that, log in to the BTCPayServer and go to Server Settings Maintenance.
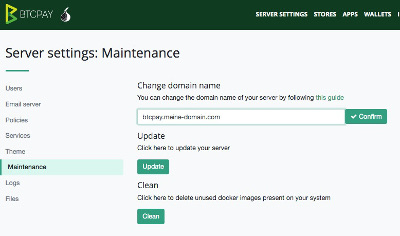
The new domain name is entered in the “Change domain name” field.
In our case btcpay.my-domain.com and then we click on Confirm.
Now you can call up the BTCPay server directly via your own domain and the payment page is also displayed via this domain.
Setup Service BTCPay Server at Lunanode
Don’t you want to set up and install the Lunanode server yourself and let Coincharge take care of setting up a BTCPay server at Lunanode?
Order the setup of a BTCPay server and select Lunanode as the provider. The BTCPay server can also be set up with another provider of your choice.






Leave a Reply
Your email is safe with us.