Create, set up and administer BTCPay Store
In this article, we explain how you can create, set up and administer a BTCPay Store on a BTCPay server.
In the first step, we explain what a BTCPay Store is.
You then create an account on a BTCPay server to be able to create a BTCPay Store.
We explain which settings and configurations you can make in the BTCPay Store and what significance it has for the acceptance of Bitcoin and Lightning payments.
For the instructions, we will set up a BTCPay Store on the BTCPay Server from Coincharge.
The procedure is identical to creating a BTCPay Store on your own BTCPay Server.
YouTube Video: BTCPay Store – How to create your own BTCPay Store on a BTCPay Server
Coincharge has an explanatory video about the article “BTCPay Store – How to create your own BTCPay Store on a BTCPay server” on the Coincharge YouTube channel in German.
What is a BTCPay Store?
A BTCPay Store is a standalone account on a BTCPay server. An unlimited number of these accounts can be set up on a BTCPay server.
Each BTCPay store can stand for its own application, service or website.
Also, the term store or store in connection with the BTCPay server must be explained at this point.
The name store and store can be somewhat misleading. This is not about an online store or store software. It is about payment processing for Bitcoin payments, which is integrated into a store (e.g. WooCommerce, Drupal, Magento, PrestaShop ) or into a project.
If you run several websites, it is recommended that you create a separate BTCPay store for each of them.
But you can also make a separation by services or applications. You can use a BTCPay Store for your online store, a separate BTCPay Store for receiving donations, and again a BTCPay Store for your retail store or for each individual store.
Create account on BTCPay server
Create BTCPay Account
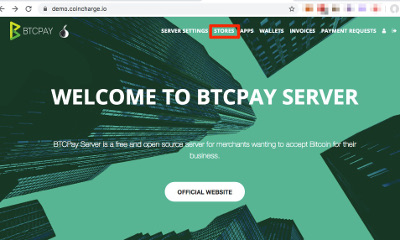
To create a BTCPay Store, you need an account on the BTCPay server.
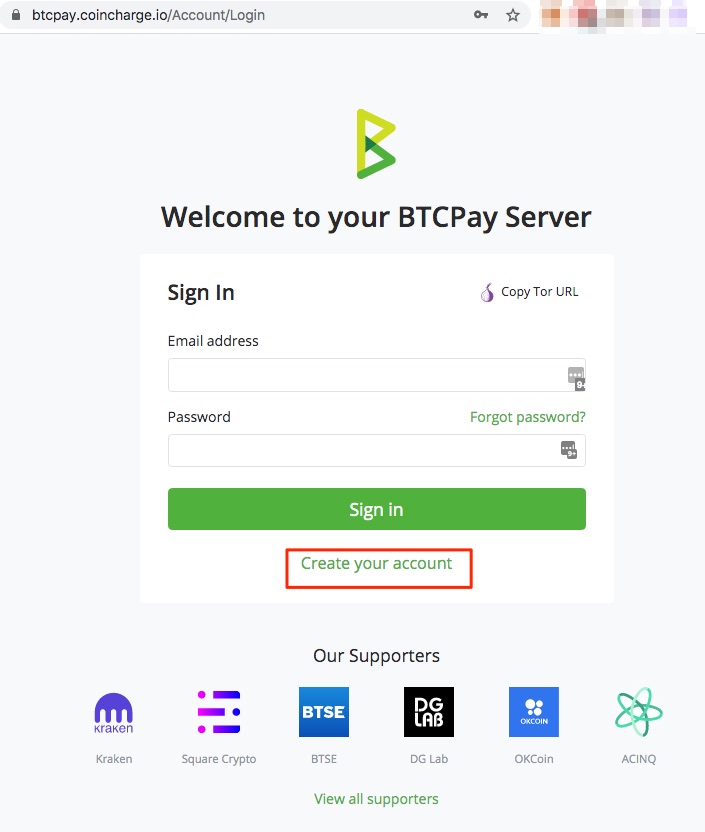
For example, if you go to https://btcpay.coincharge.io or the homepage of your BTCPay server, the login area will look like the picture on the right.
If you already have an account, you can now log in with your login details.
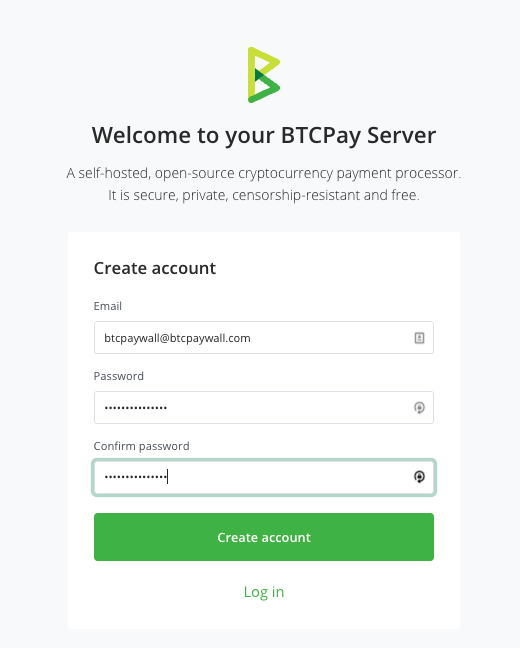
If you do not yet have an account, you must first register.
To create a new account, click on the “Create your account” link at the bottom.
Create a BTCPay Store
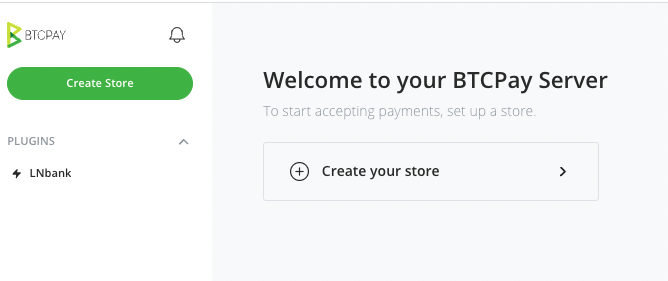
After you have logged in with your account on the BTCPay server, you have the possibility to create and set up a BTCPay store via a kind of BTCPay store generator.
All required options are called up step by step.
All these individual steps and setting options can be called up again later and adjusted.
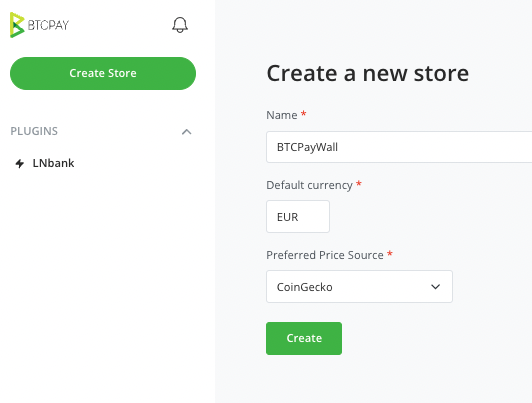
We use BTCPayWall for the store name in our example.
The default currency is USD. We can simply override this setting and use, for example, EUR or any other currency.
We use Euro as standard currency.
We use the data from CoinGecko to calculate the Bitcoin exchange rate.
Then we click on Create.
Note:
When creating the BTCPay Store, only the required basic data is requested via this BTCPay Store Generator.
If you want to make detailed settings later, you can make these options under Settings => Store Settings.
We will go into the detailed setting options in more detail in this article.
Create a wallet
The creation of the wallet is about where to credit the incoming bitcoin. Bitcoin payments are credited to the Wallet and Lightning payments are credited to the Lightning Node.
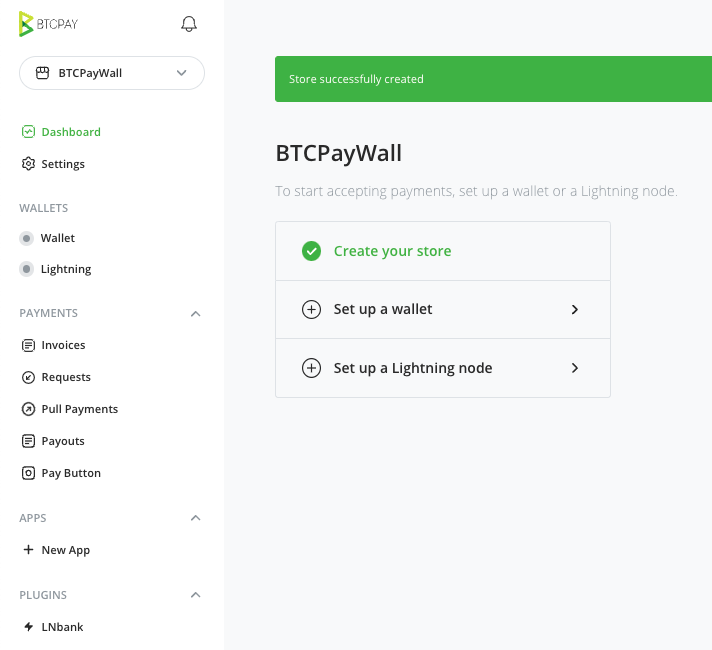
After we have created a BTCPay Store, we need to create a new Bitcoin wallet or deposit an existing Bitcoin wallet.
Continue with Set up a wallet
There are a variety of different ways to use a Bitcoin wallet. You can use a Bitcoin wallet created by the BTCPay server, you can use an external Bitcoin wallet or you can deposit the xPub key from a hardware wallet.
All the ways to use a Bitcoin wallet at a BTCPay store we have presented in detail in a separate post: BTCPay Bitcoin Wallet
If we already have a hardware wallet, we can store the xPub key via the existing wallet.
How to store an xPub key from an existing Bitcoin wallet is described in How to find your xPub key
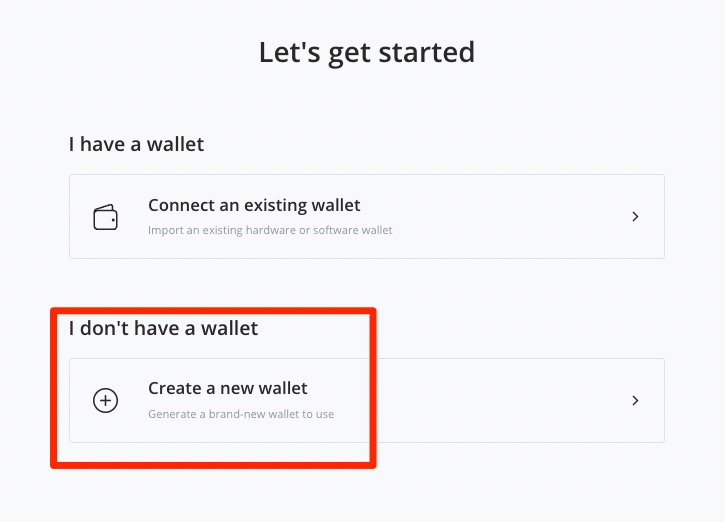
Let’s assume that you do not yet have a Bitcoin wallet and continue with the creation of a new wallet.
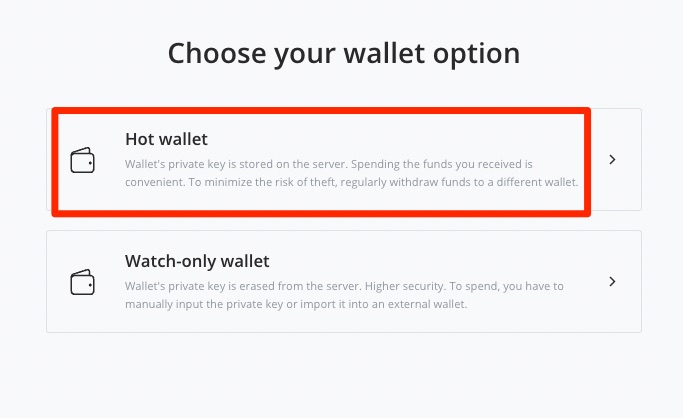
We select the Hot Wallet function.
This means that the credits in Bitcoin are credited directly to the internal BTCPay wallet.
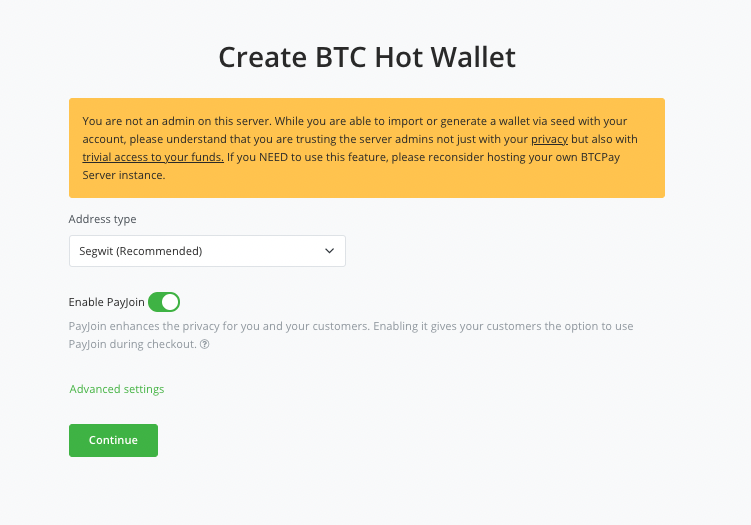
If it is not our own BTCPay server and therefore not an administrator, the warning message appears that there is a risk to the credit.
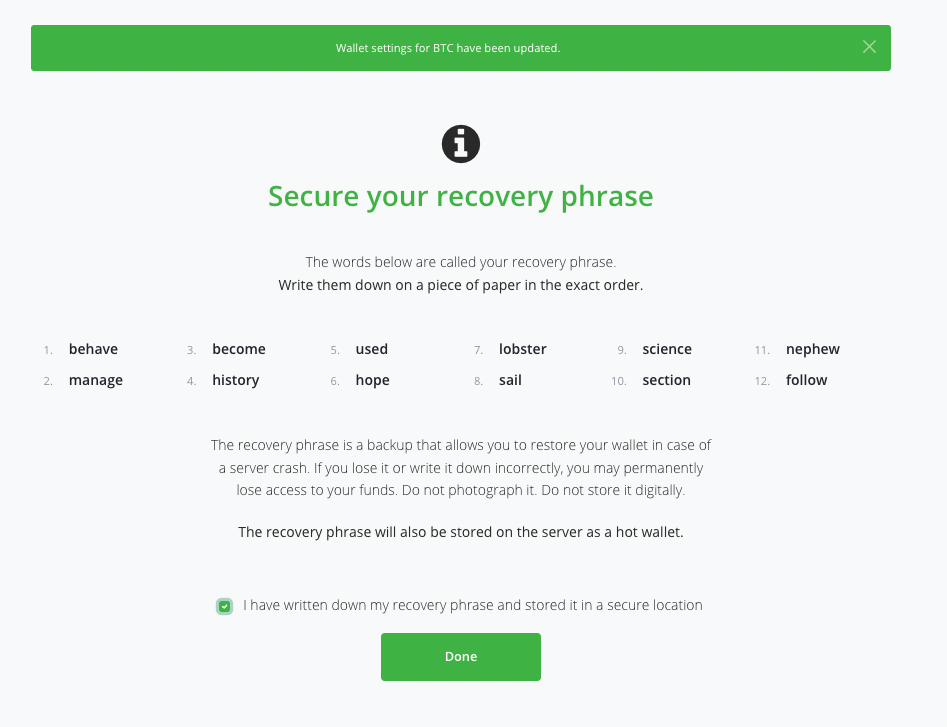
You receive your own seed (recovery phrase) with the BTCPay wallet.
This gives you security for your Bitcoin balance.
With this seed, you have access to your Bitcoin balance at all times.
Make a note of these 12 words and store them in a safe place.
You can store these 12 words in any other Bitcoin wallet and thus regain access to your Bitcoin balance.
We have now created a BTCPay store including our own Bitcoin wallet.
All the necessary settings have been made. Now we can continue with the fine adjustments, if desired.
BTCPay Store Settings
Setting up a BTCPay store via the setup wizard is very quick and easy with setting up your own BTCPay store.
If you want to make further individual settings, you will find the corresponding information below.

The area is divided into the following sub-items:
- General
- Rates
- Checkout experience
- Access tokens
- Users
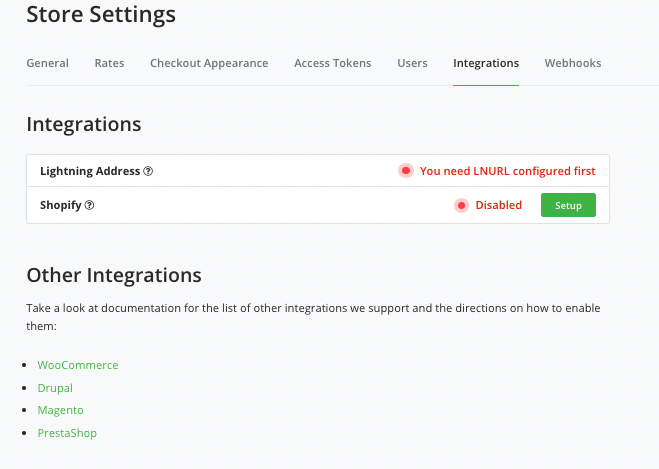
- Integrations
- Webhooks
- Payout Processors
Store Settings => General
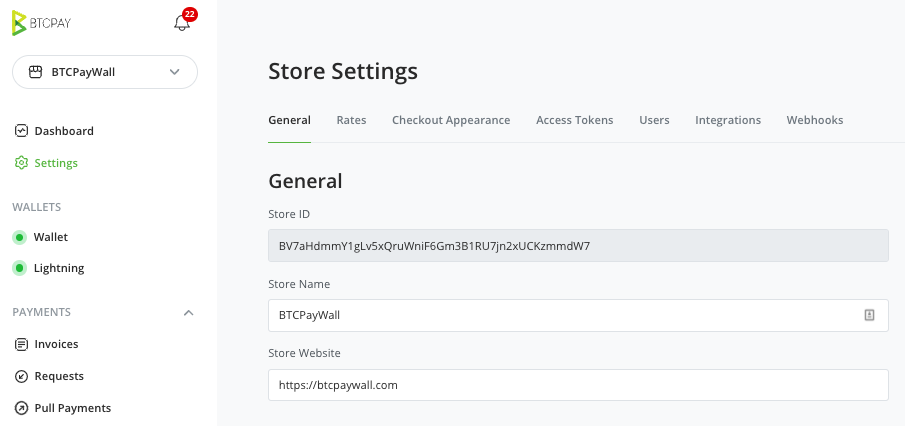
Within General Settings there is another section General.
General
In the ld field you can find the Store ID. The Store ID is assigned by the system and cannot be changed.
In the Store Name field you can give your store a name of your own. This store name will also be displayed later on the payment page.
The URL of the online store can be stored in the Store Website field.
Payment
The Payment section specifies how a Bitcoin payment should be made to the buyer.
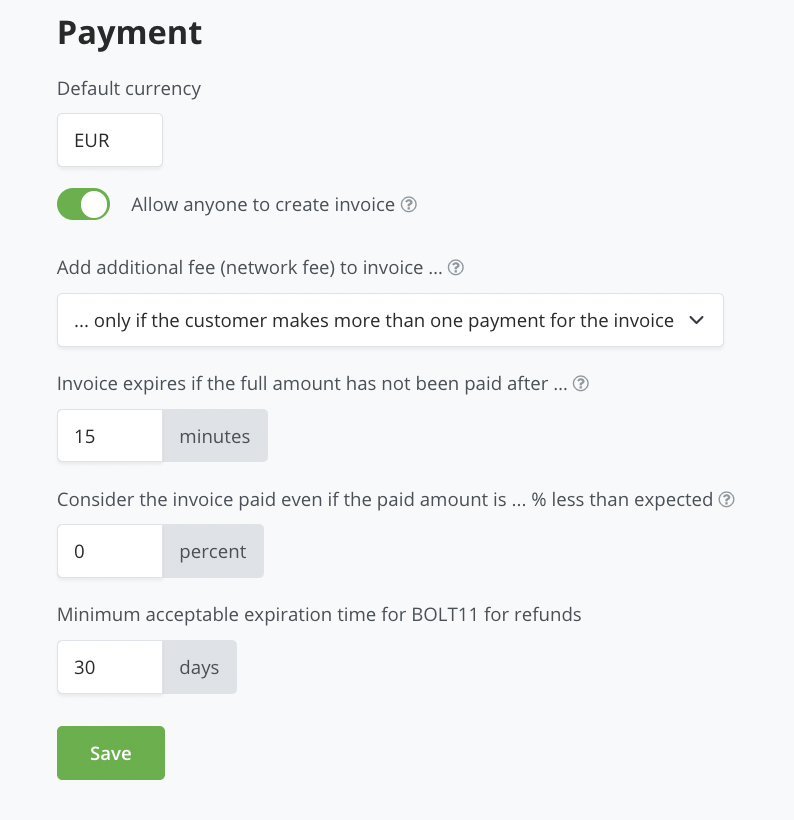
The currency we set when creating the BTCPay Store is displayed as the Default Currency. By default it is USD and we had changed it to EUR.
The “Allow anyone to create invoice” field is disabled by default.
Those who want to use one of the apps used by BTCPay Server can also leave this field unchecked. Those who want to use a Shopify online store with the BTCPay store can also leave the checkmark unchecked.
For all other external applications it is necessary that the checkmark is set.
This allows external applications (via API) to create invoices on the BTCPay server, which then ensure that a Bitcoin payment page is displayed.
Add additional fee
The field “Add additional fee (network fee) to invoice” is about an additional fee that can be charged if an end customer sends the invoice amount in numerous partial amounts. Network fees for a payment are always borne by the payer.
If a merchant wants to forward the incoming payment to another Bitcoin address later, he has to bear the network fee himself.
The amount of this fee depends, among other things, on how many previous incoming transactions make up the new forwarding transaction.
You can protect yourself from these more in fees by leaving the default setting as it is, and only charging an additional fee if a payment is made in multiple installments.
Invoice expires
The payer is shown a QR code on the payment page / checkout page for a certain time, through which the Bitcoin are sent.
The requested Bitcoin amount has been calculated based on the exchange rate.
Since the exchange rate is very volatile and can change permanently, the exchange rate should remain valid only for a limited time.
It is recommended that the exchange rate is guaranteed to the customer for 15 minutes.
This is a period that is granted by almost all dealers. Accordingly, it is recommended to leave the value in the “Invoice expires if the full amount has not been paid after … minutes” field at 15 minutes.
Payment invalid if transactions fails to confirm
After the payment is made, it still takes time for the receipt to be credited to the merchant’s wallet.
This may depend on how high the network fee the payer was willing to pay.
If the payer has paid no network fee at all or only a very small one, a transaction may take a little longer.
To protect yourself as a merchant from the Bitcoin price fluctuating too much in the meantime, you can set “Payment invalid if transactions fails to confirm … minutes after invoice expiration” to specify how long it may take until the payment is confirmed by the network.
Consider the invoice paid even if the paid amount is
The question “Consider the invoice paid even if the paid amount is … % less than expected” is about underpayments of the invoice amount. The system expects a certain amount of bitcoin. If fewer satoshi actually arrive, there is an underpayment.
This can happen if the payment is not made directly from the payer’s wallet, but from an exchange or currency exchange. In this case, the network fee is deducted from the credit balance when a withdrawal is made and correspondingly less is received.
What is the procedure to be followed? Should the payment be rejected or is there a tolerance at which you are still willing to accept the payment anyway? 0% tolerance is accepted as standard.
Consider the invoice confirmed when the payment transaction
The setting “Consider the invoice confirmed when the payment transaction…” is about after how many confirmations a payment was successful. Here there are different views of payer and merchant. For a customer (payer) the payment is executed after clicking Send in the Wallet. For the merchant, the payment is completed only when Final is received on his Wallet.
If the customer has made the payment, this payment is immediately visible in the mempool or in the blockchain.
However, this transaction is not yet confirmed by the network. Depending on the amount of the network fee paid, this can be the next block after just 10 minutes or sometimes take an hour or longer. There is also a theoretical risk that a sent transaction will not be confirmed at all. This would be the case if the end customer has not paid any network fee at all.
After how many confirmations a merchant wants to provide the service to its customer depends on the product and the potential risk of fraud.
A product with a low value can already be provided with the status “ls unconfirmed”. Especially with digital access or downloads, the outage is more tolerable. The damage is less than dissatisfied customers who have to wait a long time for the service after payment.
For products shipped via mail order, 1 or 2 Confirmation are to be represented. Until you bring the goods for shipment, you can check the status of the payment again.
A guaranteed receipt of payment is available after 6 Confirmation, this should be used for high priced products
Services
Email settings can be stored in the Services area. As the operator of your own BTCPay server, the central email settings are made via the Server Settings. However, you can also store your own email settings for a BTCPay store. This is possible at this point.
Rates
Within Rates the exchange rate and currencies are configured.
For the conversion of the currency used in an online store (for example, Euro, USD or any other fiat currency) to Bitcoin, a value must be used for the conversion. The value should always correspond to the rate valid at the time of payment. Therefore, the BTCPay store asks for the current rate at an exchange.
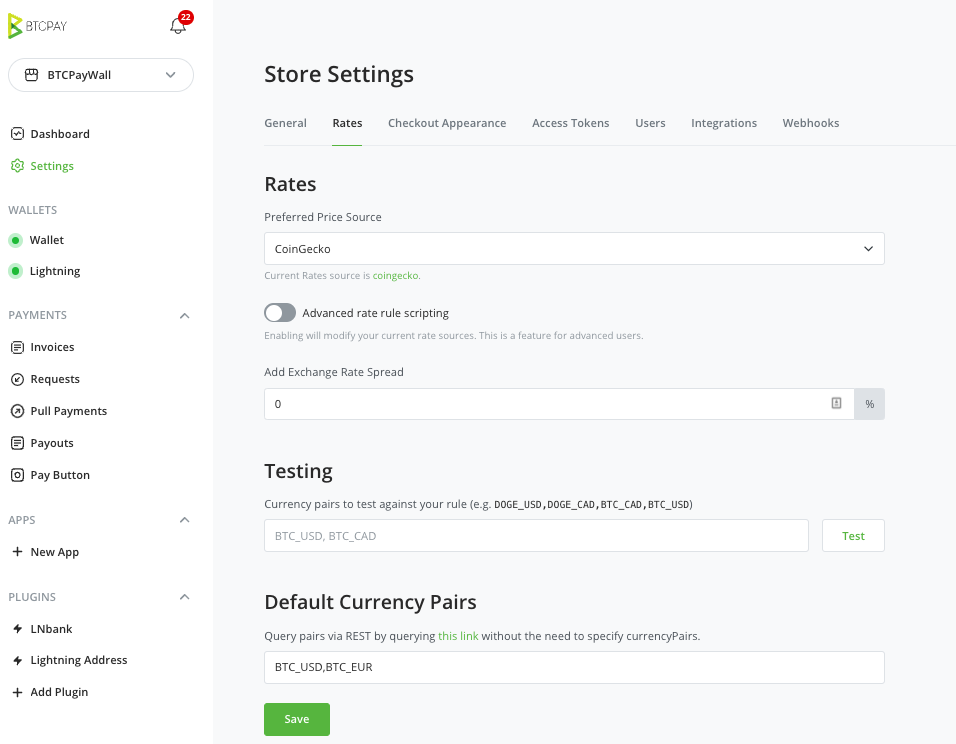
The default setting is the CoinGecko rate. You also have the option to use the rate from another bitcoin exchange.
In the field “Add a spread on exchange rate of … %” the value 0 is set. This means that one takes 1:1 the exchange rate of the stock exchange as a basis. You can also put a small premium to make a hidden margin over the exchange rate.
In the rate settings, under Default Currency Plan, we enter the currency pair on the basis of which the conversions are made.
If all prices on our website are shown in euros, then we use the currency pair BTC_EUR.
If the prices are in US dollars, then BTC_USD accordingly.
In the Testing field, we can test this and are then shown the respective valid Bitcoin rate in our currency.
The “Default currency pairs” field is used to specify the currencies to be changed to. This depends on the currencies that are required in your store. If your store displays the products in Euro, then you have to deposit the trading pair BTC_EUR. If your store is in USD or in Pounds, then accordingly all values: BTC_USD, BTC_EUR, BTC_GBP
Save the currency pairs you need for your store and run a test. Then you will receive the respective rates, which will be used as a basis for calculation at that time.
Checkout Appearance
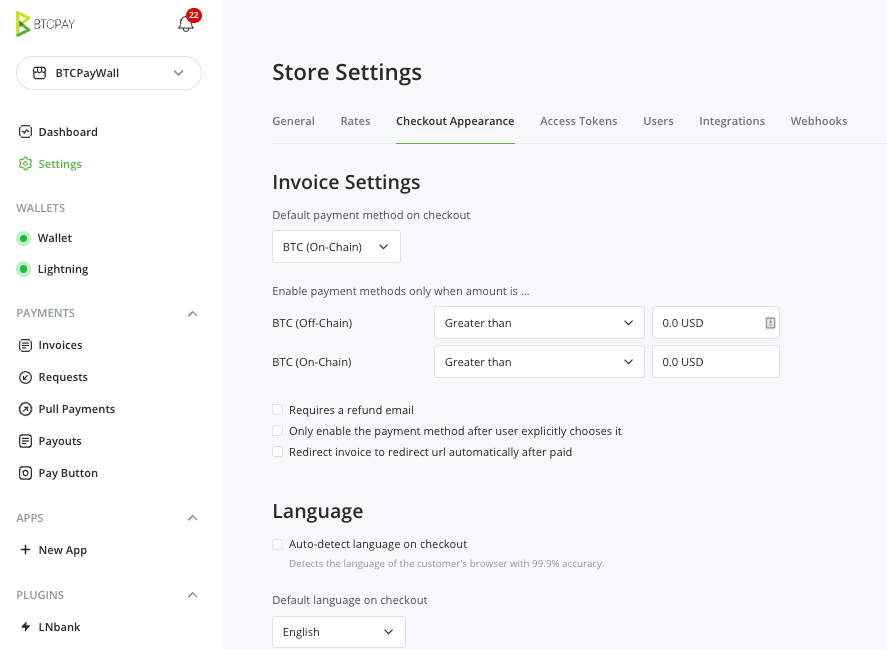
In the Checkout Experience section, the settings for the payment page or checkout page are made. This includes the settings and also the individual optical adjustment.
This menu item is divided into the sections:
- Invoice Settings
- Language
- Appearance
Invoice Settings
If you offer Bitcoin and Lightning as a payment method to your customers, you can specify which of the two payment methods should be displayed first under “Default payment method on checkout”.
In the “Enable payment methods only when amount is…” section, you can specify which payment method should be offered to the customer for which invoice amount.
Lightning (off-chain) is predestined for micro-transactions and can be used for as little as a few cents.
With Bitcoin payments (on-chain), the transaction goes through the blockchain and therefore should not necessarily be used for very small amounts. It is recommended here rather only payments from an equivalent of two euros / USD.
However, since Lightning is not yet so widespread and you should not exclude any customers, it is recommended to choose the settings very liberally.
If the “Requires a refund email” field is checked, then the email address will be required from the payer within the payment page. This can usually remain deactivated, since the online store software, for example, already queries the email address.
One should not interrupt the customer’s desire to pay by collecting data that is not required.
If you sell a digital product that is delivered via email and you want it to work without a separate online store software, it is recommended to activate the email input.
This would be the case, for example, with the application example “Deliver digital products by email“.
Redirect invoice to redirect url automatically after paid
After successful payment, the customer can either be redirected back to the store page or to the page with the payment / invoice details.
Language
If the “Auto-detect language on checkout” function is enabled, then the payment page will be displayed to the customer in the same language that was selected as the default browser language.
Appearance
The Appearance section defines the appearance of the payment page.
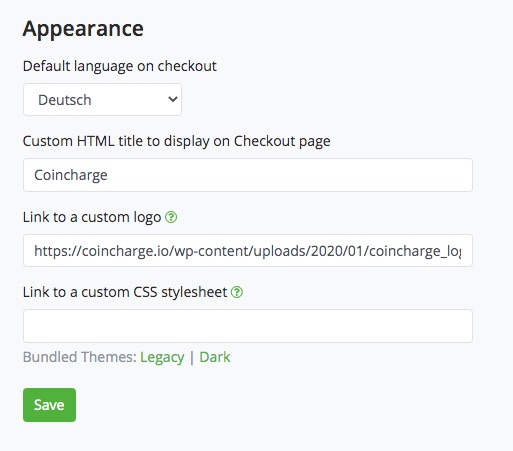
You can specify which default language should be displayed to the payer.
The name of the store should be entered again in the Custom HTML area.
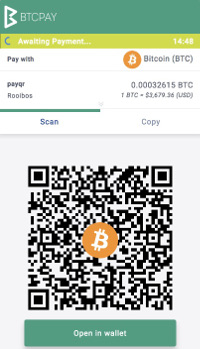
The payer is then shown the standard BTCPay payment page shown opposite.
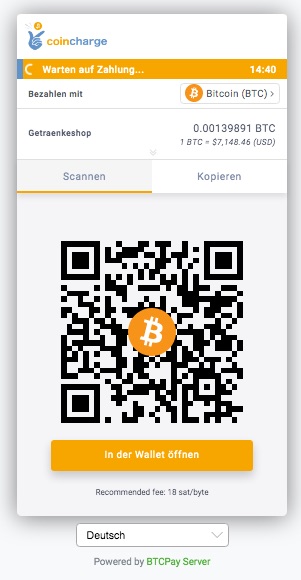
However, this payment page can be customized and adapted to the look and feel of the store page.
In the Link to a custom logo field, you can enter the URL to your own store logo.
In the Link to a custom CSS stylesheet field, you can also adapt the colors to your own wishes.
Access tokens
A token is generated in this area to enable communication between an external application and the BTCPay server.
This Acces Token is needed, for example, if you want to connect an online store to your BTCPay store via Shopifyor WooCommerce.
To establish a connection between an external application and the BTCPay Store, a token is created at BTCPay Store. This token is a legitimate proof that the external application is authorized to exchange with BTCPay Store.
Accordingly, we create a token that we can later deposit with the external application.
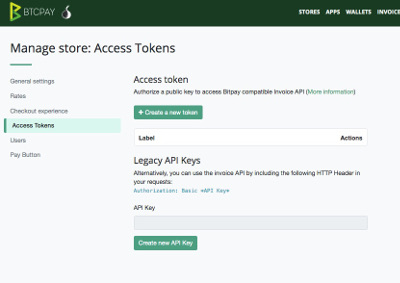
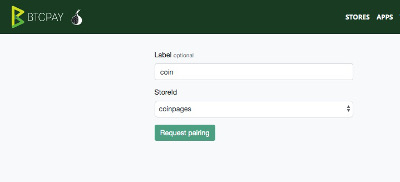
After clicking on “Create a new token”, you have the option to define a “Label”.
Then click on Request Pairing and the following page will appear
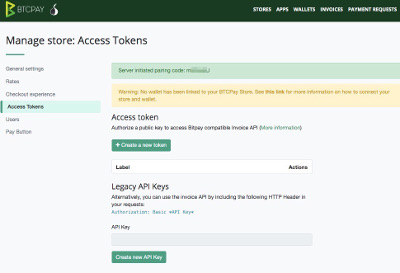
The “Server initiated pairing code:” that is displayed at this point is then used to store this code with the external application.
Users
In the Users area, additional users can be created who should also have access to the BTCPay Store. You can create users directly at this point and they do not need to be registered through the BTCPay server home page.
The person who created the BTCPay store is automatically an admin. You can give additional users admin rights (owner) or create them as guests.
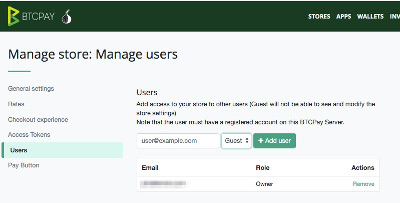
As Guest no changes can be made, only read rights. This can be e.g. Be employees who should control the transactions for accounting.
Users with Guest status will not be able to make any changes in the settings and will not be able to make any payments.
Webhooks
Using webhooks, HTTP events can be sent from the BTCPay store to another server.
Payout Processors
Explanation follows
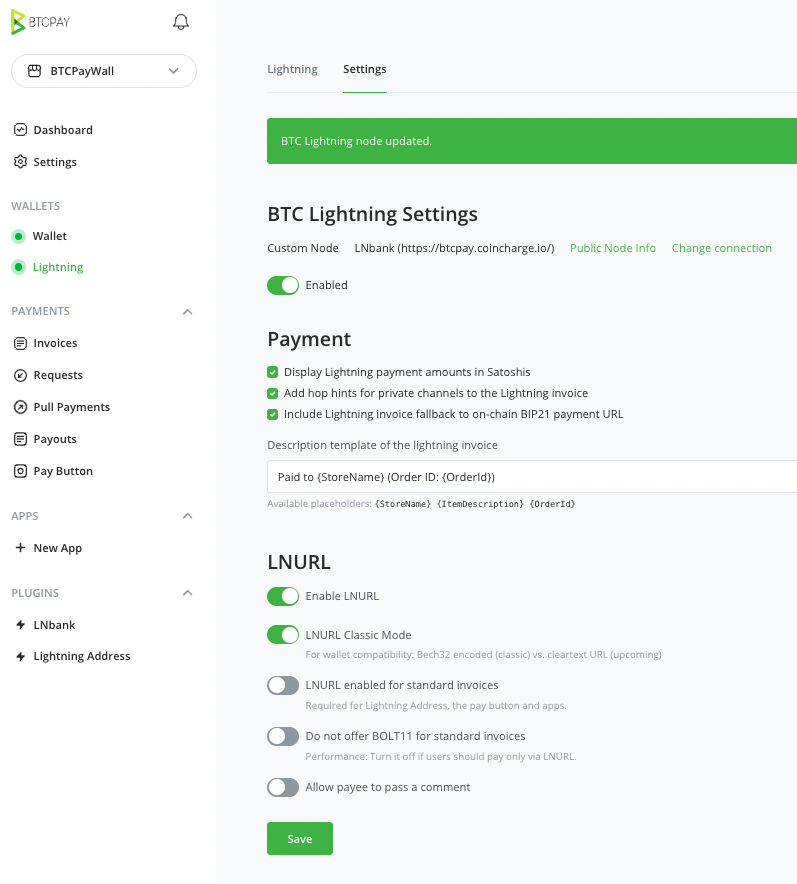
Lightning
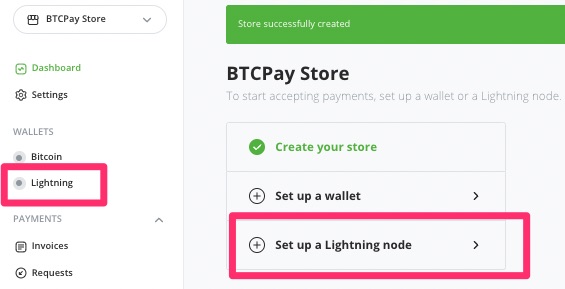
If we have used the BTCPay Store setup wizard, we will be offered the option Set up a Lightning Node in addition to the option to store a Bitcoin wallet.
We can also access this option by clicking on the Lightning sub-item in the left-hand menu under Wallets.
In this way, we can use Lightning for the BTCPay Store.
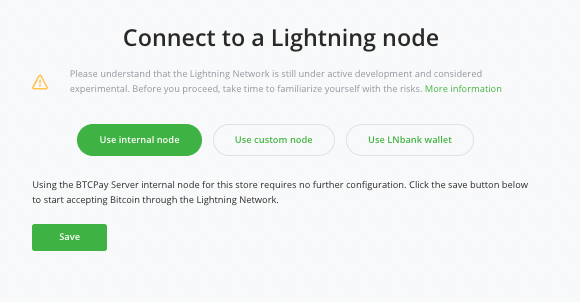
We are then offered three options on how we want to use Lightning:
- Use internal node
- Use custom node
- Use LNbank wallet
If you run BTCPay Server on your own server, then it is recommended to use Use internal node. The Lightning Node is then used, which runs on the same server as the BTCPay Server. Incoming Lightning payments are credited directly to your own Lightning Node.
With Use custom node another Lightning Node can be used.
If you run a Raspiblitz at home and want to share an external BTCPay server, then you can deposit your own Lightning Node on a 3rd party BTCPay server.
You can find instructions here: Use your own Lightning Node with BTCPay Server
The option Use LNbank Node is offered only if the plugin LNbank is installed on the BTCPay server. You can learn how to set up LNbank on your BTCPay server in the article: LNbank Lightning Wallet for BTCPay Server.
In our tutorial we use the Internal Node
Payments
Display Lightning payment amounts in Satoshis
Under Payments you can specify how the amount should be displayed. The Bitcoin amount is mostly displayed as 0.00001000 BTC. With Lightning, it has become established that the amount is displayed in satoshis. Then 1000 sats would be there.
If the bitcoin amount is to be displayed in Sats or if the Lightning Invoice can also be settled with a normal bitcoin payment.
Add hop hints for private channels to the Lightning invoice
If you have connections on your Lightning Node that were created as private channels, then no route to your own Lightning Node can be found. But if no route is found, then no Lightning payments can be received. Unless you include this information when you create a Lightning Invoice.
Include Lightning invoice fallback to on-chain BIP21 payment URL
You can additionally integrate the information for a Bitcoin payment into the QR code of your Lightning Invoice. If you present a payer with a Lightning invoice, but the payer pays with a Bitcoin wallet instead of a Lightning wallet, the payment will still be made.
LNURL
Explanation follows. See as long as description LNURL

